

-
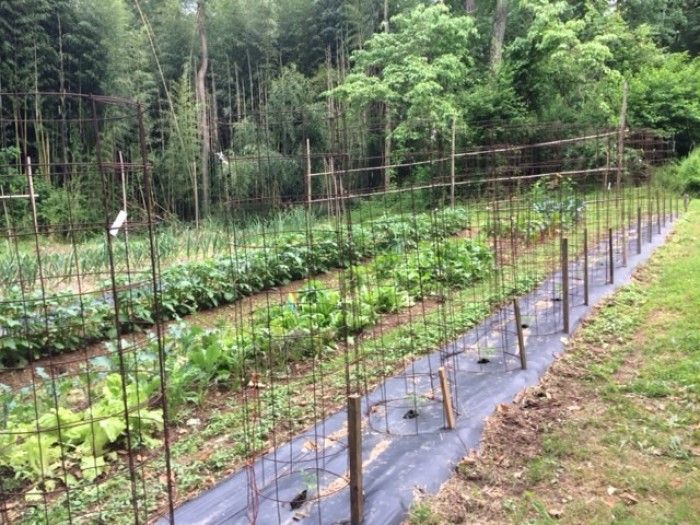
Tomatoes planted on black plastic mulch with tomatos cages fastend to the earth with wooden stakes.Photo/Illustration: susan belsinger
-
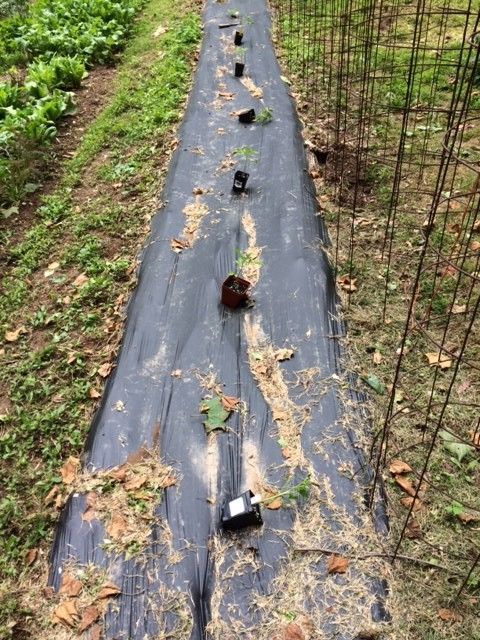
Space the holes to fit the cages (3 feet apart center to center) and place the plants where you want them and then transplant.Photo/Illustration: susan belsinger
-
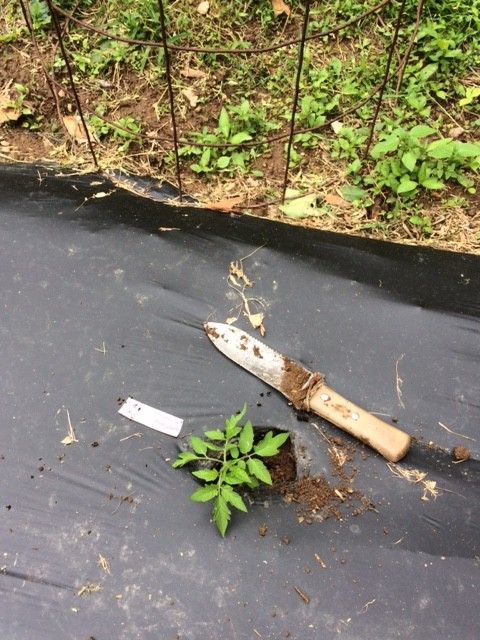
Plant each tomato and insert the label beside it in the hole. Then place the cage over the transplant.Photo/Illustration: susan belsinger
-
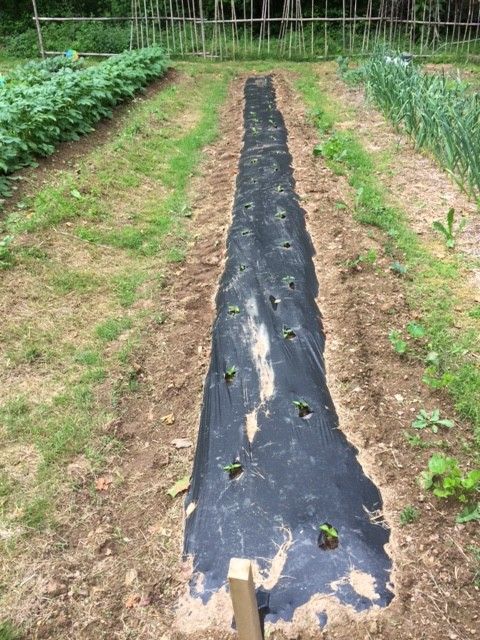
We plant peppers in two rows rather than a single row since they can be closer together than tomatoes.Photo/Illustration: susan belsinger
-
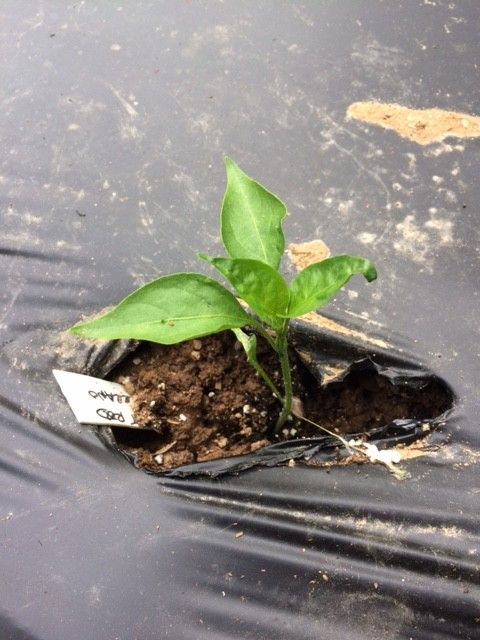
Closeup chile pepper transplant--be sure to water the transplants in after planting.Photo/Illustration: susan belsinger
Oh boy did I open a can of worms when I started to do research on the pros and cons of using black plastic mulch! Yes, it does warm the soil, extend crops growing time, hold moisture in the soil and keep down a plethora of weeds. No, black plastic is not organic. Most black plastic eventually goes into the landfill in a season or two-unless you use one of the newer biodegradable or photo-degradable black plastic mulches. There are many types of plastic mulch as well as garden cloth available nowadays, which come in all different weights-so you need to do your research here.
Frankly in my mind, plastic and biodegradable are oxymorons. I do not want to contribute to putting plastic in the landfills, however I do want to grow the tastiest tomatoes and hottest chile peppers that I can.
I try to garden organically. Our family has been vegetable gardening here in zone 7 Maryland since the early 70s. At that time, we bought a Troy-Bilt rototiller to turn a lawn of established grass into a plantable garden space and subscribed to Rodale’s Organic Gardening Magazine. We don’t use inorganic sprays and pesticides and we use organic matter to build up the soil every year and for fertilization.
Our neighboring farmers who have grown vegetables on a large-scale, commercial basis have grown their plants on black plastic for many years. Early on, I witnessed how they don’t have to weed and how their crops grow faster and bigger than some of ours. Generally, it works best on hot-weather crops like tomatoes, peppers, melons, squash and pumpkins. (Although I have read of folks getting their best broccoli ever on black plastic.)
According to SFGate website, (https://homeguides.sfgate.com/pros-cons-black-plastic-used-vegetable-gardening-74830.html) here are a few advantages of using black plastic mulch:
1. Temperature: The plastic warms the soil by as much as 5 degrees, which means that you can plant crops earlier. Warm-season crops produce higher yields and mature up to three weeks earlier, according to the Colorado State University Extension. Black plastic mulch might get too hot in warm climates, scorching the plants-so gardeners in southern climes keep this in mind.
2. Moisture: Black plastic mulch can reduce soil evaporation by up to 70 percent. Be aware though, that plants placed in plastic mulch don’t get water readily from rainfall or overhead sprinklers so install soaker hoses under the mulch.
3. Weeds: One of the best things about using black plastic mulch is that it cuts weed growth down enormously.
Reduced weed growth means less dependence on herbicides and less time spent weeding, not to mention helping reduce invasive species. It can also mean healthier crops and fewer insect pests that eat weeds or lay their eggs on them.
4. Environmental Issues: Black plastic mulches reduce soil erosion, a positive environmental consideration. One drawback of using plastic mulches is their contribution to landfills. Biodegradable plastic mulches are currently being developed, and they seem to be as effective as regular mulches at weed suppression and moisture conservation.
We tried planting our tomatoes and peppers on black plastic when we first saw them planted next door and they did extremely well. Being novices, we did not put in drip irrigation under the plastic and when the weather was hot and dry, we had to water by hand with a wand at the base of each plant where there was a hole in the plastic, since the plastic is otherwise impermeable. Also, we learned in the first season of use, that the plastic mulch had to be pulled up at the end of the growing season when spent plants are removed and the garden is cleaned up. If not, the plastic can break down in the garden into small pieces which are laborious and difficult to pick up and remove; you don’t want them blowing around the yard.
We have grown peppers and tomatoes on both black plastic and directly in the soil and mulched with straw. One thing that we do know after years of staking, is that tomato cages are well worth the time and energy to use for growing large plants that don’t sprawl all over the ground and are much easier to harvest.
A few years back, we ordered a 0.6 mil Photo-Degradable Embossed Black Plastic Mulch from Garden Solutions; here is the description from their website: “Photo-Degradable mulch is the latest greatest in agricultural plastics. Now not only do you get all the qualities from non-degradable plastics, but also the ease and eco-friendliness of our photo-degradable plastic mulch. It’s simple, lay the mulch, have an outstanding harvest, & let the plastic break down into H20, CO2, & Biomass.” https://www.growerssolution.com/PROD/photo-degradable-embossed-black-plastic-mulch-0-6-mil/ecoblack
We have used the Photo-Degradable mulch for the past few seasons, however I do pull it up at the end of the season and do not leave it in the garden. We just use it for tomatoes and peppers-a row of each. After working amendments and compost or aged manure into the soil, we make a raised bed with two deep V-channels on either side of the row. Then we place a soaker hose down the center of the bed. We then roll out the plastic the length of the row and fill in the Vs with soil to hold the plastic mulch in place. It is best to do this when the earth is moist so that the soil under the plastic is damp and will hold the moisture. We try to get the beds ready a week or two before planting.
When ready to transplant, use a narrow garden hoe or hori hori to make the holes for each plant. Then I place the plants to be transplanted alongside each hole and go down the row and put them in. I usually put the identifying plant marker in each hole along with the plant and record the same in my garden notebook (so I can still identify cultivars when the tags mysteriously disappear).
Next, the tomato cages are placed around each plant and then stakes are driven into the earth alongside each cage and wired together. This secures the large cages to the earth, so when a heavy-laden plant is loaded with fruit, it doesn’t topple or blow over in a summer wind or rain storm. Two rows of peppers are planted per row of black plastic mulch and we found running stakes down the middle allows us to tie the plants up from either side.
Now we are just waiting for the sun to shine and the plants to grow!


Comments
Log in or create an account to post a comment.
Sign up Log in