

If your garden needs a boost, perhaps it’s time to rethink your edges. Installing new edging is one of the easiest, fastest ways to improve the overall appearance of your garden. Whether you want to dress up a swath of perennials, draw attention to a bench in the distance, or simply keep gravel inbounds, freshening up your edges often does the trick.
You can install some materials, such as metal and bender board, in an afternoon. Others, such as concrete and boulders, require a weekend or longer to complete and may challenge you to learn some new skills.
Take a look at the following six low-maintenance options. On function alone, they will keep your garden neat and tidy by holding back soil, defining beds, blocking the relentless march of invasive roots, and preventing mulch from migrating. But their aesthetic value is perhaps their greatest asset, ranging from nearly invisible to command performers.
Subscribe to Fine Gardening magazine to learn more basic techniques like how to edge your garden. In fact, you’ll find instruction and inspiration for gardeners of every skill level.
Brick
 Photo/Illustration: Jennifer Benner
Cons: Intermediate masonry skills required for creating curves
Brick offers a classic look, with new, red bricks standing up crisp and modern, and salvaged bricks lending a subtle, timeworn appearance. Brick’s weathered, low-profile surface recedes into the background, shifting your attention to the lawn and sweeps of flowering perennials.
Installation tip: When setting a single row of bricks, no mortar is necessary; you can simply butt the bricks together. Dig a shallow trench and fill it with a 1- to 2-inch-thick layer of sand. Bury horizontal bricks at least ½ inch deep and vertical bricks 2 to 3 inches deep. If you stack several rows of bricks, however, you will need mortar to hold the bricks in place.
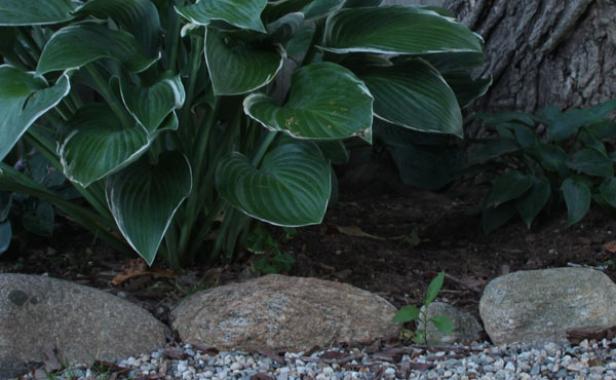
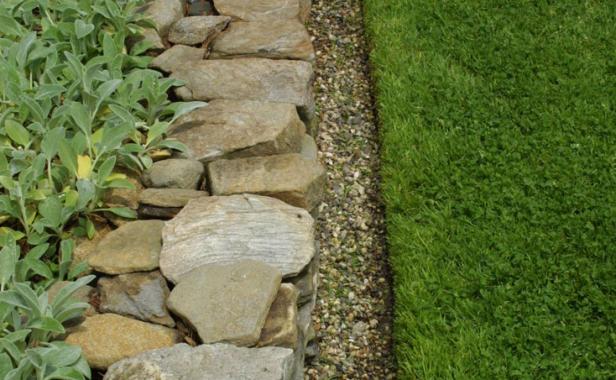
Stones
 Photo/Illustration: Antonio Reis
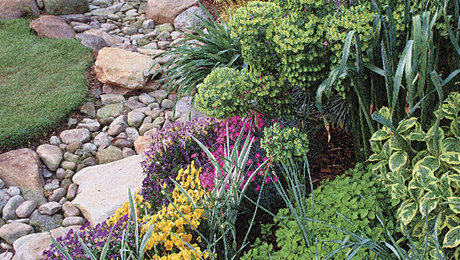
Cons: Heavy; time-consuming and tricky to imitate nature
Locally sourced stones are among the most natural-looking edging options. Obtaining the stones is as simple as digging them up from another area of your yard or bringing home a load from a local supplier. Yet placing the individual stones can easily consume more than an afternoon as mimicking nature is surprisingly challenging. As pictured, the most successful efforts marry the casual look of the stones with an equally casual arrangement of plants.
Installation tip: Before placing any stones, determine how you want to mark the start and finish of the edging. You might select the two largest stones to stamp a definite beginning and end of a bed, or you could use a series of increasingly smaller stones that gradually disappear into the ground. Either way, roll each stone before placing it to find its best side. Bury the stone’s lower half at least 1 to 2 inches deep so that it looks like it’s emerging from the earth.
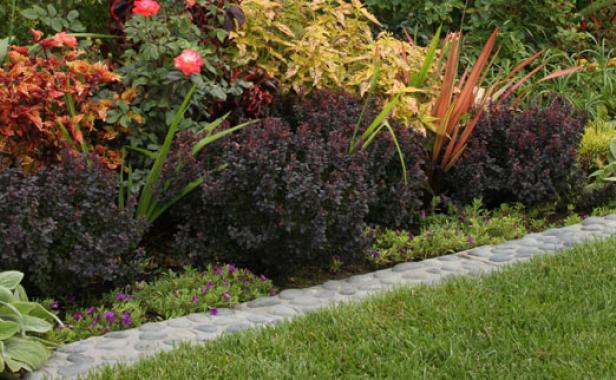
Concrete
 Photo/Illustration: Danielle Sherry
Cons: Time-consuming and complex installation; relatively permanent
Poured concrete is fluid—at least during the installation phase—so just about any shape is possible, from the tightest curve to the flattest, longest run. Plus, you can vary its height, both above and below ground. If the goal is to corral an aggressive grass or discourage gophers and moles, dig a 6- to 12-inch-deep trench for your concrete. Above ground, you can personalize a concrete edge by imprinting shapes, such as fallen leaves; pressing in pebbles, shells, tiles, or decorative glass; or mixing in pigment for a dash of color.
Installation tip: The greatest challenge when installing concrete edging is properly setting up the forms—the temporary sides into which you’ll pour the concrete. Use rigid lumber, flexible hardboard siding, or bender board to build the forms. (All of these products are commonly sold at lumberyards and big-box hardware stores.) Make sure your forms are parallel and level. Once you’ve filled them to the brim with concrete, run a 2×4 across their tops to smooth the surface. If you’re a novice at pouring concrete, start with a simple, straight edge, rather than a series of intricate curves.
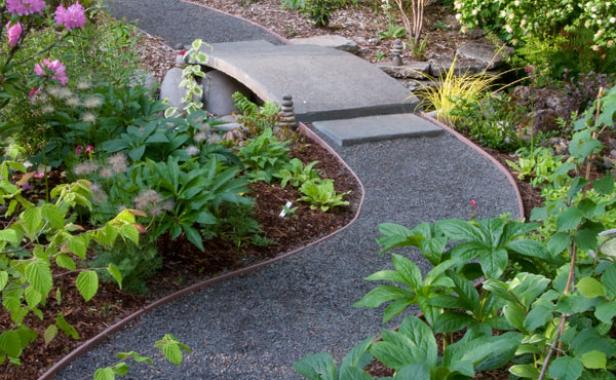
Bender board
 Photo/Illustration: Allan Mandell
Cons: Hard to create straight lines; splices can separate over time; not widely available in stores
For smooth, sinuous curves, it’s tough to beat bender board. The pliable material flexes easily and is relatively inconspicuous, with its top barely visible aboveground. In the past, the thin strips were typically made from rot-resistant wood, such as redwood or cedar; today, however, most bender board is composed of recycled or engineered plastic. Because it’s a manufactured product, there is some variety. Strips come in brown, black, or green. And they may be 16 or 20 feet long; 4, 6, or 8 inches tall; and ¼ to 2 inches wide.
Installation tip: The thinner the strip, the more easily it bends. Before installing, lay your bender board in the sun for a few hours to loosen it up. Dig a shallow trench, set the bender board in place, and level it. Finish by affixing matching plastic stakes with screws every 4 to 6 feet or wherever necessary to hold curves in place.
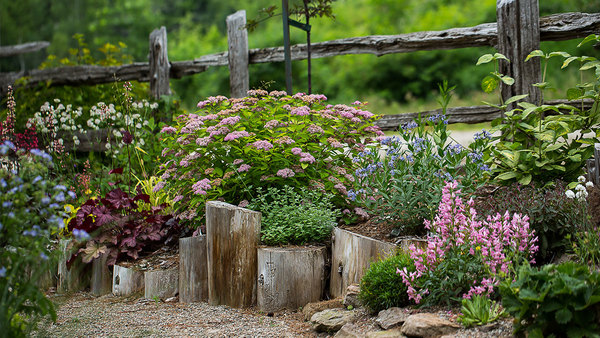
Decorative Ideas
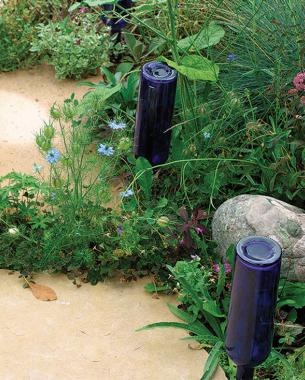
Edgings are not limited to what you might find at your local garden center. Sometimes the prettiest edging is simply a conventional material used in an unconventional way. Here are just a few creative options:
- Upside-down wine bottles arranged in a row (right)
- Sparkly glass pebbles raked into a 4- to 6-inch-wide strip
- Stout, 6- to 8-inch-tall sticks of bamboo stuck vertically in the ground
- Slender logs or fallen wood laid end to end
Metal
 Photo/Illustration: Virginia Small
Cons: Requires a hacksaw to cut
Long in vogue in botanical gardens and commercial settings, metal edging is becoming an increasingly popular option in home gardens. With its whisper-thin silhouette, it forms an inconspicuous, clean line between disparate elements. It is especially useful for creating a crisp separation between gravel and planted areas. Furthermore, because of its ability to remain unflinchingly straight, it complements and reinforces strong geometry in modern designs.
Installation tip: Like plastic bender board, metal edging comes in long strips and in similar lengths, heights, widths, and colors. It’s either made of heavy-gauge aluminum, which does not rust, or weather-resistant steel. To install either type, check your soil first; if it’s relatively soft, there’s no need to dig a trench. Place a 2×4 on the top edge and, using a rubber mallet or small sledgehammer, drive the edging into the ground. To anchor the edging, pound in matching metal stakes on both sides. Some metal edgings make the anchoring process even easier: These products come with a series of horizontal metal straps attached to one side into which you insert the metal stakes.
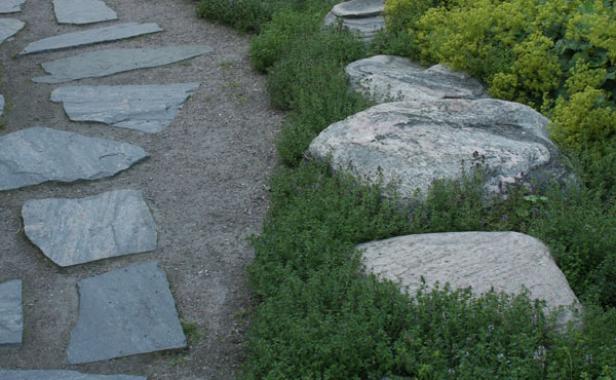
Boulders
 Photo/Illustration: Kerry Moore
Cons: Larger boulders are costly and difficult to move
You can’t miss a bed lined with boulders. Their domineering size makes any spot they’re situated in an automatic focal point. For a soft-looking edge, consider surrounding a row of flat-topped boulders with a well-mannered ground cover. Choose boulders that are of a similar size, shape, and color, and arrange them so that they appear as a continuous mass, rather than as distinct, individual elements.
Installation tip: Start by clearing the area and loosely excavating the soil. Line up the boulders, spacing them 6 to 12 inches apart to allow room for a ground cover to creep in between. For a natural look, bury the boulders at least 3 to 4 inches deep; some boulders may need to be placed deeper to maintain a consistent height down the row. To make leveling easier, use builder’s sand to fill the contours of each boulder’s underside. When selecting a ground cover, choose one that won’t grow more than a third of the way up the boulders. Look for compact varieties, such as the diminutive, evergreen ‘Elfin’ thyme (Thymus serpyllum ‘Elfin’, USDA Hardiness Zones 4–9).


Comments
The metal edging will get scraped and damaged by the mower and weed eater. Perhaps the very very thick black plastic with the rolled top edge would hold up better.
I am earning about 6000-8000 dollars a month from freelancing at home. For those of you who are willing to complete simple at home jobs for 2-5 h every day from your home and make valuable income while doing it... Then this gig is for you... http://ur1.ca/pm79v
dsf3453
I usually stick with the simple deep edge or if i am looking for something abit more fancy then go for the 'brick-edge'
Calgary Landscaper
.This garden edging will produce beautiful, maintenance-free curves in your lawns and gardens while remaining virtually unseen with its thin yet extremely durable profile.
Very good guide, thanks. We've spent a lot of time landscaping our property, and edging is one of the last major things we need to do. We're trying to avoid paying an arm and a leg for a professional, and instead do as much of it ourselves as we can. We're probably going to go with brick; I found that this article (https://carveyourcreation.com/how-to-install-landscape-edging-bricks) was a great help in terms of the installation process. Do you have an article exploring brick edging installation in more detail?
Log in or create an account to post a comment.
Sign up Log in