

-
Photo/Illustration: All photos: Greg Holdsworth
-
-
-

I have to confess that I am somewhat of a perfectionist when it comes to the layout and look of my raised bed garden. There is this compelling drive in my brain to have all of my plants and rows spaced as perfectly as they possibly can be.
One side of me (the one in the director’s chair speaking an annoying French accent) says, “Greg, lots of people are going to see the garden this year. It has to be perfect! No plants can be out of place.” The other side of me (the one wearing the Jimmy Buffet parrot hat holding a cocktail) says, “you’re not trying to win an award, buddy. Besides, the plants could care less if they’re misaligned.”
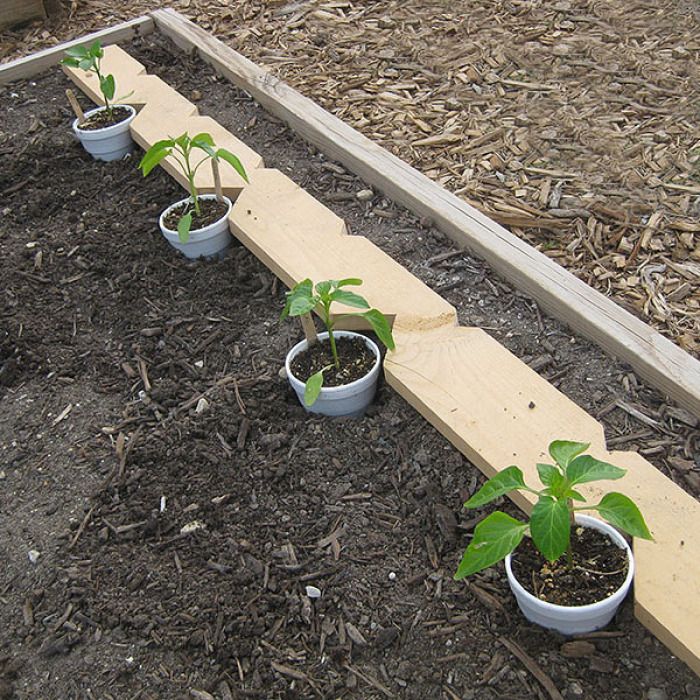
All joking aside, this cool tool, originally called the “planting board”, is based on one that I found in my favorite gardening book, The New Victory Garden by Bob Thomson. I’ve adapted it for smaller raised bed use, as well as putting the spacing notches on both sides rather than one.
The list of things you’ll need:
• Piece of 1″ x 4″ x 6′ plywood (you probably had one of these lying around from my other projects)
• Saw (an electric jigsaw would be best)
• Pencil, calculator and tape measure
Construction:
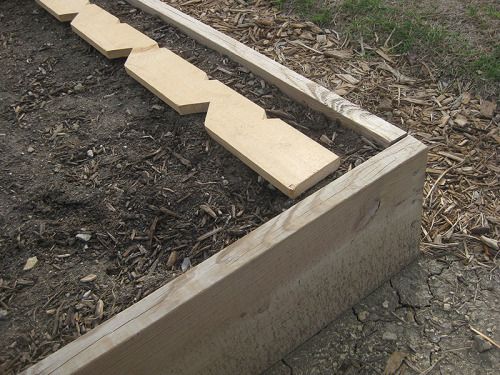
1. Measure the inside distance of the raised bed and subtract 4 inches from that measurement. This is the length your plant spacer needs to be. Why 4 inches? I’ll get to that.
2. Determine where you want your “margin” to be. In other words, decide how close to the edge of the raised bed your outermost plants are to be planted. I wouldn’t recommend less than 6 inches myself, but this is determined by what you’re planting. Mark this measurement from each edge of the planting spacer.
3. Measure the distance between these two marks. Divide that distance in such a way as to get as close to 6-inch sections as you can along the planting spacer. Six inches represents a common spacing distance for many vegetable transplants. Mark these locations on one side of the planting spacer.
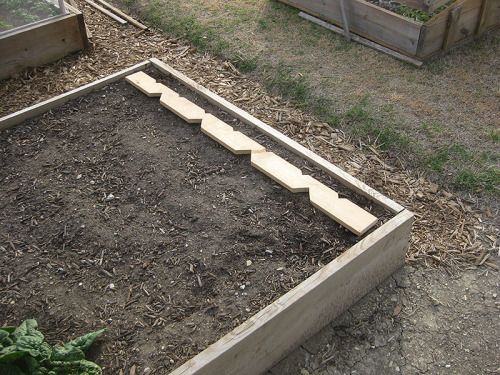
4. Repeat these steps for the other side of the board, only this time we’re making one foot sections instead of 6-inch sections for larger plants.
5. Cut 1-2 inch triangular notches on the side with the 6-inch section marks on it. Then repeat on the other side, only this time you’ll make the triangular notches about 3 inches deep by 5-6 inches wide. The cuts don’t have to be perfect.
You’re basically done. To use, lay the board down and use the notches as a guide to space the plants evenly along a straight row.
Bonus:
Need to make straight lines to plant rows in your raised bed? Fret no more. Take the planting spacer and put it edge side down on the soil. After making sure it’s as straight as you wish inside the bed, move the spacer back and forth, pushing into the soil with enough pressure to create a trench in the soil. This is the reason for the two inches of extra space on each side of the spacer and the inside edges of the bed.
Your plants are spaced evenly and your seeded rows are straight. Time to enjoy that cocktail we talked about.


Comments
Log in or create an account to post a comment.
Sign up Log in