

-
Photo/Illustration: Greg Holdsworth (All photos)
-
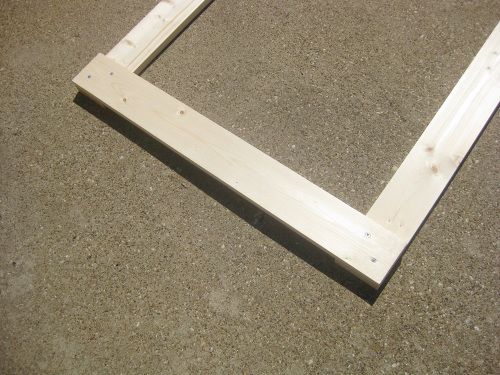
PHOTO A - The top edge of one side of the trellis.
-
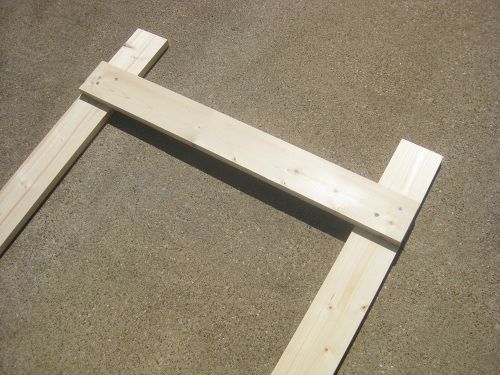
PHOTO B - The bottom edge of the angled side of the trellis.
-
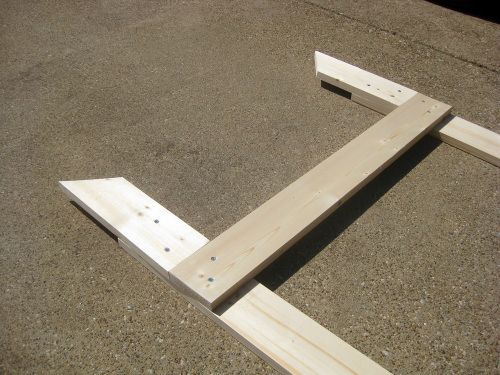
The bottom edge of the angled side of the trellis, with the "feet" attached.
-
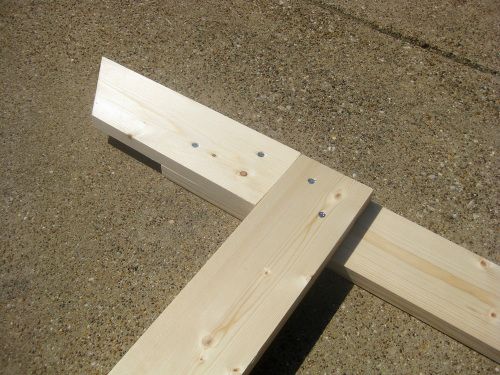
PHOTO C - The feet are attached to the bottom of the two 6' boards, below the 3' cross piece.
-
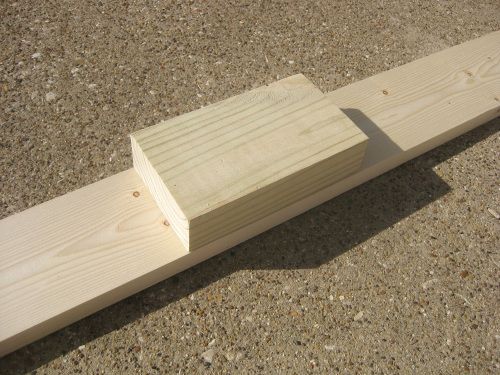
PHOTO D - The "block" pieces attach to the 6' boards near the bottom. They MUST be as thick (or slightly thicker) than the raised bed's frame that you are securing the trellis to.
-
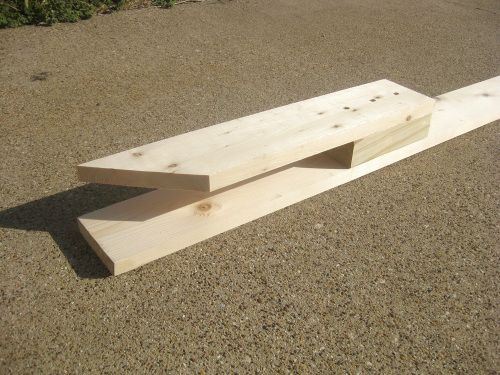
PHOTO E - The foot attached to the block piece and attached to the two sides of the trellis frame.
-
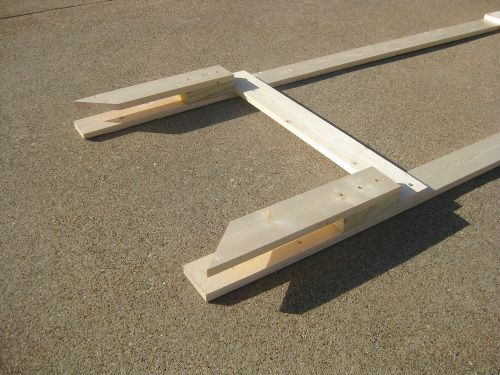
The bottom section of the straight-up side of the trellis, with the cross piece attached.
-
PHOTO F - The bottom of the straight-up side of the trellis.
-
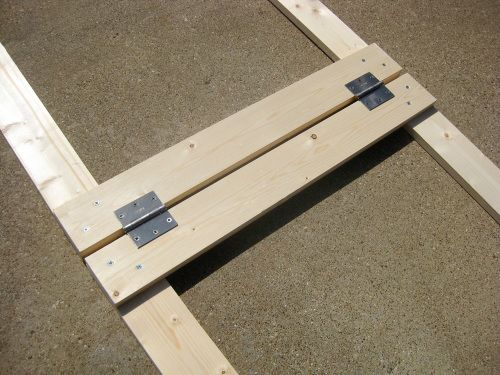
PHOTO G - The two sides of the trellis attached with two 3" metal hinges. TIP: Remember to leave a "gap" between the two sides before attaching the hinges.
-
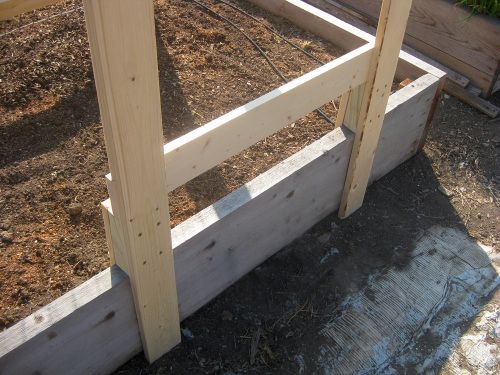
The straight-up side of the trellis anchored to the side of the raised bed frame.
-
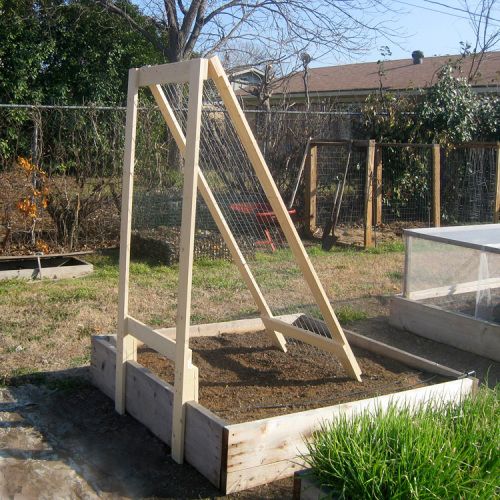
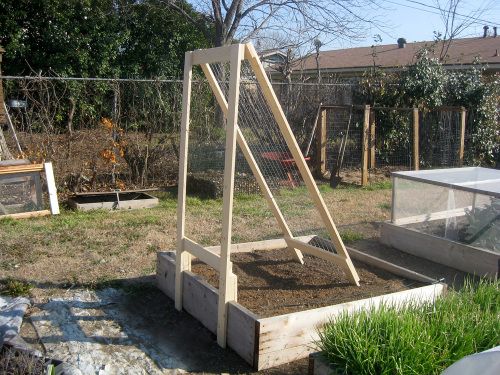
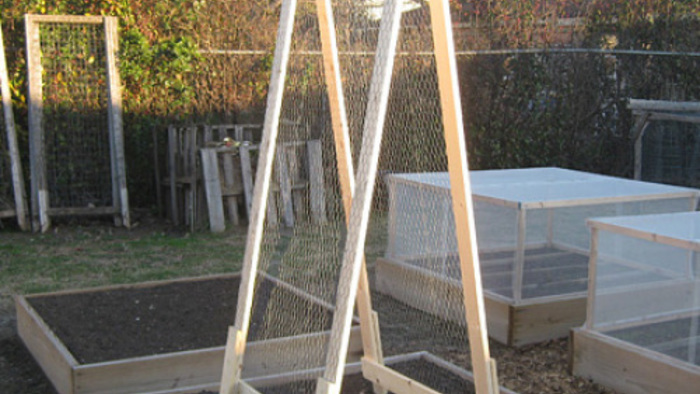
The finished trellis, ready for my climbing cukes!

One of the best ways to take advantage of vertical growing space is by using a trellis. The a-frame type of trellis has two sides and gets its support from the opposite side of the trellis, as well as the weight of the plants themselves. The “replaceable feet” that my first trellis design featured provided additional support by being anchored in the soil. You would think this would be enough to keep it from falling over. One or two of the strong Texas windstorms convinced me otherwise. I usually ended up hammering in stakes at the four points where the feet went into the soil.
This new version, or upgrade, takes support in a different direction. The primary difference is that one of the sides of the trellis goes straight up, perpendicular to the ground. It not only uses it’s “feet” buried in the soil for support, it now has “anchors” that attach it to the side of the raised bed.
Although you can certainly put the fencing material on both sides, I’ve chosen in this case to only use it on one side. The length of the “angled”, or leaning side can be set to whatever length you want, and will determine where in the bed the trellis will go into. The advantage of having a wider angle (and therefore a longer side) is that you can grow plants under it that can benefit from a little shade once the climbing plants are established.
This project will produce a trellis approximately 6 feet tall (on both sides) by 3 feet wide. Refer to the photos when going through the steps below, as they may give you a better picture of the construction.
The list of things you’ll need:
• 8 Pieces of 1″ x 4″ x 6′ wood boards (I used whitewood)
• A 12-14″ piece of 2 x 4, or a leftover piece from one of your previously-made bed frames
• 24 – 1 1/2″ #8 wood screws
• 10 – 2″ wood screws
• 3′ x 7′ of hardware cloth or other “fence” material
• 2 – 3″ metal hinges (I used ones with a satin nickel finish)
• Saw – manual or electric
• Drill and drill bits
• Staple gun – manual or electric
• Wire cutters
• Pencil
• Tape measure
• Square triangle
Construction
1. Cut 2 of the 6-foot boards in half to get four 3-foot pieces. Note: we’ll refer to the two sides of the trellis as “Side A” and “Side B”.
SIDE A (the angled side)
2. Attach two of the 6-foot boards to one of the 3-foot pieces with wood screws, aligning them together at the edges (PHOTO A).
3. On the opposite ends of those 6-foot boards, measure off and mark about 6-8″ from the edge. Attach the third 3-foot piece to the two 6-foot boards at the marks you made (PHOTO B).
4. From another 6-foot board, cut a piece 10-12″ long. Measure and mark the middle of it. Then, cut the piece diagonally in the middle. This creates the two “foot” pieces.
5. Attach the two foot pieces made in STEP 4 at the ends of the 6-foot boards, below but touching the 3-foot cross piece. The feet should be sticking out about 6-8″ (PHOTO C).
SIDE B (the straight-up side)
6. Attach two of the 6-foot boards to one of the 3-foot pieces with wood screws, aligning them together at the edges.
7. From the same 6-foot board used in STEP 4, cut one more 10-12″ piece. Again, measure and mark the middle, then cut the piece diagonally in the middle.
8. Using a 2 x 4, or a leftover piece from one of your raised bed boards, cut two pieces about 8″ long. They should be about 4″ wide. Let’s call these the “blocks”. NOTE: This is a VERY important step. If this piece is thinner than the raised bed’s side you’re mounting the trellis to, it won’t fit properly.
9. Measure the length of the foot pieces made in STEP 7 and mark that on the two 6-foot boards (from STEP 6), measuring from the edge. Attach the two block pieces made in STEP 8 to the two 6-foot boards, at the marks you made (PHOTO D).
10. Align the top of the foot piece to the top of the block piece and attach it. Repeat for the other leg (PHOTO E).
11. Attach the last 3-foot piece across both of the legs, above the feet section (PHOTO F).
PUTTING IT TOGETHER
12. Connect both sides of the trellis together with the two 3″ hinges. I measured about 3″ from each edge and attached the hinges on that mark (PHOTO G).
13. Roll out enough screen/fencing material to cover one side. Using your staple gun, staple it to the frame.
TIPS: Attach the four corners of the fencing material to the wood frame first. That way, it is held in place while you are stapling. Also, pull the fencing material tight as you are stapling it to the frame, otherwise it might sag in the middle.
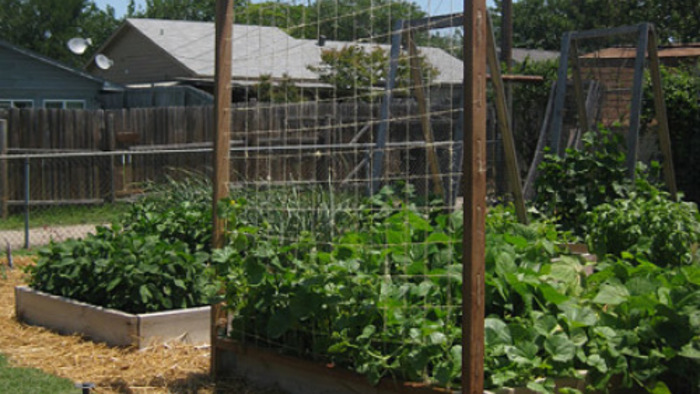
Your climbing veggies will love you for this project!


Comments
Log in or create an account to post a comment.
Sign up Log in