
Sometimes in the summer, I steal away to a secret spot on our farm. This is The Herbfarm’s dump, a collecting ground of cast-off potting soil and homeless plants. Here, amid motley patches of other herbs, the robust mints have made a home. And how they thrive! By July, I can stroll chest-deep through huge, healthy patches of peppermint, spearmint, and apple mint.
No kitchen garden should be without at least a few mint plants. For drinks or desserts, or to pair with savory foods, mint’s clean and bracing flavor has earned it a place in many recipes.
But mint is never content to stay put, and can be one of the most invasive plants in the garden. So to avoid starting an herbal jungle, you’ll want to keep mint in check.
Start with two mints
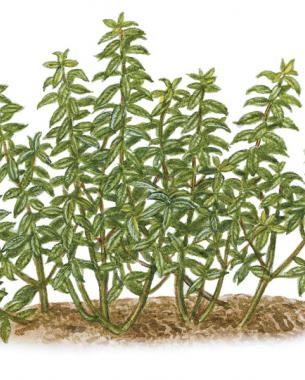
 Mint wants to cover the earth. Left to its own devices, mint multiplies by sending out fast-spreading underground runners.
Though there are names for 600 mints or more, there are only 25 or so truly distinct forms. Because mints cross and hybridize easily, it is best to propagate them by taking cuttings, dividing roots, or buying plants rather than starting them from seed.
Before you begin planting exotic mints, start with the two cornerstones of any kitchen mint collection—peppermint and spearmint. Peppermint (Mentha piperita), with its head-clearing aroma and expansive, menthol-cool flavor, gets the decided nod for tea, for dessert, and for taming spicy fare. Peppermint is popular in Middle Eastern, African, and Southeast-Asian cuisines because its cooling effect offsets the fiery ingredients.
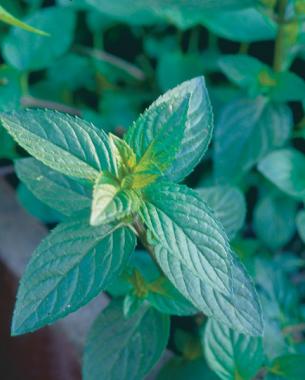
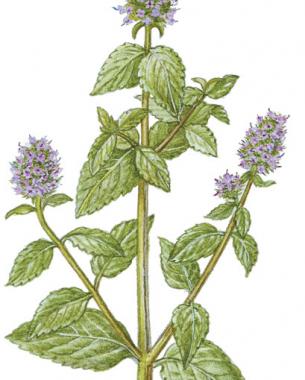
Peppermint leaves are dark green, smooth, and have tiny serrations along the edges, as the photo at right shows. The stem is touched with a deep violet, almost chocolate, color. Peppermint loves partial shade, good rich soil, and moisture.
In our restaurant, we choose spearmint (Mentha spicata) to go with savory fare. Because its flavor isn’t as overpowering as peppermint’s, spearmint accentuates the subtle, natural sweetness of meats and vegetables. It also blends well in sorbets and dessert sauces.
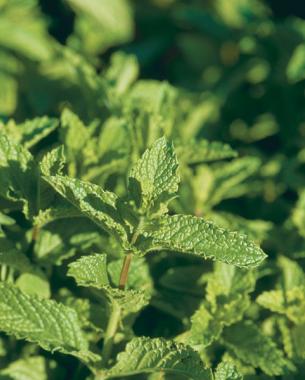
Spearmint leaves are thinner, more pointed, and more coarsely serrated along the edges than peppermint leaves. They’re a medium-green color and have an overall pebbled texture, clearly evident in the top photo. Spearmint tolerates more sun and a somewhat drier soil than does peppermint.
Once you’ve got a basic patch growing, try experimenting with other mints. Chocolate peppermint is a good choice for desserts and confections. True mint and curly mint can substitute for spearmint. Exotic mints, such as pineapple mint, lemon mint, apple mint, and ginger mint, are often more aromatic than our two mainstays, but are usually less flavorful.
Growing mint
Photo/Illustration: Redenta Soprano
Photo/Illustration: Redenta Soprano
Growing mint
• Start with cuttings or plants, not seeds.
• Plant in containers to keep mint from spreading.
• Water the soil deeply.
• Pinch back for bushier plants.
• Cut plants to the ground as winter approaches.
• Divide and repot root-bound plants.
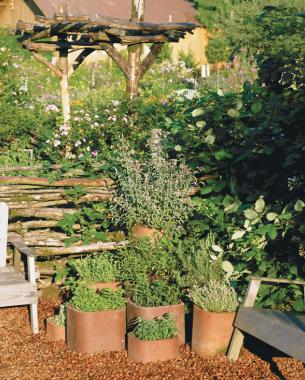
Potted mint can’t stray
Creative gardeners have tried almost everything to keep mint from invading neighboring beds and walkways. At our farm, we curtail its habit by planting it in terra-cotta chimney-flue liners. These can be set directly on the ground or partially buried, and because they have no bottoms, drainage isn’t a problem. By playing around with their placement, you can add architectural interest and charm to your garden.
Flue liners are available from building or masonry suppliers. They are 1 ft. square and 2 ft. long, but they can be shortened using a circular saw with a masonry blade. Like most terra-cotta, the flue liners can spall—that is, they flake off in pieces with repeated exposure to rain, snow, and freezing. Our liners usually last five to eight years before their antique charm seems excessive.
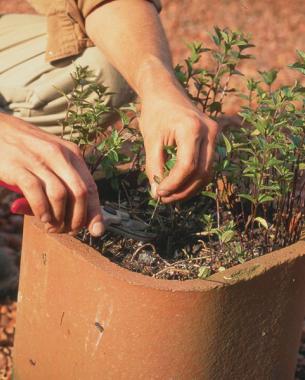
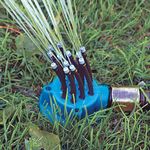
To plant your mint containers, you will need one to three mint plants per liner. Fill the liner to within 1 in. of the top with rich potting soil. Make a hole in the soil a little larger than the mint’s root ball, place a plant in the hole, and pack the soil firmly around it. Sprinkle the soil with a little time-release fertilizer if you wish. Water in the plants well. Finally, positioning your fingers like mine in the photo at left, pinch off the top two to four leaves on each plant. This will make the mint branch out and become bushy.
Keeping mint healthy

Water mint deeply and heavily once in a while, rather than watering it lightly more often. To help prevent the spread of leaf diseases, such as rust, water the soil and not the foliage.
Pinch off any leaves that have small brown spots on them—these could be rust. If your plants become heavily infested with rust, pull them up and throw them out. If this seems too drastic, try cutting the plants back to the ground and sprinkling the surface of the soil with a liquid sulfur compound.
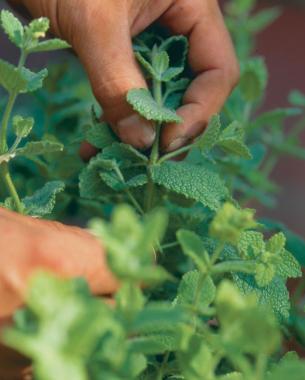
Mint plants stay healthy and produce better if you pick them regularly and often. If you need just a little mint or want an attractive garnish, pinch off the top two sets of leaves. If you need a lot of mint, cut the stems near the ground, leaving just a couple of leaves, as I’m doing in the top right photo on the facing page. Don’t worry—your mint pots will soon be full of lush new growth.
Mints are perennial, but in most American climates they go dormant or die back in the winter. Plants left above ground risk rotting or becoming woody. So when winter approaches, cut your mints right to the ground. Plants that have been cut back to their roots will be more prolific the following year. In cold climates, protect the roots by piling mulch around the pots or by bringing the pots into the garage until spring.
In about three years, your mint will probably outgrow its container. A sure sign that the plant is root-bound is when the center of the plant dies. Then it’s time to pry your mint from the container and cut the root mass into thirds, as I’m doing in the photo above. Then replant each third in new soil in a separate container.
![]() Did you like this article? Our new Web site, vegetablegardener.com , is your place to go to learn everything about raising edibles, from starting seeds to preparing tasty dishes.
Did you like this article? Our new Web site, vegetablegardener.com , is your place to go to learn everything about raising edibles, from starting seeds to preparing tasty dishes.
Fine Gardening Recommended Products

RAINPOINT Sprinkler Timer with Brass Swivel
Hunter Industries MP-1000-90 Hunter Nozzle
D&X Garden Sprinkler


Comments
Log in or create an account to post a comment.
Sign up Log in