

Nothing is more relaxing than the music of moving water in the garden. But finding a water feature to complement your style can be tough. So why not make a custom fountain out of a beautiful piece of pottery? Glazed pots come in every size, shape, and color imaginable—and making them into fountains is simple.
Pot fountains consist of an underground, waterproof basin; sturdy grating; and a pot of your choice. Water is pumped from the underground reservoir up through the pot, where it overflows and disappears back into the ground. With no exposed pool of water, this type of water feature is safe for children, and birds and other wildlife—including the family pets—love to drink from it. Creating your own unique fountain is easy and fun, and you’ll love the statement it makes in your garden.

What you’ll need
Most of these items can be found at a plumbing-supply or hardware store or at a nursery that carries water-garden supplies. It will take approximately two hours to complete this project.
|
|

Step 1: Plumb the pot
A. Most pots have drainage holes, but if yours doesn’t, use a masonry bit to drill a ½-inch-diameter hole in the center of the bottom of the vessel. An existing center drainage hole can be widened by slowly rotating the masonry bit around the sides of the hole. Plug any other drainage holes with epoxy putty.
B. Place the barb fitting into the hole so that the threaded end goes inside the pot. Thread the PVC female adapter onto the end of the barb inside the pot. Apply epoxy putty around the base of the fitting to seal it in place and to make the container watertight.

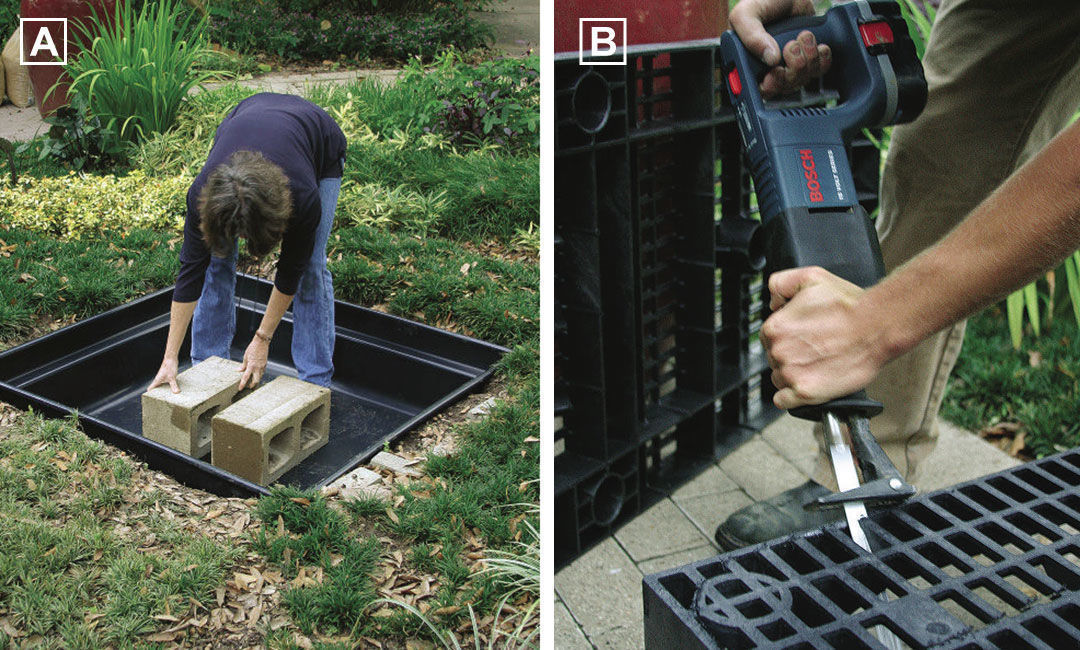
A. Dig a hole deep enough to allow your waterproof basin to sit slightly above ground level. Shovel in a 1-inch-deep layer of sand, which allows you to easily adjust the level of the reservoir. Put the basin in the hole, and level it. Place two or three cinder blocks in the center of the basin (to give additional support to the pot), and put the pump in a corner of the basin.
B. Using a reciprocating saw or jigsaw, cut a trapdoor in the corner of the plastic grate that is large enough for the pump to easily pass through. This will give you easy access to the pump for maintenance without having to disassemble the fountain. The pump’s electrical cord should be pulled off to the side.
C. Cut a small hole in the center of the grate for the flexible tubing. Attach one end of the tubing to the pump, clamp it in place, and poke the other end out of the hole in the center of the grate.
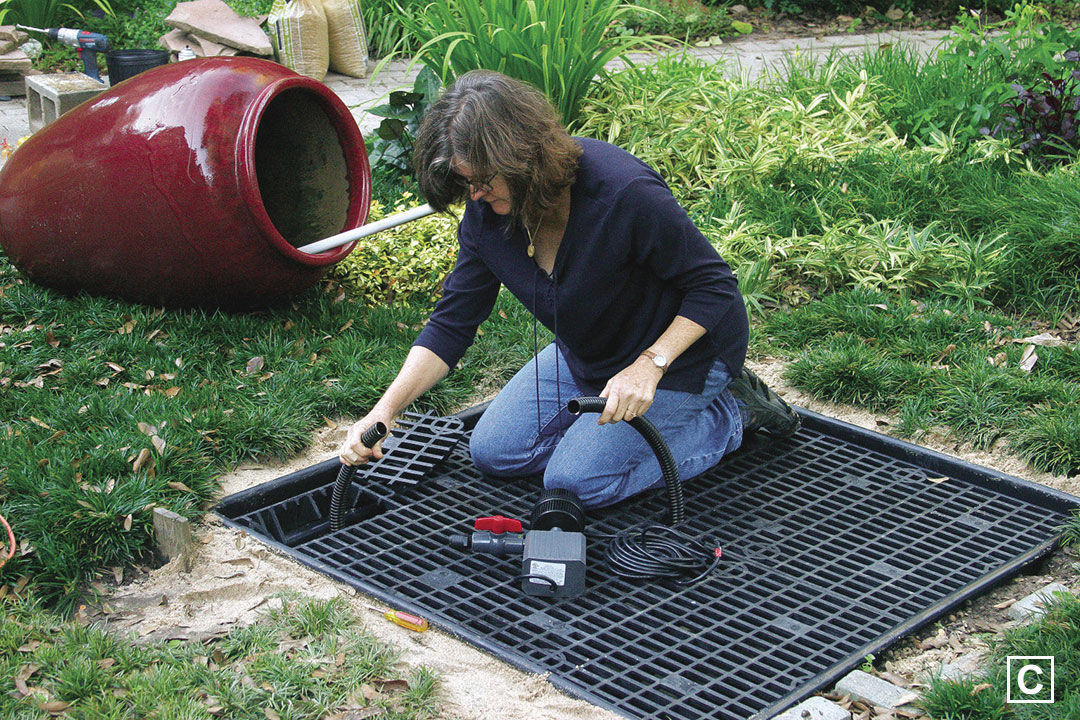
D. Place the screen or mesh over the grate. Cut a corresponding hole for the flexible tubing, and put the tubing through the hole.
Step 3: Place the fountain
A. Cut a length of PVC pipe so that it is as tall as the pot, and spray the top 6 inches with black paint. Slip the PVC pipe (black side up) into the PVC female adapter in the bottom of the pot. Do not glue the PVC pipe in place—you want to be able to easily remove it to drain the pot.
B. Bring the pot over to the reservoir; depending on its size, this can be a cumbersome step and may require the help of a friend. Twist the flexible tubing onto the barb sticking out of the bottom of the pot, and clamp it in place. Slowly raise the pot into place, and level it.

C. Place decorative stones on top of the screening to disguise the reservoir. Fill the reservoir with water, turn on the pump, and enjoy.

Pump it up!
A pot no more than 30 inches tall will need a pump rated at 950 gallons per hour (gph) or less. A taller pot requires one rated at 950 gph or more. When it comes to pumps, you can always reduce the water flow but never increase it, so if possible, choose a pump that is one size larger than the minimum-gallon requirement. This should cost you only an additional $20 to $30. I prefer magnetic-driven pumps because they are energy efficient and are the most reliable.

Don’t let a good pot go bad
You might need to scrub your fountain occasionally to remove algae and scale. Some people prefer the natural patina of algae on their pot—in which case, no scrubbing is necessary.
For those living in cold areas, you will need to drain your fountain to prevent cracking due to freezing. Don’t let what happened to this pot (right) happen to your fountain.
Anita Nelson is the owner of Nelson Water Gardens and Nursery in Katy, Texas.
Photos, except where noted: Danielle Sherry. Illustration: Steven Cominsky
To watch a video on building a pot fountain, go to How to Build a Pot Fountain


Comments
Log in or create an account to post a comment.
Sign up Log in