
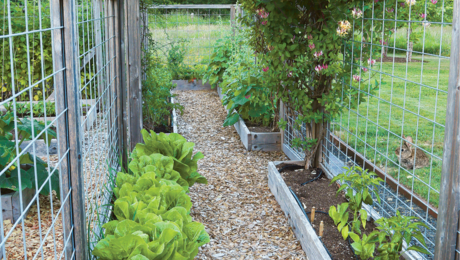
Your garden looks beautiful. The beans, lettuce, carrots, tomatoes, and flowers are all growing well, and you’re enjoying the results of your diligent care. Then one morning you discover some tomatoes are missing and several bean plants have been nipped. The culprit has left tell-tale ragged edges on the plants, and most of the missing shoots are more than 2 feet above ground. Tracks in the soft garden soil make it clear that white-tailed deer were responsible.
As a specialist in managing wildlife damage, I’ve seen a lot of plant losses caused by these four-legged vegetarians. The deer population in North America is higher than ever; some biologists speculate that whitetail numbers exceed 20 million nationwide. The impact of deer on vegetable gardens and landscape plants is particularly severe in suburban areas where there is some woodland habitat and not enough deer-hunting to keep numbers down.
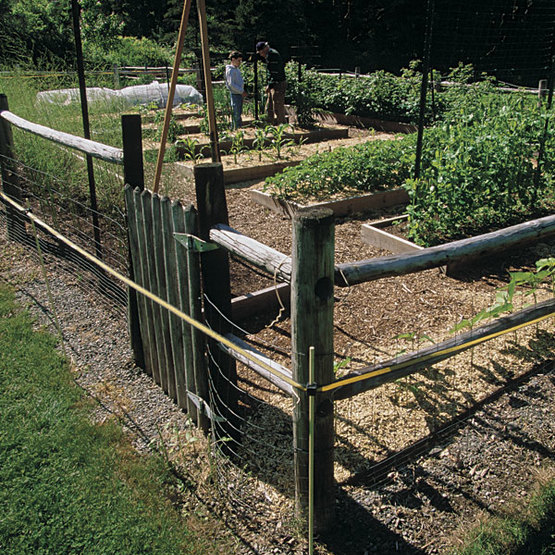
In many cases, deer damage to home gardens during the summer can be prevented with a simple electric fence. An electric fence is not a complete physical barrier; instead, it produces an electric shock that conditions animals to avoid the fence. To a deer, an electric fence is an unfamiliar object. A deer investigating the fence for the first time may touch it with its nose. If the deer receives a sufficient shock on this first encounter, it usually stays clear of the fence afterward.
Improving the effectiveness of an electric fence
With an electric fence, current is supplied by a high-voltage charger, which provides regularly timed pulses—55 to 65 per minute—followed by approximately one second with no current flow. These short-duration, high-energy pulses provide sufficient voltage (greater than 4,000 volts) to keep deer away from the fence.
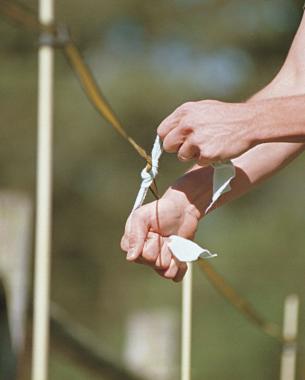
There are two ways to improve the effectiveness of an electrified fence. Combining the fence with attractants or lures encourages deer to touch the fence with their noses or mouths, enhancing the aversive conditioning. One tactic is to attach aluminum flags to an electrified wire, and to coat the flags with peanut butter. Another approach is to use electrified ribbon, known as polytape, and to treat the entire length with a peanut butter and oil mixture. Deer are more likely to see the high-visibility polytape tape at night, reducing the chance that they will walk into a wire and break it.
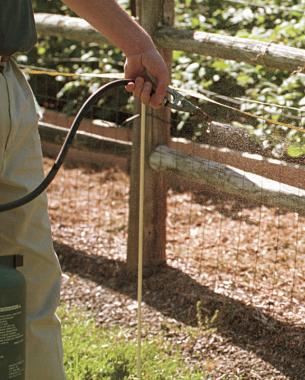
The other way to improve the effectiveness of an electric fence is to take the opposite approach and attempt to repel the deer. Field experiments conducted by Dr. Milo Richmond, with the New York Cooperative Fish and Wildlife Research Unit, showed that commercial deer repellents can increase the efficacy of electric fences. In the experiments, cloth strips were sprayed with an odor-based deer repellent (i.e., Deer Away or Deer Stopper) and spaced every 3 to 4 feet on an electric fence. These repellent-treated fences were more effective than electric fences with aluminum tabs treated with peanut butter as an attractant, or electric fences without attractants or repellents. I prefer to use the double negative conditioning of an aversive odor combined with an electric shock. Also, spraying cloth strips with repellent is far less messy than using a peanut butter and oil mixture.
Materials and costs are modest
Installation of an electric fence around a small, 50-feet by 50-feet home garden should cost less than $200. The materials can be reused for 10 or more years, so the long-term cost will be around $20 per year. A basic list of fence supplies includes about 75 yards of polytape or electric wire; about two dozen 4-foot fiberglass support rods and the same number of plastic insulators; and a high-voltage (greater than 4,000 volts) fence charger, along with a copper rod for grounding the system. It’s also helpful to purchase a digital voltage meter to test the fence and ensure it is working properly. A meter costs $15 to $20.
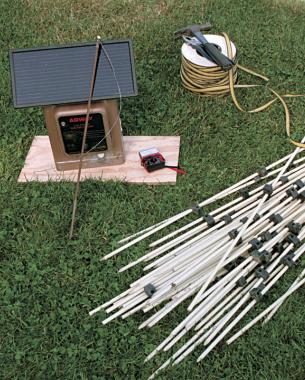
About half the cost of this system will be devoted to the fence charger. If an electric outlet is readily available, you can use an AC-operated fence charger, which will provide continuous current and eliminate the need for battery recharging. If an outlet is not close by, you can operate a fence charger with a deep-cycle marine battery, recharged either by solar panels or by a standard battery charger. Purchasing a marine battery will add $50 or more to the roughly $200 cost of our hypothetical fencing system. I have used a fence charger with a self-contained, rechargeable battery and solar panel for more than 10 years.
Before installing an electric fence, check with town officials to make sure there are no zoning ordinances or local regulations that would prohibit its use in your community. Some municipalities do not allow homeowners to install electric fences because of safety concerns. If you decide to protect your garden with electric fencing, put up warning signs. Pets or children who accidentally come in contact with the fence will receive an unpleasant shock, but no permanent injury.
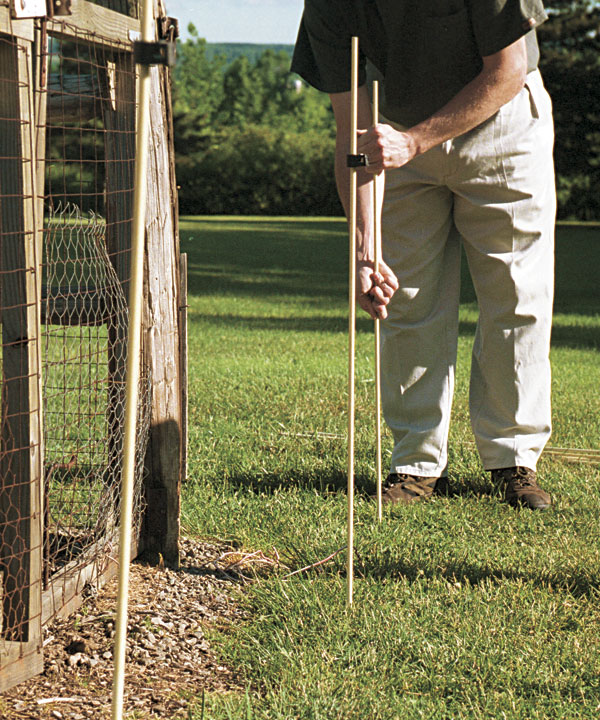
Installation is easy, with the power turned off
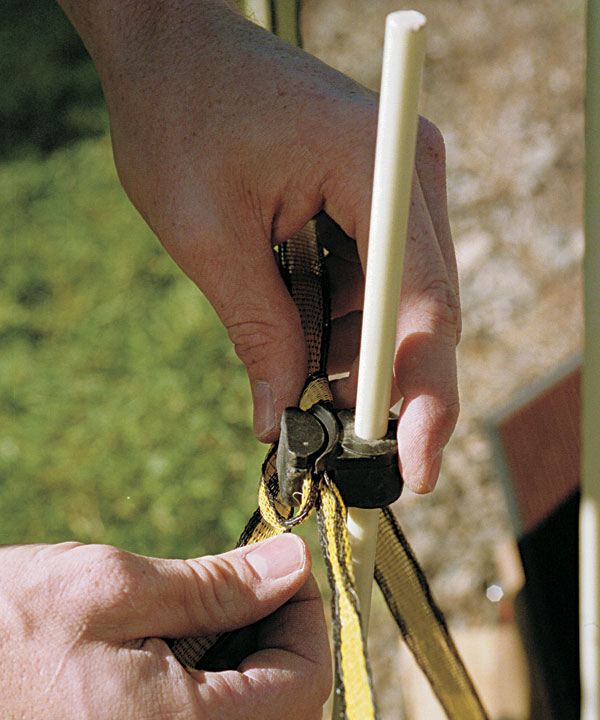
Here’s the procedure for installing the fence: First, drive four corner rods about one foot deep into the soil around the periphery of the garden. Then drive in the remaining support rods at 8- to 12-foot intervals to keep the wire taut. Slip an insulator over each post at 30 inches above ground level. Stretch the polytape around the four corner posts and thread the strand through the insulators. Pull on the polytape to hand-tighten it, and tie the ends to an insulator with a square knot to keep the strand taut. If you want to exclude woodchucks, rabbits, and raccoons as well as deer, add insulators and a lower wire at 6 inches above ground.
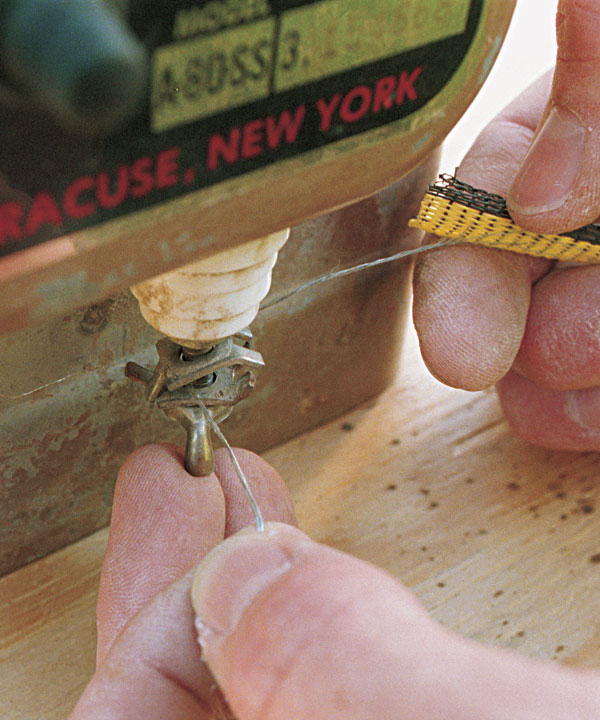
Position the fence charger on a wooden post or a building near the fence and hook a bare wire from the polytape to the charger to activate the fence. Install adequate ground rods for the charger, following the manufacturer’s recommendations.
Finally, you’ll want to test the line voltage with a digital voltage meter to verify that the current produced meets the manufacturer’s specifications. Although a non-digital voltage tester will verify that a charge is being produced, it will not tell you whether the fence is operating at full voltage. It is worth investing an extra $10 or so to purchase a digital meter.
Installing the electric fence

The fence should be left on 24 hours a day, as deer often forage at night. It should cost less than $1 per day to run an AC-powered fence charger; there is no additional expense for solar-powered units.
With the fence charger turned off, you’re ready to add either a repellent or an attractant. To repel deer, attach cloth strips to the polytape at 4-foot intervals. Spray the cloth strips once a month with a deer repellent that contains putrescent eggs as the active ingredient.
To attract deer, use aluminum-foil tabs. Smear a dab of peanut butter on the inside of the tab, and hold the tab in place with a staple. You can also treat the entire length of polytape with a peanut butter mixture. For this, a small paint roller will help. Mix vegetable oil and peanut butter in a tray to form a sticky liquid, then dip the roller and apply it to the fence. One treatment with peanut butter should last the entire summer.
You’ll further enhance the effectiveness of any electric fence system by installing it before the first sign of wildlife damage. It’s much easier to keep critters from penetrating a fence if they don’t know there is great food inside. If you’ve experienced plant losses in the past, install the electric fence early in the growing season, before damage is anticipated. With proper fence installation and maintenance, you should be able to enjoy deer-free gardening.


Comments
Where does one start to hook up an electric fence? How high and at what voltage do you keep it? Looking to stop deer and foxes.
Measure the length and width of the area you want to cover. For a 600'x400' area, for example, you'll need need at least 2,000 feet of wire for one go-round on the posts. For two wires around the garden, you'll need 4,000 feet, etc. That's why the rolls of wires note the "Miles" on the rolls in the store. I use a 6-volt solar powered unit. The store where you buy the equipment should be able to help. Tractor Supply offers a free DVD on all the how-tos. Put at least THREE ground rods in the soil. Put the sturdiest poles in the four corners.
Does an electric fence work in the snow/winter months?
Yes, I live in Michigan and have cattle and horses. I electrify my barnyard for them all winter, and my garden fence is simply hooked into the pasture fence in the summer.
If the snow gets deep enough, i.e. deeper than the bottom line of electrified wire, I turn it off, as there will be nothing for the deer to eat in the garden and the cattle won't try to get out, they'll stand at the hay feeder. Deer do sometimes eat from the hay feeder with the cattle, but that happens seldom.
Log in or create an account to post a comment.
Sign up Log in