
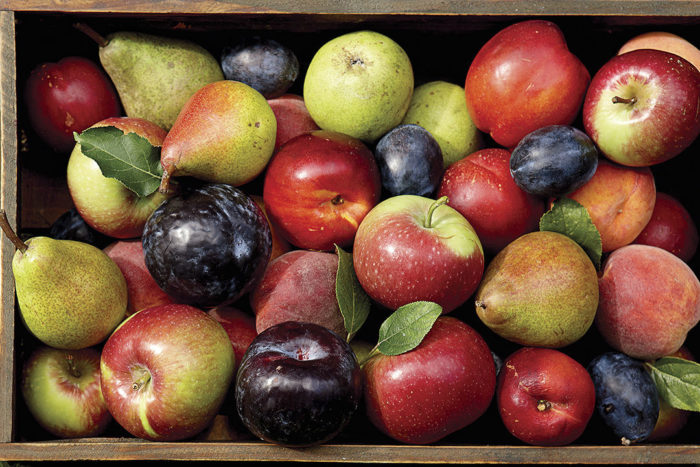
Eating seasonally is a way of life for many people, especially gardeners, but it can be a challenge because a lot of fresh fruits and vegetables are not available year-round. Canning is one way to enjoy homegrown or locally grown produce long after the gardening season is over. For some reason, however, canning has gotten a bad rap. Many myths and fears about canning keep people from enjoying the fruits of their labor. This is especially true with water-bath canning, one of the easiest and safest ways to preserve a harvest. Here are some of the most common myths and their corresponding facts.
Myth 1

You have to grow a lot of food to make canning worthwhile.
TRUTH: You can use the water-bath method to can small batches of homegrown food or food purchased at a local farmers’ market.
People used to preserve food on a massive scale. But you can preserve food you have grown or purchased at your local farmers’ markets in any volume. One trick is to freeze food, such as berries and tomatoes, in small batches as they ripen, then later make jam or sauce when you have the time and enough produce for your recipe. There are many recipes that yield just a few jars at a time, making it easy to try new foods and flavor combinations without committing a lot of shelf space. Also, you can now find winter farmers’ markets in many parts of the country, enabling you to preserve all year even if you didn’t grow the food yourself.
Myth 2
Tomatoes need to be pressure-canned.
TRUTH: Tomatoes and tomato products may be preserved by water-bath canning as long as you acidify them.
Tomatoes are a special case because the pH varies by variety, growing conditions, and the length of time that they are left on the vine. Tomatoes generally hover around a pH of 4.6, making them a borderline candidate for water-bath canning (see myth 6). You can put up tomatoes or tomato sauce in a pressure canner, but you can also use a water-bath process if you acidify the fruit. To do so, simply add 2 tablespoons bottled lemon juice or ½ teaspoon citric acid per quart of tomatoes; for pints, use 1 tablespoon bottled lemon juice or ¼ teaspoon citric acid. Four tablespoons of vinegar that has 5 percent acidity per quart may be used instead of lemon juice or citric acid; however, vinegar might cause undesirable changes in flavor. All of these acid-enhancing ingredients can be added directly to the jars before filling them with tomatoes. Be aware that citric acid is not the same as ascorbic acid (vitamin C). You can find citric acid wherever canning supplies are sold.
Myth 3
You need a gas stove to use the water-bath canning method.

TRUTH: Depending on the make of your appliance, you might be able to use an electric stove.
Standard coil electric stoves are generally all right to use for water-bath canning. You’ll want to use flat-bottomed stockpots so that you have even coverage of the heating element. That said, most modern electric stoves are flat-surface types with either glass or ceramic tops. If you want to can on one of those stovetops, check with the manufacturer to verify it is appropriate to use. Many makers of flat-topped electric stoves will advise against any type of canning because of the risk to the surface.
Myth 4
Water-bath canning is expensive.

TRUTH: You likely have all the equipment you need for water-bath canning.
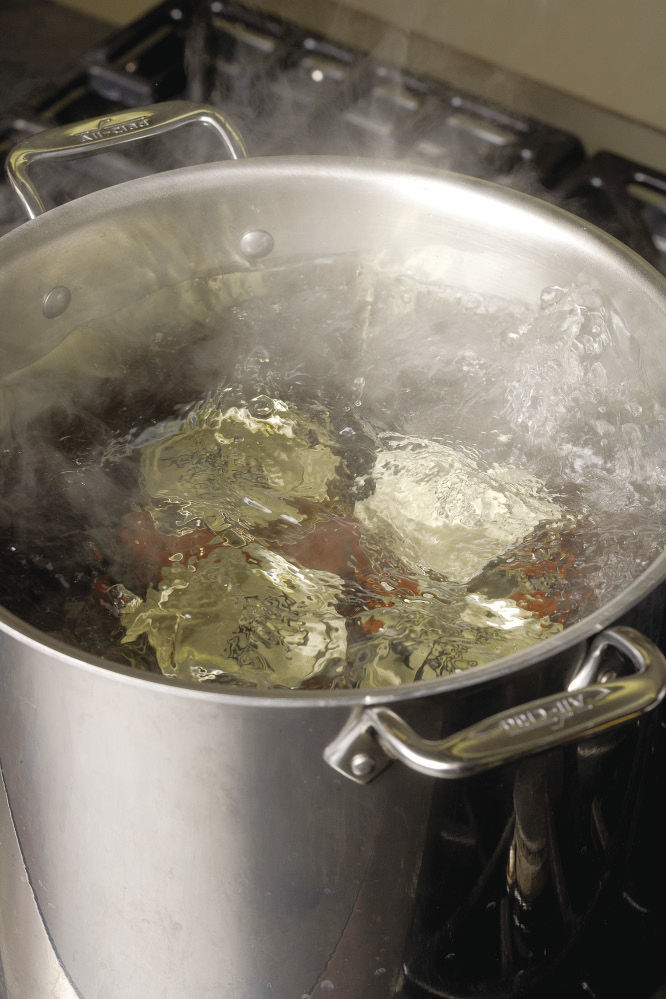
While special equipment is needed for pressure canning, water-bath canning is a great way to put up (preserve) a variety of foods, including tomatoes, pickles, jams, jellies, pie filling, and whole fruit. Water-bath canning can be accomplished with a few canning jars and a standard stockpot. Store-bought canners are, in fact, nothing more than a large pot with a rack on the bottom to hold up the jars and to allow the heat to circulate. If you are using a tall stockpot, you simply need something to hold the jars away from the bottom of the pot. I use a round cake rack that happens to fit inside my pot, but a large trivet works just as well. The pot you use as your canner also needs to be tall enough for jars to sit on the rack and still be covered by at least 1 inch of boiling water.
Myth 5
Water-bath canning is difficult.
TRUTH: Water-bath canning is no more difficult than following a simple recipe.
Water-bath canning is no more time-consuming than baking a cake or making a meal. As with any other food recipe, the more complex the ingredients and steps, the more time-consuming the process will be. That has nothing to do with canning but, rather, with what you decide to can. If you’re a beginner, stick to canning something simple, such as applesauce, tomatoes, or other fruit.
Myth 6
You can get sick or die of botulism from water-bath canning.

TRUTH: Only low-acid foods are susceptible to botulism.
Botulism is caused by a toxin that you cannot taste or see. If consumed, the botulism toxin will make you extremely ill—or worse. In the world of canning, all food is categorized as “high acid” or “low acid.” Only high-acid foods are candidates for water-bath canning because botulism cannot grow in a high-acid environment. Foods in the high-acid category have a pH of 4.6 or lower and include most fruits, pickles, and acidified tomatoes. Low-acid foods have a pH level above 4.6 and must be pressure-canned. This category includes meats and vegetables such as beans, corn, peas, and squash. So if you want to dive into canning for the first time, start with high-acid foods and the water-bath method.
Myth 7

Oven canning is just as safe as water-bath canning.
TRUTH: Oven canning is not recommended by the USDA or master food preservers.
Oven canning is not recommended by the U.S. Department of Agriculture (USDA) or master food preservers for three reasons. First, even at the same temperature, there is a difference between dry heat and wet heat. Dry heat penetrates food at a slower rate than wet heat, and there are no definitive rules with oven canning for how long an item should be baked to kill bacteria or to create a vacuum seal. Second, given the concentration of heat, there is a higher risk that the jars will break with oven canning versus water-bath canning. Third, many people who oven-can affix the lids after the jars come out of the oven. The seals are more likely to be weakened this way. But more important, the period of time between removing the jars from the oven and affixing the lids after heating opens up the possibility that bacteria will enter the jars.
Basics
Simple Steps For Water-Bath Canning
- Gather a tall stockpot and some jars, and wash the jars for your recipe.
- Fill the stockpot with enough water to cover jars by at least 1 inch. Add a trivet or cake rack to elevate the jars. Set at medium heat, and add your empty, clean glass jars. Leave them in the hot water until ready to use.
- Bring the water to a boil, and lower the temperature to a gentle boil for 10 minutes until you are ready to add food to the jars. This sterilizes the jars.
- Fill a small saucepan with about 1 inch of water. Place the jar lids in this pan, bring the water to a simmer, and then turn off the heat. This softens the rubber seal.
- Fill your jars according to the recipe. Wipe the jar rims with a clean, damp cloth, and add lids and rings to each jar. Tighten the ring to just finger tight.
- Lower the jars into the boiling water, and cover. Set a timer for the recipe you are following, based on your altitude. Note that recipes are written for use below the altitude of 1,000 feet; if you live above that altitude, use the chart at http://nchfp.uga.edu/how/general/ensuring_safe_canned_foods.html to determine if you need to add processing time.
- Remove the cover from the pot when the time is up, turn off the heat, and let the jars sit in the water for an additional 5 minutes. Move the jars to a wooden board or a towel-covered countertop to cool completely.
- Check the seals when the jars have completely cooled by pressing the center of the lids. If the lid pops up and down, the jar is not sealed and needs to be refrigerated and consumed within two weeks. If the lid does not move, it is sealed and ready to be stored. Remove the rings to prevent rust or mold from developing under them; a ring can also hide a broken seal. Place the jars on the shelf for up to six months. Do not stack the jars; the weight of the top jar can break the seal of the bottom jar.
Theresa Loe is co-executive producer of and canning expert on the PBS television show Growing a Greener World. She is a lifelong canner and a graduate of the Master Food Preserver Program. She teaches about preserving food at livinghomegrown.com and growingagreenerworld.com.
Photos: Scott Phillips; Lynn Felici-Gallant; Carol Collins; Abigail Lupoff. Illustration: Abigail Lupoff


Comments
Log in or create an account to post a comment.
Sign up Log in