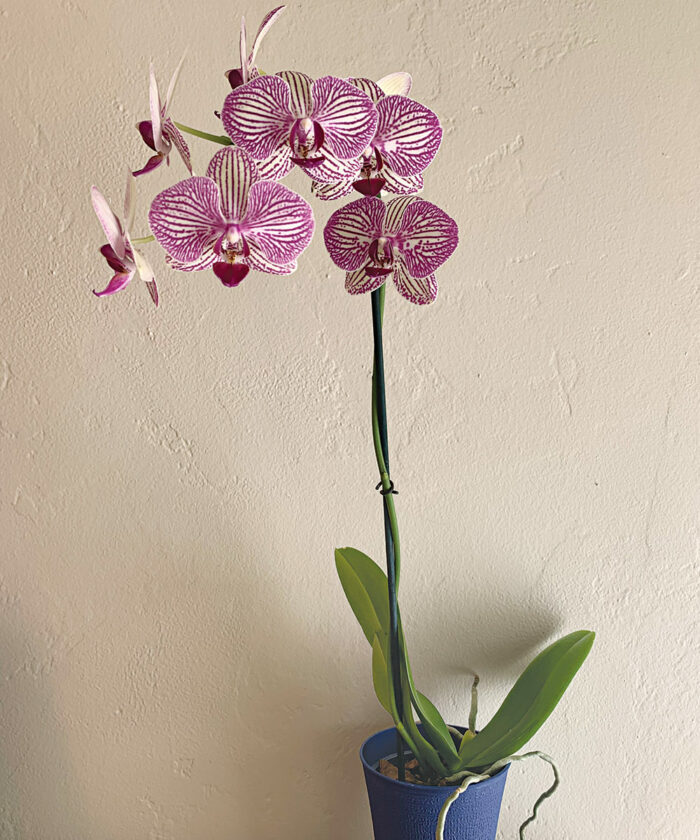
For many people, picking up a potted moth orchid (Phalaenopsis spp. and cvs., Zones 10–12) is like buying cut flowers; they don’t care for the plant once it stops blooming. But for indoor gardeners, buying one or getting one as a gift is a challenge. How to keep this exotic thing alive?
Moth orchids are the most popular orchids on the market today. Grown from clones, most arrive in bulk at big box and grocery stores, where they can be found flaunting candy-colored blooms. While moth orchids are always found in flower at stores, if you grow them year-round at home, then they will naturally start blooming in fall and last several months, sometimes persisting into winter. For this to happen, though, you’ll need to treat them right.
Provide indirect light
You can put a new blooming moth orchid almost anywhere in the house for a month or two while the flowers are still open, as long as the plant doesn’t get direct light, which can burn the leaves. For as long as you’re enjoying the display, your watering habits will be much more important than providing the perfect light conditions.
But things change if you want to keep the plant growing after the bloom is done. Take a cue from moth orchids’ native habitat. They like to grow under the canopy in forests, where filtered sunlight trickles through the leaves to the branches below. Thus, moth orchids do best in bright, indirect light. An east-facing windowsill in a bathroom or over your kitchen sink (where there’s lots of humidity)
is often the perfect location.
Learn More About Caring for Your Moth Orchid
What do I do after it’s done blooming? And how do I deal with rot or pests?
Water deeply and let the roots dry out
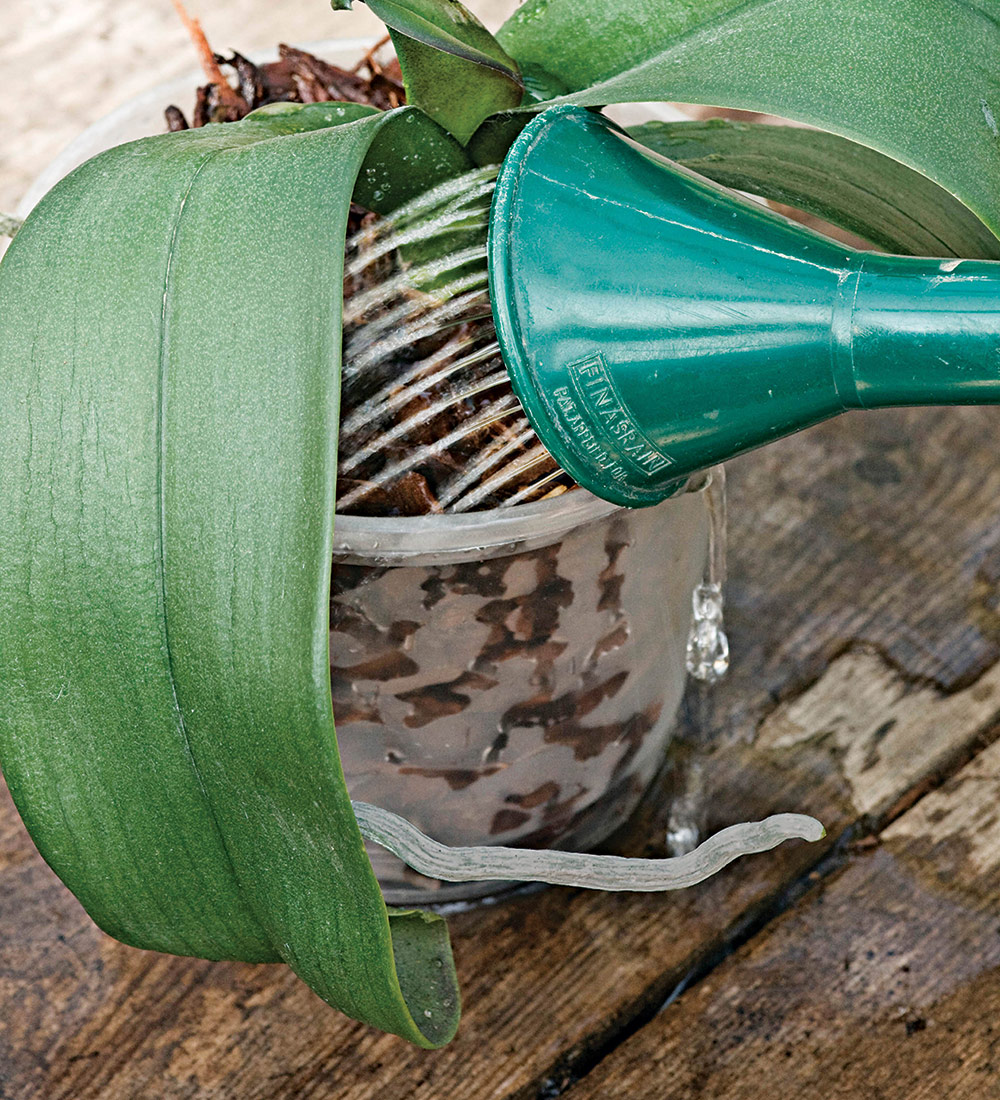
Orchid roots are highly specialized. Not only do they absorb water rapidly, but they also aspirate and grip onto surfaces to anchor the plant. Moth orchids appreciate high humidity, but it’s not true that they require a lot of water. What they really need is a good root-soaking every few days, followed by a drying-out period that allows the roots to change back to silver.
Unless you have a dedicated growing area with good drainage where you can drench your plant, water it weekly in the sink, thoroughly soaking the roots. Be careful, however, not to let water sit in the natural divot formed by the leaves. This can lead to rot. Instead, soak the plant and then turn it over to drain. If the roots are packed into sphagnum moss in a plastic container, gently squeeze the container to wring out some of that extra moisture.
You may have heard about the trick of putting a few cubes of ice on your orchid to provide a steady drip of water while they melt. While this may save some time, it’s not the optimal way to water your orchid. If you can, avoid the ice cubes in favor of the spray nozzle or sink faucet.
Drainage is key
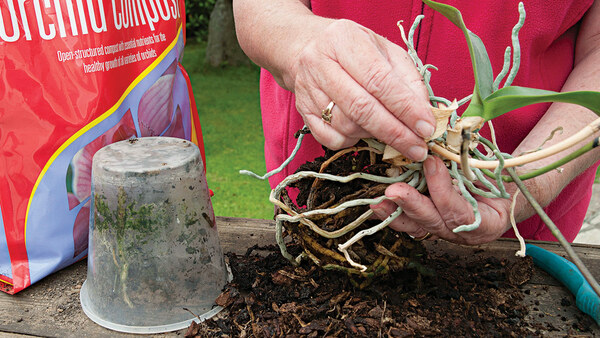
Moth orchids are typically sold in clear plastic containers packed with sphagnum moss that are then placed in decorative pots. These plastic containers usually have lots of drainage, which is great. If you recently acquired a flowering moth orchid in one of these pots, the first thing to do is … nothing. Definitely do not try to repot a blooming orchid, which will stress it out. Do the repotting after it’s done blooming, or wait until the spring growing season.
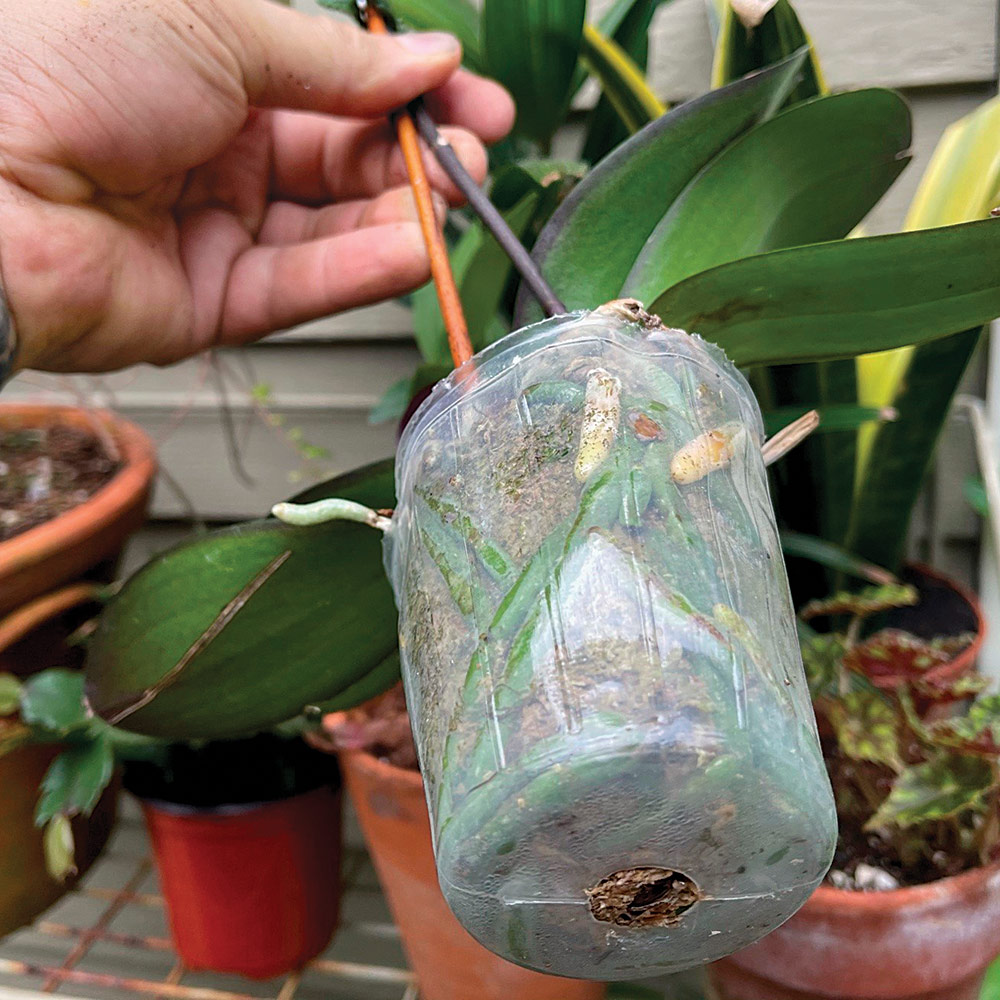
For as long as the orchid is in its original container, the most important thing to be aware of is soggy moss. Orchid roots are meant to be exposed to the air; moth orchids don’t like to be continuously moist. Consistent moisture will lead to root death and eventually kill the whole plant. This is why it’s important to squeeze excess water out of the moss.
When it does come time to repot your orchid, you want a container with plenty of easy drainage. Clay or plastic are both good options as long as they have drainage holes. Most plastic containers that orchids come in have slits in the side or holes in the bottom to allow water to drain out freely. Again, the idea is to imitate the growing conditions found on the side of a tree, where heavy rains drench plants and then the sun and the air dry them out.
If cared for properly, moth orchids are easygoing plants that will reward you once a year with beautiful, long-lasting blooms.
Jon VanZile is a Master Gardener living in South Florida. He is the author of Houseplants for a Healthy Home: 50 Indoor Plants to Help You Breathe Better, Sleep Better, and Feel Better All Year Round.



Comments
Log in or create an account to post a comment.
Sign up Log in