
-
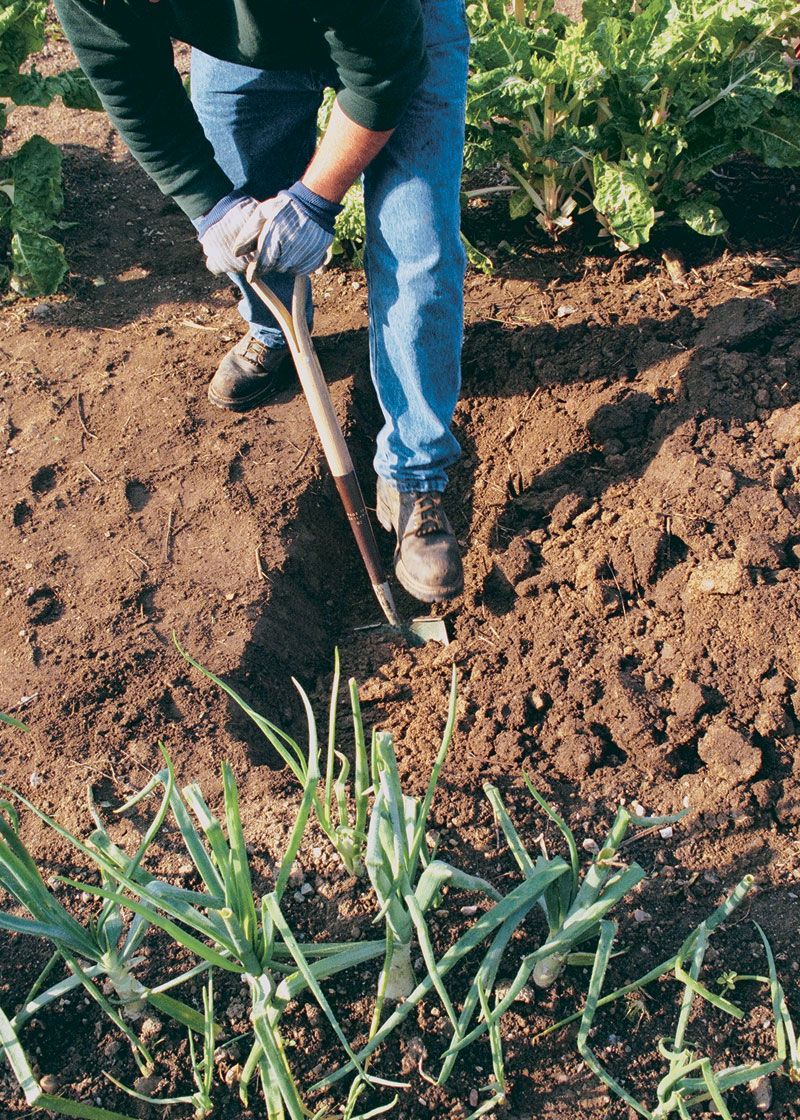
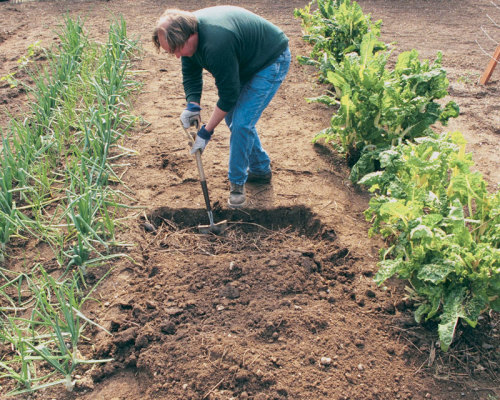
Double digging is a quick fix for impenetrable soil. It's hard work, though.Photo/Illustration: Janet Jemmot
-
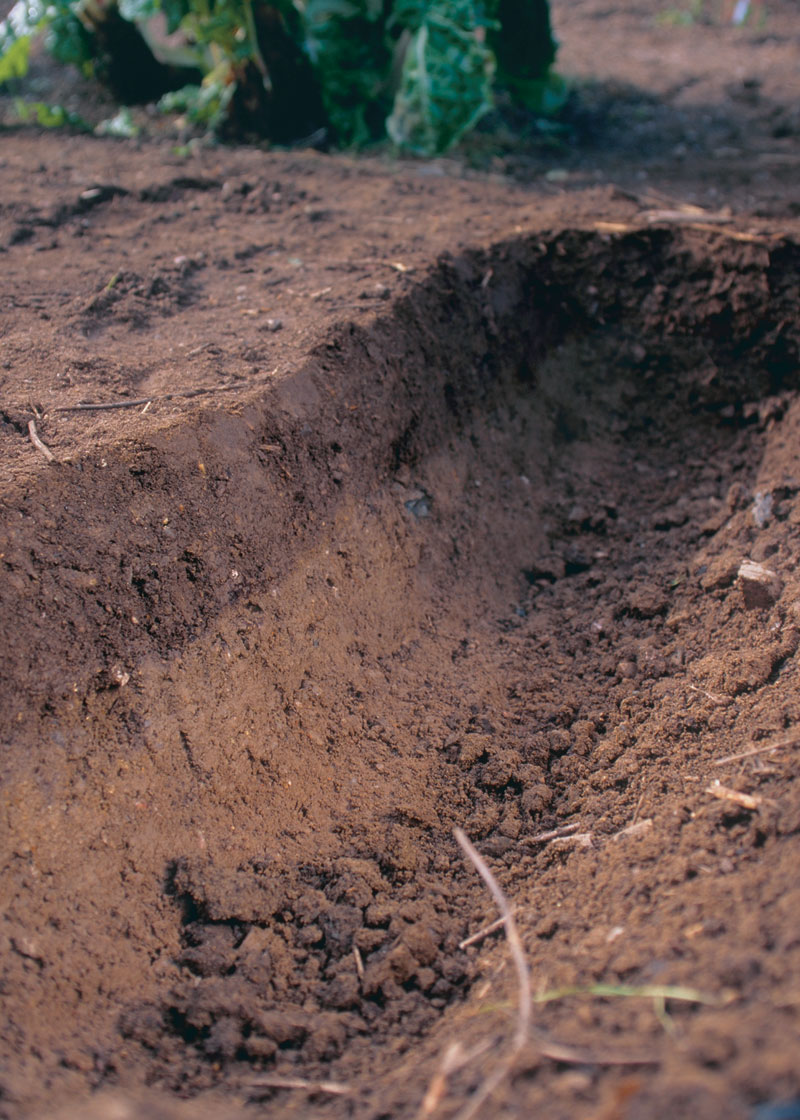
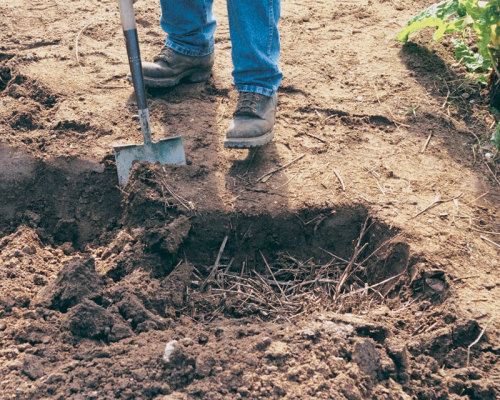
This subsoil is so dense that plant roots will have a tough time penetrating it. Double digging and the addition of organic matter will change all that in a hurry.Photo/Illustration: Janet Jemmot
-
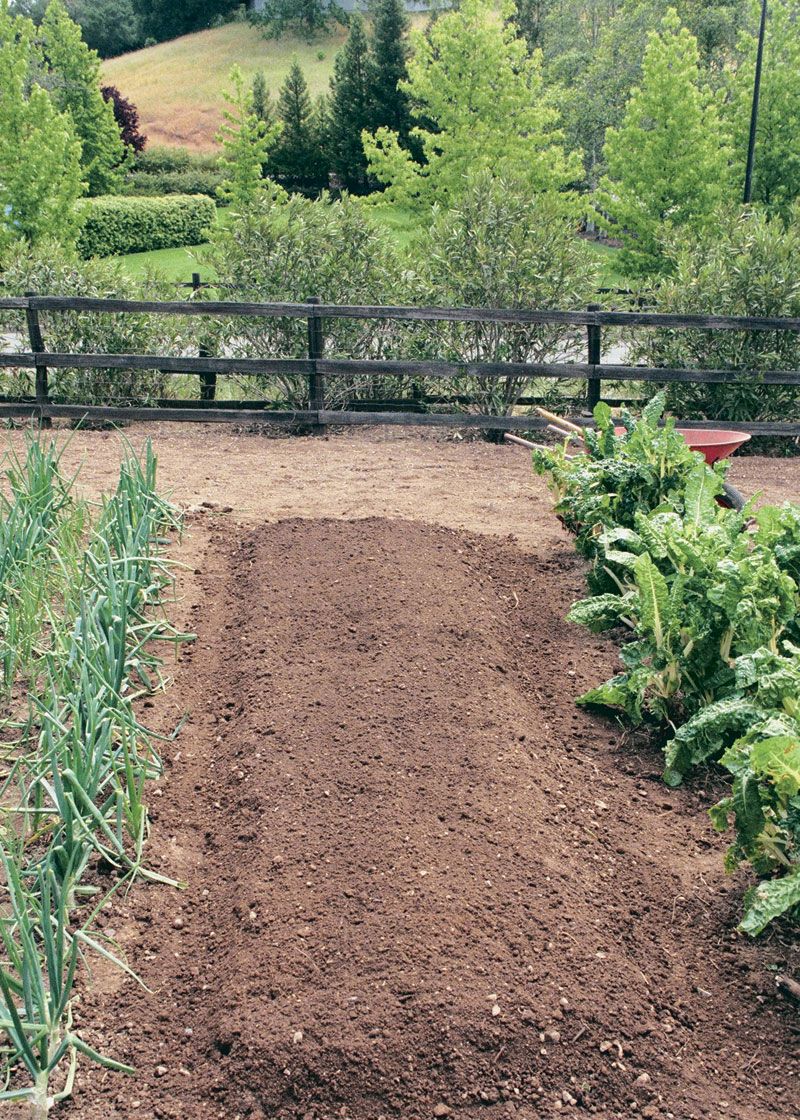
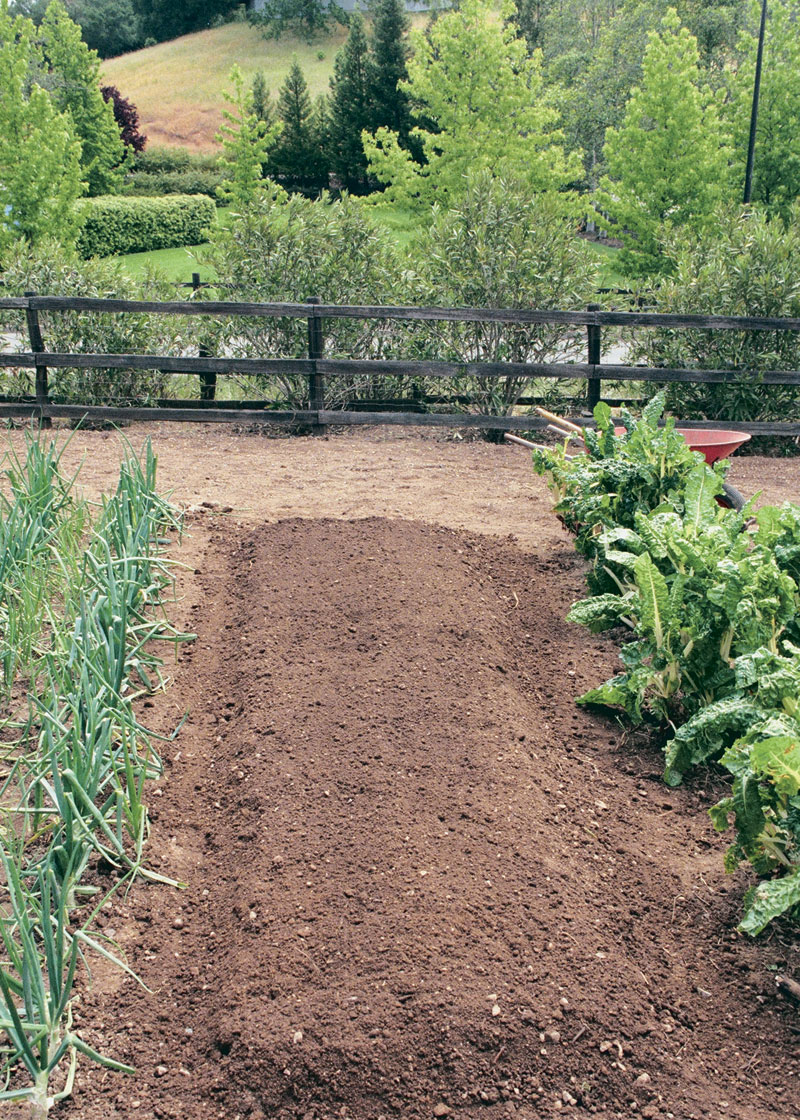
Here's a double-dug bed ready for planting.Photo/Illustration: Jennifer Matlack
-
Photo/Illustration: Janet Jemmot
-
Photo/Illustration: Janet Jemmot
-
Photo/Illustration: Jennifer Matlack


by James Kerr
October 1998
from issue #17
As every serious gardener knows, the key to a bountiful harvest is good soil. Along with adequate light and moisture, fertile, well-drained soil can make all the difference between healthy, pest-resistant plants and those plagued with problems.
Good soil is something that is sought, rarely found, but can be made. With the first thrust of a shovel into new ground, a gardener is likely to discover that just beneath the surface lies an almost impenetrable layer of clay and rock. Or, he may find shifting sand that won’t hold either nutrients or water.
How you deal with difficult dirt is dictated by resources. If money is not an issue, a backhoe, a dump truck, and loads of topsoil is the easiest route. But if cost matters, that solution’s quickly ruled out. Even raised beds, another option for managing soil quality, can be expensive, and some find the boxes objectionable.
Many gardeners resort to rototilling, but most tillers don’t go deeper than 8 in., which is not enough to break up poor subsoil. Double digging is the inexpensive, low-tech way to go. It requires lots of elbow grease but creates fertile, well-drained soil every time.
Why double dig?
Simply put, double digging involves removing the top soil layer, exposing the subsoil or hardpan beneath, breaking it up, adding organic matter, and replacing the topsoil that was initially removed.
Double digging allows roots to reach deeper into the earth, where better-draining subsoil makes it less likely they’ll become water-logged or oxygen-deprived. Deeper roots mean plants don’t have to be watered as often. And more plants can grow in the same area because they don’t have to rely on the topsoil alone for moisture and nutrients.
That’s the rationale for this simple technique, but simple doesn’t mean easy. Double digging through rock-hard subsoil is tough work. Fortunately, double digging a bed is a one-shot deal you’ll never have to repeat. And it’s the fastest way to good soil.
A spade is all it takes
This low-tech process requires only a couple of tools, the most important of which is the proper digging implement. I use a short-handled, square-tipped spade rather than a round-tipped shovel (the latter I use for double digging holes, not beds). The spade allows me to make flat, sharp slices through the dirt, and the short handle forces me to bend my knees while digging, thus taking the strain off my lower back.
You may also need a wheelbarrow for hauling organic matter to work into the bed. The wheelbarrow can also serve to move topsoil from the first trench dug to the last; a tarp would work, too.
Proceed to the garden
Before you start, determine the beds you want dug. Make them 3 ft. to 4 ft. wide if you want to reach the middle of the bed from either side. They can be as long as you want.
Some plants require wide spacing, such as tomatoes and eggplant. These don’t need to be put into beds, but can be planted separately with a modified double-digging technique. Double digging an entire bed for them would mean more work. Unless you’re a glutton for hard labor, double digging a hole (and amending the soil) is all you need do for these plants.
 |
|
| When you double dig a bed, you expose the subsoil layer, break it up, and amend it with organic matter. | |
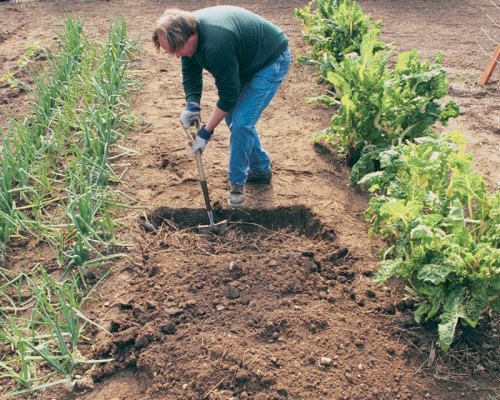
Technique for double digging. Healthy soil is essential to a productive garden, so it pays to expend the energy and double dig your way to it. But don’t hurt yourself in the process. Remember to bend your knees, and try to keep your back straight. Don’t try to lift too much soil at one time. Take periodic breaks and drink plenty of water.
When you’re ready to go, expose an 18-in. to 22-in.-deep section of your soil. Typically you’ll find an upper layer of topsoil and subsoil beneath. Sometimes, as in the photo at right, the strata are easily seen. In double digging, you want to work the subsoil, amending it with organic matter.
To double dig a bed, start at one end and move backwards. Once the soil is loosened, turned, and aerated, you don’t want to step on it again, as compaction defeats one of the purposes of double digging. Dig a trench across the width of the bed, removing the topsoil and piling it at the top of the bed on a tarp or in a wheelbarrow. The trench should be 6 in. or 7 in. wide, the width of your spade, and as deep as your spade, 9 in. to 11 in.
 |
 |
|
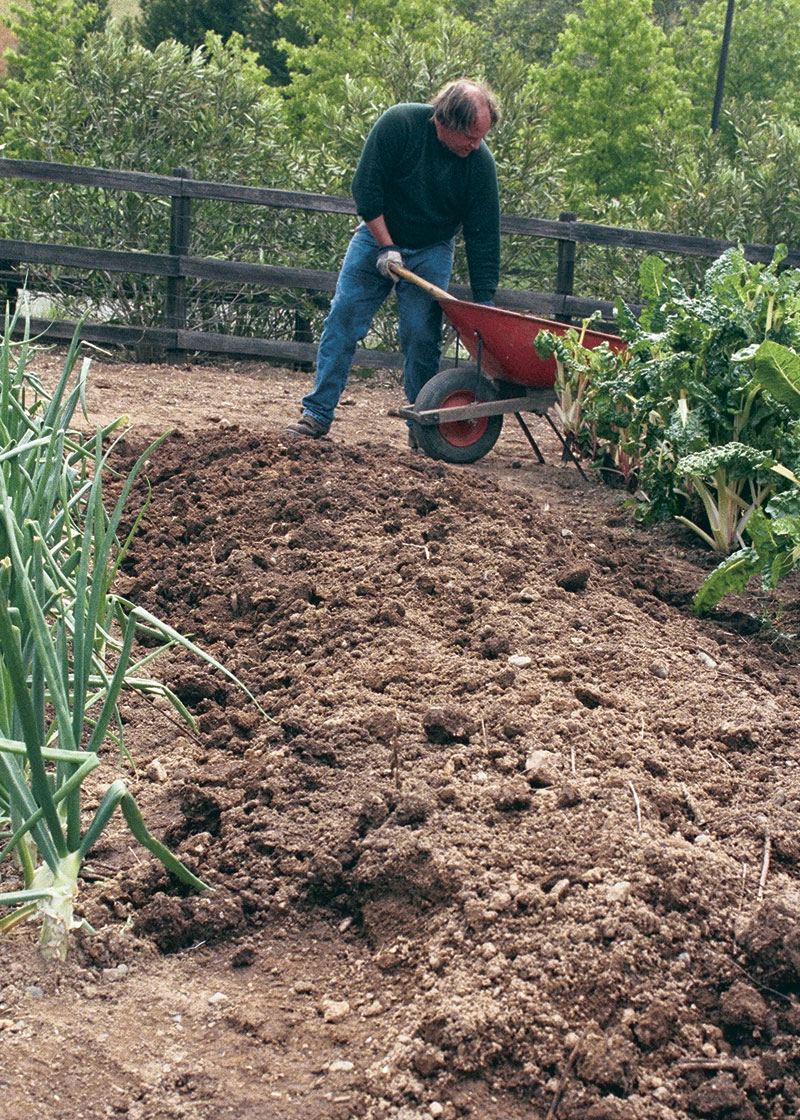
| 1. Dig a trench as wide across as you want the bed to be. The trench should be 9 in. to 11 in. deep and as wide as your spade. Remove this topsoil and pile it at the end of the bed. Add organic matter to the trench and chop it in. Above, I’ve used old cornstalks, but any organic matter can be used, as long as it’s disease free. Now loosen the subsoil another 9 in. to 11 in., working in the organic matter. | 2. Do yourself and your soil a favor and don’t walk on it again after you’ve finished digging. Work backwards and dig another trench just behind the first, following the same steps. Place the topsoil on top of the first trench’s subsoil and organic matter mix. Continue to dig trenches until you reach the end of your bed. Don’t hesitate to take breaks. | |
Next, put several inches of organic material in the trench. Fresh manure or any rough, non-woody plant matter like leaves, grass, or old flower stems can be used. I like hollow cornstalks and sunflower stems because the air trapped inside them allows microorganisms in the soil to flourish and accelerates the breakdown of organic matter and the production of humus. Don’t use diseased plants, as they may infect the soil and pass on the disease to future crops. And save your fine compost to mix in the topsoil once you’ve finished digging the bed. If this is your first garden and you don’t have a source of organic materials to add to your soil, commercially bagged compost or manure will do.
After adding the organic material, loosen the soil to another spade’s depth, chopping or turning the organic matter into the subsoil. If it is very rough and rocky, take 2-in. to 3-in. sections at a time. Remove large rocks as you go. You want to break the hardpan into small chunks interspersed with organic matter, providing channels for water to drain and roots to grow into. If you find a soil fork works better than a spade on this bottom layer, by all means use it.
There, you’ve double dug the first trench. Wipe your brow, have a drink of water, and repeat the process. Start another trench parallel to and just behind the first, one spade-width wide and one spade-depth deep. Throw the topsoil from the second trench on top of the first trench’s mixture of organic material and subsoil.
Repeat the process by tossing a layer of organic material into the second trench, and digging and mixing it into the subsoil. Keep double digging trenches down the length of your bed. When you get to the end of the bed, you will be one layer short of topsoil. Go to the top of the bed where you put the topsoil from your first trench, and bring that layer of topsoil down to spread on the last trench.
That done, rake smooth the top of the bed, add some fine compost or other soil amendment, and your double-dug bed is finished. You’ll see it’s raised 6 in. or more above the surrounding area. This is due not only to the addition of the organic material, but also to the de-compaction of existing soil. And this is how soil should be— loose, enriched, well aerated, and as pleasing to the eye as it will be to your plants.
 |
 |
|
| 3. Bring the topsoil from the first trench dug to the last. The soil should be aerated and free of large rocks. Add compost or other amendments if needed. | 4. Rake the soil smooth and take in the bed’s beauty. The bed will be raised a few inches above the surrounding soil, due to aeration and organic matter. You now have a home for your plants where they can reach their full potential. |


Comments
Log in or create an account to post a comment.
Sign up Log in