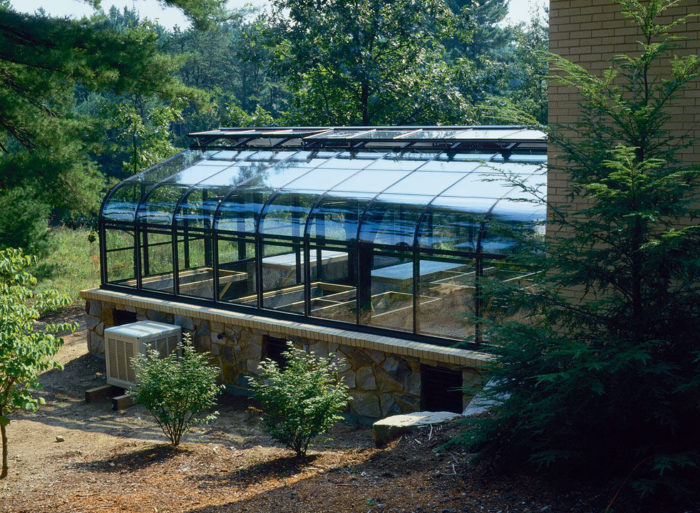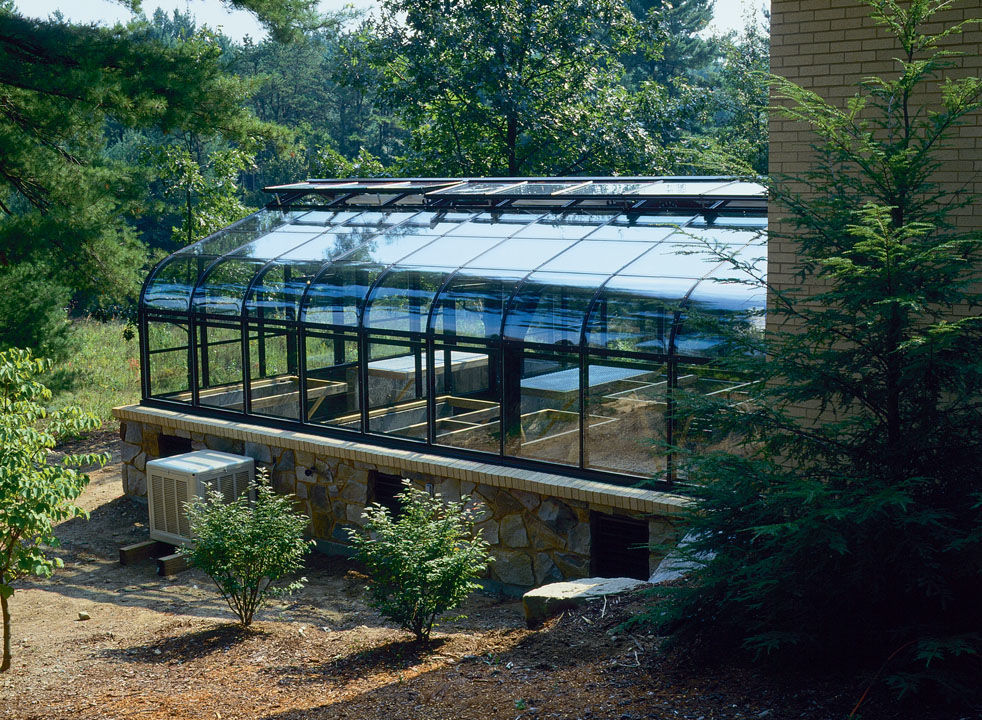
If you dream of having a greenhouse one day but are intimidated by cost or construction, my experience can help you. Like my father before me, I build greenhouses and solar rooms for a living. I’ll take you step by step through the installation of a typical prefabricated kit greenhouse. A well-made kit is reasonably priced (about $50 per square foot, installed, excluding foundation), reliable and can be put together by a handy person. Whether you assemble it yourself or hire a contractor like me, you’ll know about costs and good practices. I have skipped some of the details of installation here, but kits come with thorough manuals so a beginner can assemble one by following the instructions.
There are two basic greenhouse designs. One is a lean-to; it’s higher on one side than the other, and is installed as an addition to a house or other building. The other is an even-span two lean-tos joined at the ridge either free-standing or attached at one end to a house or other building.
Most homeowners build an attached, rather than free-standing greenhouse. For one thing, the shared wall can save on construction materials. For another, since the shared wall is usually the north end of the greenhouse, it offers shelter from winter winds. An attached greenhouse also donates solar heat to the neighboring building. The kit I’ll describe here is an attached, even-span greenhouse.
Planning the greenhouse and foundation

I lay out, account for and measure all parts in the kit before I start planning the foundation. Laying out a foundation usually takes adjustments to compensate for variations in the shared wall and the greenhouse components.
The foundation for a greenhouse must extend below the frost line for stability (4 feet deep here in New England). If the foundation settles, or heaves during a freeze, the greenhouse frame will twist, causing the glass to shatter. Most patio slabs are poured to a 4-inch depth without footings and won’t support a greenhouse. If you want to build on a slab, you should dig a trench below the frost line, pour a concrete wall around your patio and set the greenhouse on it.
You can build a greenhouse on an existing wooden deck providing the posts rest on footings below the frost line. The posts and framing should be of pressure-treated wood and the decking of rot-resistant redwood, cedar or pressure-treated lumber, which will all withstand greenhouse humidity to a great degree.
You’ll need to reinforce the deck directly under the greenhouse walls with extra joists and posts that rest on footings below the frost line.
Constructing the foundation and greenhouse
If you lack a suitable patio or deck, you’ll need to build a foundation. The most common method is to pour a concrete footing below the frost line and top it with a low concrete wall, but you can also lay up a wall of concrete blocks, bricks or stone. For the job I’ll describe, my client ordered a big greenhouse, 23 feet 6 inches long and 15 feet 9 inch wide.

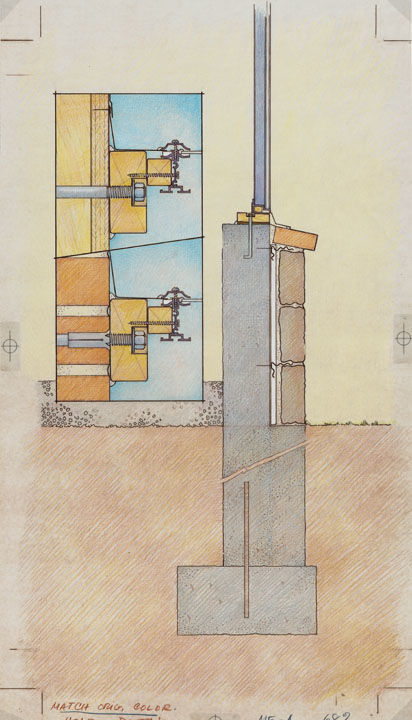
My client also wanted a 3-foot-high concrete wall faced with stone to match stone work on his home. The foundation would need to be 7 feet tall (4 feet below ground and 3 feet above), so I hired a foundation contractor to form the walls. The manufacturer supplied a standard foundation drawing, which I altered to allow for the stone facing and for a heater, a cooler, and vents. Some even-span greenhouses have a pole set on a footing to help support the ridge, but this kit had a glass partition that formed a load-bearing wall and required a foundation. (The partition, which has a door, divides the greenhouse into two rooms, one for cool-climate and the other for warm-climate plants.
I’d hired an excavator to dig the foundation, but to my surprise, my client announced that he owned a backhoe and could do it himself. I laid out the foundation with stakes and string. He dug a 4-foot-deep trench, making it 5 feet wide so the contractor would have room to install the concrete forms. First, the contractor and his crew poured a footing 2 feet wide and about a foot deep. Then they pushed 2-foot lengths of 5/8-inch steel reinforcing rod half into the wet cement, along the center line of the footing. The rods lock the foundation walls to the footings. We let the footings cure, or air-dry, for a few days. Then the contractor poured the walls, and I inserted 1/2-inch and 8-inch anchor bolts (for the greenhouse sills) into the wet concrete at 30-inch intervals.
The foundation walls cured for a week, and then my client filled inside the foundation to within 8 inches of ground level with earth.
If you want a sink in the greenhouse, install a drain pipe and tie it into the main drainage system before you backfill. Compact the earth around the drain pipe to avoid damage and leaks from settling earth. Conduits for wiring should also be added at this time if you want the wiring to run under the floor. After filling with earth, I added 8 inch of 1/2-inch crushed stone inside to form a floor. The loose gravel provides drainage and easy access to underground water, heat, and electrical lines.
I insulated the foundation by nailing serrated metal ties to the concrete and pushing 1-in. thick rigid foam insulation onto the metal ties. Insulating the knee-wall with rigid foam keeps stone and cement, which are poor insulators, from conducting cold and dampness into the greenhouse. Enough of each tie remained exposed to anchor the stone facing to the concrete wall.
My helper, Bob Parker, and I prepared the top of the foundation by setting predrilled, pressure-treated 2x6s over the anchor bolts. Then I found the highest point of the wall with a transit, and shimmed the 2x6s to this level, with cedar shingles next to each bolt. I inserted the shingles, thin end first, from inside the wall, tipping the 2x6s slightly, which helps to shed rain and snow.
With the foundation ready, I prepared to assemble the greenhouse. I placed the aluminum sills on top of the pressure-treated 2x6s and took measurements. At both ends of the greenhouse, I checked the distance from side to side to make sure the sills were parallel. To check for squareness, I measured the distance between diagonal corners. I adjusted the sills until the measurements were the same, marked their position on the 2x6s and lifted them off. Then I caulked the inside and outside of the 2x6s where they met concrete and covered them, the insulation and the stone facing with aluminum flashing made at a sheet metal shop. The finishing touch was a bead of caulking where flashing met the top row of sloped brick.
Assembly
The next step was preparing the wall of the house. Whether a greenhouse is framed with wood or with aluminum, it needs to be sealed against the elements where it meets the house. I attached pressure-treated 2x4s and flashing to the house to bridge uneven places in the wall and make room for the greenhouse ridge vents to open and close.
If a house is sided with clapboards or shingles, I remove a 4-in.-wide strip, following the outline of the greenhouse gable. This exposes the house’s sheathing, which provides a smooth face for the 2x4s. I slide the flashing under the siding and then nail 2x4s through the sheathing into the house framing. If your house, like my client’s is smooth brick, fasten the 2x4s to the brick with anchor bolts every 2 ft. Before you bolt the 2x4s in place, caulk their backs at top and bottom.
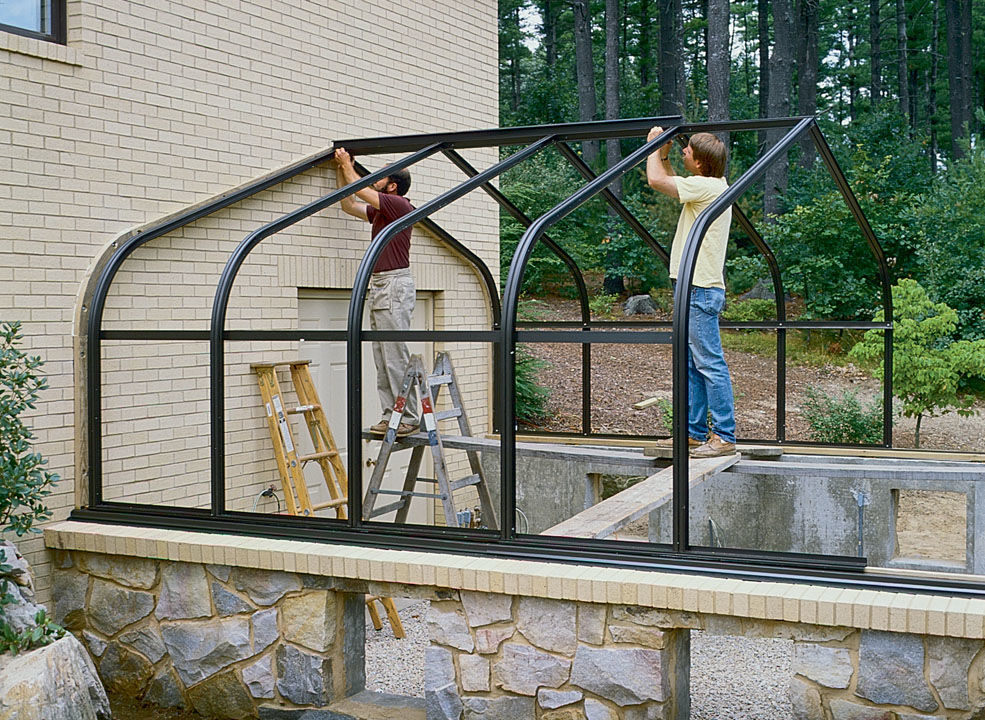
With the house prepared, I was ready to assemble the greenhouse frame. It’s fastened togethr with bolts and screws, included in the kit, through pre-drilled holes. Following the manufacturer’s directions, my helper and I easily fastened together each side in a day. We assembled the greenhouse in sections, on the ground sill, vertical glazing bars (the parts that hold the glass) and ridge. The glazing bars were spaced 30 3/4 in. apart to accommodate 30-in.-wide panes of double-insulated safety glass. Then my helper and I each lifted opposite sections and set them in place on the sill plate, ridges butted together. We sandwiched a structural I-beam between the ridges, bolted them all together and anchored the aluminum sill through the flashing and into the 2×6’s with stainless steel screws.
With the frame in place, we attached a horizontal brace, or purlin, across the midpoints of all glazing bars to provide additional support.
Glazing
My client’s greenhouse now had a solid foundation and a sturdy frame, but it still needed glass set into the walls and roof. Glazing can be plastic or glass. I prefer glass. Glass always looks great, but plastics eventually deteriorate. Single sheets of glass work fine for unheated greenhouses or in warmer climates, but considering fuel costs, insulated glass is the sensible choice in cold climates like New England’s. Double-insulated glass consists of two sheets of glass with a space between them, sealed at the edges with caulking.
Installing glass is simple as long as the frame is square and level. A good kit comes with glazing tape, caulking and an aluminum barcap that creates a water-tight seal around each pane. Glazing tape is an adhesive putty, sticky on both sides. You unroll the tape and press it against the glazing bars. Then you position the glass carefully and press it against the tape. With the glass in place you run butyl caulking along the edge of the glass and the glazing bar. Barcaps hold the glass in place and keep sun, rain and snow off the caulking.
I started glazing at the sill, completing one full horizontal row on each side of the greenhouse, then the next row above, working my way up to the eaves. I alternated from side to side to keep the weight distributed evenly on the frame. The glass panes overlap like shingles, to shed water. The top row of glass on each side of the ridge forms vents. These vents have a separate frame that is hinged continuously at the ridge. Roof vents are needed in all greenhouses to vent hot, stale air.
I left the glass gable end for last so we could come and go easily while we glazed the roof. The end has a door, which came with factory-fitted jambs, and the same glazing as the rest of the greenhouse.
Installing utilities
The greenhouse was now ready for utilities. For greenhouses, most codes require exterior-grade wiring connected to a ground-fault circuit breaker. A licensed electrician must do this installation. Household 110-volt current is used for outlets, but lighting can be low-voltage for added safety.
An attached greenhouse can be heated by a home furnace. Consult a plumbing-heating contractor to determine if the furnace is large enough. My client’s heating system was able to run two hot-water units, separately zoned, one for each room. If your furnace is inadequate, or if you’re heating a free-standing greenhouse, install a forced hot air furnace or a boiler for hot-water perimeter heat. I prefer hot-water heat because it’s an even heat that doesn’t dry the air as forced-air heat can.
In summer, you must cool the greenhouse or circulate air. My client got an evaporative cooler, which has a fan that draws air through a constantly wet porous mat. An evaporative cooler costs less to use than an air conditioner and has the additional benefit of humidifying the air. However, it requires both electricity and a cold water supply. More economical alternatives include a gable exhaust fan controlled by a thermostat or an oscillating fan that runs constantly to move stagnant air.
Greenhouse benches are a matter of choice. My client built pressure-treated wood-framed benches with galvanized steel-mesh tops. This arrangement is easy to keep clean and allows for air circulation and easy rearrangement. Factory-made benches are usually made of galvanized steel or aluminum.
The last thing I installed was exterior roll-up shades to protect my client’s plants from direct sunlight. Shades are easy to roll up or down, and can be made of shade cloth or more permanent, but more expensive, aluminum slats. Another option is one large piece of shadecloth draped over the greenhouse roof, but it must be put on in the spring, and removed in the fall.
Jed Meuse owns Meuse & Berglund, a greenhouse and solar room construction firm in Groveland, Massachusetts.
Photos, except where noted: Susan Kahn


Comments
Log in or create an account to post a comment.
Sign up Log in