
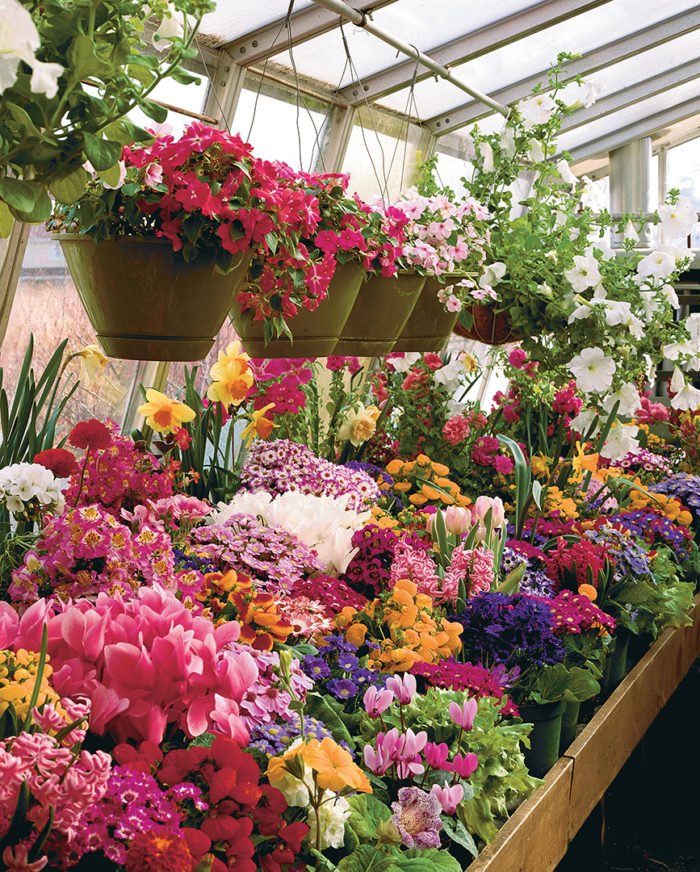
It’s early March in the Chicago area. The temperatures are still in the 20s, and it’s snowing again. When I get home from work, I head immediately to my greenhouse, which is attached to the kitchen through a sliding glass door. With a flip of the light switch, I’m greeted by an absolute riot of color from the 200 or so flowers in bloom. Sliding the door open brings the sweet aroma of blooming hyacinths and petunias wafting into the house.
Starting in mid-February and continuing through March, my wife, Barbara, and I have the pleasure of dining in front of this display, and sharing it with friends, relatives and fellow garden-club members. It’s a great way to make use of our greenhouse in fall and winter—a time when many greenhouses stand empty—and it requires only a few packets of seeds, some spring bulbs and a few hours of winter gardening.
If you have a greenhouse or are thinking of building one, please don’t look at these pictures of my flowers and say, “It’s too much work for me,” or “I can’t do that.” As I always tell my visitors, a winter greenhouse garden takes very little time to start and needs almost no attention once it’s planted. So if you’d like to have a display like mine, keep reading and I’ll tell you exactly how to do it.
Growing conditions
Our greenhouse measures 12 by 20 feet. It is oriented east to west and receives full sun. Over the past 20 years I’ve had two greenhouses in other locations. I’ve had success with west and south exposures, but I’m sure east would be fine as well. Full southern exposures seem ideal.
We installed 3-foot-wide benches along the length of both sides of the greenhouse to maximize the growing area. A 3-foot-high, 5-foot-long workbench forms an island down the middle. A Modine 50,000-Btu natural gas forced-air heater takes care of our -heating needs. Plexiglas acrylic panels, measuring 2 feet by 4 feet, slip into the runners of the glass panes on the -inside of the greenhouse; these help keep the heating bills in line. A battery-backup power supply is always ready to keep electricity flowing to the motor and controls in the event of a power outage.
Because different plants like different conditions, I find it advantageous to utilize the three climates -available in the greenhouse. Even though the thermostat is set to 50°F, the 8-foot-high roof creates a warmer climate (55°F–60°F) on top, with 50°F on the benches and as low as 40°F on the floor. Most of the seed–propagated plants like the temperature at bench height, but this climate variation gives me the opportunity to place the plants that like warmer temperatures at a higher level. Petunias, impatiens, spider plants and burro’s-tail cactus do very well in baskets hung from the ceiling. Spring bulbs go on the floor under the benches, their pots covered by black plastic trash bags. The cool 40°F temperature and dark environment are perfect for the eight-week chilling period needed to force the bulbs into bloom just when I want them.
Our winter garden favorites

The process begins in August with the selection and ordering of seeds and bulbs. My favorite catalogs are Parks and Stokes. Between them, we get a wide assortment of suitable plants. We select varieties that we know from experience will do well at 50°F. We keep the greenhouse at that setting in order to conserve energy, but it also happens that a lot of the flowers we like to grow thrive in cool temperatures.
One of our favorite flowers is Cineraria ‘Cindy’, which produces daisylike blossoms in vibrant blue, purple, pink, red and white. We get brilliant yellows and reds from the pocketbook plant (Calceolaria ‘Any-time’). Its distinctive, balloon-shaped flowers are so unique they always draw attention. And this year we tried the miniature yellow Calceolaria ‘Gold Fever’ with great success.
The rarely grown poor-man’s orchid (Schizanthus) is always on my list. A new cultivar available from Stokes called ‘Star Parade’ grows only 8 inches high, and it was a real hit last year. The top two-thirds of these mounding plants were covered by hundreds of orchidlike flowers with bright centers and pastel margins.
Pansies grow well in cool temperatures, and their smiling faces are always welcome. Greenhouse varieties of snapdragons make great cut flowers, and I’ve even had success with ranunculus and primrose from seed. I had tremendous results from petunias grown in baskets, and marigolds did just fine in the cool climate too.
To these seeded plants, I add refugees from the summer garden. Before the first frost, I dig up fibrous begonias, impatiens, geraniums and enough herbs to fill Barb’s culinary requirements all winter long. This year a seeding of lettuce provided salads as well as decorative greenery.
There are also year-round residents in the greenhouse. We have hanging baskets of spider plants, miniature cymbidium orchids and a variegated bougainvillea. Pots of Christmas and Easter cactus, night-blooming cereus, kalanchoe, aloe, tropical hibiscus and numerous varieties of cactus and succulents seem to survive the cool temperatures in winter and the hot temperatures in summer. Cyclamen bulbs that come back to life each year are usually the hit of the winter season. To complete the assortment, we purchase spring bulbs for forcing. Favorites include tulips, daffodils, hyacinths, crocuses and grape hyacinths.
Starting seedlings

We plant seeds in late August or early September. Conditions in the greenhouse are too hot at this time of year, so I start the seeds in the basement. I have a wonderful three-tiered wooden plant stand; its shelves are lined with heavy plastic to retain water. Evaporative mats cover a thermostatically controlled heating mat that I set to 75°F to promote germination.
I use seed-starting trays that have 20 shallow rows. Each plant variety gets its own row and stays nicely separated from the others without tak-ing up too much space. I plant the seeds per the instructions on the package.
While I’ve accumulated these -planting aids over the years, you can be just as successful using something as simple as a shallow plastic tray left over from a frozen -dinner. Punch holes in the bottom of your frozen food tray to make a seed tray. The purpose of the holes is to allow watering from the bottom of the tray. I simply water the evaporative mat, and the water is drawn up through the holes. This eliminates the need to water from the top, which can damage very tiny seedlings. You can do the same thing by dipping the tray in a pan of water, then removing it when the soil is wet.
I grow my seedlings under fluorescent lights that are on for 12 hours per day. Placing the plants by a bright window without direct sun will also work. Be sure to cover the tray with a sheet of clear plastic to keep in the moisture if you are not setting the plants on an evaporative mat. In about four weeks, or when four true leaves are visible, transplant the seedlings.
Transplanting
I prepare a mix of 4 parts ProMix BX (a mixture of peat moss, perlite and vermiculite) and 1 part sharp sand. The sand helps drainage and adds weight to the mix. I add liberal amounts of Osmocote 14-14-14 fertilizer, which -provides nutrients for six months. After transplanting, I also fertilize with Miracle-Gro about once a month.
I transplant only once into 6-inch-diameter plastic pots large enough to accommodate the mature plants. When purchased in bulk, the price is reasonable. Although tiny seedlings with only four leaves look ridiculous at first, they soon fill all the space.
Transplanting is the part of the program that requires the most work, so Barb and I get our garden-club friend, Sam Solomon, to help. We fill all the pots with soil mix and then prepare the seedlings. It’s very important not to damage the roots. When you remove the plants from their trays, they will be bound together by their roots. To separate them, I use two pointed wooden skewers, the kind usually used for barbecues. Once the plants are divided, we lift each one by its leaves and set it in the depression already made in the center of the soil-filled pot. Then we simply tap the sides of the pot to gently drop the soft soil around the roots. I feel this gentle treatment is key to the ultimate success of my plants.
At this point the amount of work is drastically reduced. Watering is about all that is needed, and I water about once a week after the days noticeably shorten and temperatures drop. I keep an eye out for whiteflies and aphids but have had few problems with them. If a problem occurs, an application of pyrethrum in a premixed spray form usually cures it. Pyre-thrum biodegrades within 24 hours, so I don’t worry about a buildup of chemicals in the greenhouse.
During October, I put my bulbs in pots and place them on the floor to chill. I’ll pull them out and place them on the bench in early February to achieve March blooms. As winter progresses, the seeded plants grow ra-pidly, filling their pots by January. The petunia -baskets grow lush with greenery, and blooms begin to cover the plants around the third week in Jan-uary. I water more frequently as the blooms increase and the days lengthen. All this work is timed to cause the garden to reach its peak in mid-March. That’s when we invite all our friends, relatives and garden–club co-members to share the fruits of our winter-long ef-fort. Some years the garden club sponsors a free garden walk, which is open to the public. We always make it a point to be included. It’s well worth the effort when we see the faces of our guests as they view the brilliant display and smell the fragrant aromas of the greenhouse. After a long winter, an “instant spring” really lifts the spirits.
Alan Schulman’s greenhouse brightens his home in Highland Park, Illinois, all four seasons of the year.


Comments
Log in or create an account to post a comment.
Sign up Log in