


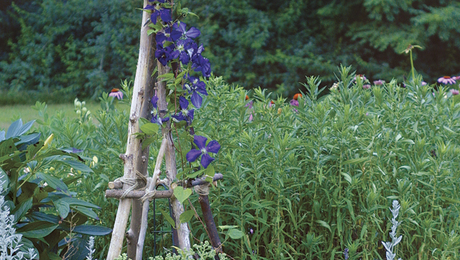
My father decided to build this structure not because he needed something for his vines to climb on but because he bragged to my mother that he could build one better than the one she saw in a store. I then saw his and, naturally, thought I could build one better than that.
If you knew anything about my father and me, you’d know that any project we do is fast, easy, and cheap. This tuteur, a variation on the classic version, is the same. Supplies are minimal and inexpensive. The biggest investment of your time will be finding the sticks and waiting for the glue to dry. And the effect is nice. Anyone who sees it will say “Hey, where’d you get that?” and will leave convinced that this is an easy, straightforward project.
Watch a video of the author demonstrating how to build a garden tuteur.
Supplies You Will Need
• A large number of branches measuring between 14 inch and 1 inch in diameter
• Loppers or saw
• Knife to strip bark
• Sandpaper
• One or two thick elastic bands
• Wood glue
• A cordless drill/screwdriver
• Screws
• Clamps
• All-purpose glue
• Jute twine
• Spar urethane

I always use fallen branches, as I don’t believe a healthy tree should give up its branches for my little project. I scour my yard and the woods, and I’m not picky about the type of wood I use. I also keep an eye out for neighbors who might be pruning their trees; they are often happy to be rid of branches. If you do use this green wood, I suggest letting it dry for a few months to minimize shrinkage or twisting, which could pull apart the glue.
Try to gather many more branches than you think you will need; having a number of choices helps. To give the branches a smooth look, strip the bark and sand the branches before you start putting them together.
When I build one of these tuteurs, I try to keep in mind that the structure is supposed to be rustic, so flaws are OK — anyway, they will all be covered by vines. As you might imagine, the project can be built to whatever Dimensions your plants require or your branches allow.
1. Arrange the branches and secure the top


Gather the four posts together at the top in a tight grouping in which each post fits snugly up against at least one other post, all the while keeping the bottom ends of the posts in a somewhat even square. This step takes some patience. Once you have the tops gathered and the bottoms spaced, wrap one or two thick elastic bands around the top for temporary stability. To help hold the top together, I add some wood glue to the places where the posts come together, wiping up any drips with a rag. It’s best to let the glue dry before moving on, but if you’re pressed for time, you can go ahead. Screw each post to an adjacent post after first drilling and countersinking the hole. Drilling prevents splitting and countersinking creates a hole for the head of the screw to sit in just below the surface of the wood.
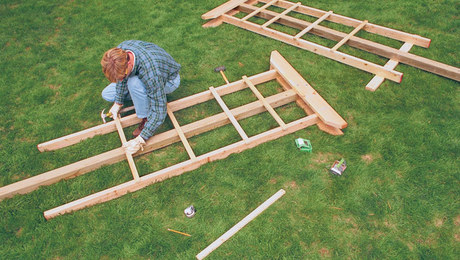
2. Attach the braces


The lower set of braces is attached first. Cut them to length, remembering that they need to extend an inch or two beyond the posts. Use a clamp to hold one end as you drill and screw the other end, again drilling and countersinking the hole. Position your braces where you will not have to drill through or into a knot in the wood. Attach two braces opposite each other first. The remaining two should sit on top of the ends of the first pair. After attaching the lower braces, add four more in the same manner higher up, for more stability. The vertical pieces help vines get a leg up. At this point, things are purely decorative, so you can let your creativity take over.
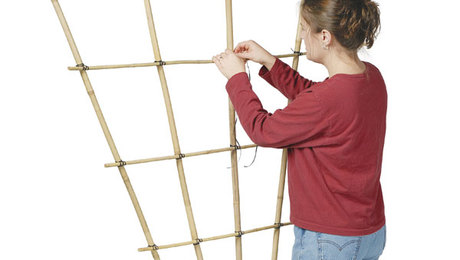
3. Add the twine


The purpose of the twine is to hide the screws and to complete the rustic look of the piece. The first step is to rub some glue into the end of the twine to keep it from fraying. Next, tuck one end of the twine into a crevice to get it started, and use some more glue to help hold it in place. Since the twine is intended to hide the screws, just wrap it around until they are all covered. Again, treat the end of the twine with glue and tuck it inside the tripod. The glue will help it stay in place. To hold the twine together, run some glue down the wrapped twine and rub it in.


Adding twine to the braces and verticals is a bit trickier, but the same method applies. First, glue the end and tuck it into a crevice. Wrap the twine around in a pattern that covers the screws and looks as though you’ve lashed the branches together. The pattern you use doesn’t matter as long as it looks good. Then add more glue to the end.
4. Apply protection
 A few coats of spar urethane will help your tripod withstand the elements.
A few coats of spar urethane will help your tripod withstand the elements. Turn the tripod on its side to coat the inner surfaces, making sure to spray up into the top. Then turn it right-side-up and spray all the outer surfaces and the ends. Check the product label for drying time.


Comments
I used INSULOK(cable ties) for securing the top and attaching the braces ( it may be not rustic). You can build a Tuteur within 10 minutes.
Log in or create an account to post a comment.
Sign up Log in