

-
Photo/Illustration: Greg Holdsworth (all photos)
-
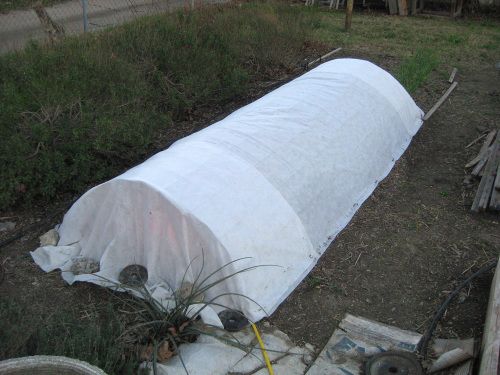
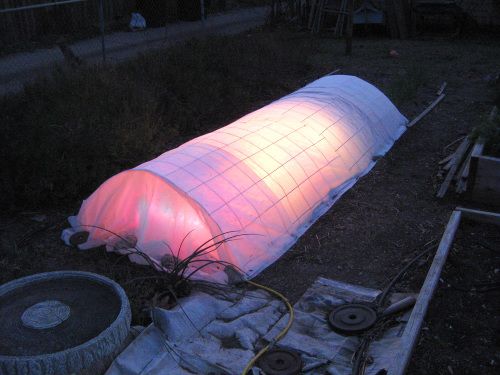
PHOTO A - The low tunnel.
-
PHOTO B
-
PHOTO C
-
PHOTO D
-
PHOTO E
-
PHOTO F
-
PHOTO G
-
PHOTO H
-
PHOTO I
-
PHOTO J

In my never-ending quest to come up with better ways to improve my seed starting success, I again take advantage of resources or tools available during a particular time of year. In this case, I am revisiting using repurposed holiday lights as a clever way to keep seedlings and transplants warm. In past projects, I built a holiday rope light powered heat mat, and used holiday light bulbs to heat the inside of a cold frame. In this project, I step further outside, crank it up a notch with more lights, and combine the project with an existing low tunnel. A great advantage of this project is that it can be customized to your specific needs and available space. In this case, it was designed to accommodate two 10″ x 20″ seed trays with extra room for wiring. The results, as you will see, are quite awesome.
What I Used:
Supplies
• 1 – 16-18′ length (approx.) of heavy gauge cattle fencing wire (4″ mesh)
• 16-18′ length (approx.) of frost cloth
• 2 – 1″ x 8″ x 6′ wood boards
• 2 – 10 count C9 incandescent light bulb strings
• 1 – 25 count C9 incandescent light bulb strings
• 1 – 200 count mini string lights
• 1 – 1″ x 2″ x 8′ hardwood wood furring strip
• 1 Box – T50 3/8″ Arrow galvanized steel staples
• 12 – #6 x 1 1/2″ wood screws
Tools
• Bolt cutter or heavy duty wire cutters
• Circular saw
• Drill and drill bits
• Pencil and tape measure
• Square (fast plastic type)
• Staple and nail gun (I love my Arrow Powershot)
• 6′ General purpose 16/2 extension cord, with 3 outlets
• Heavy gauge extension cord
• On-off toggle switch
• Outdoor thermometer (with wireless remote)
Low Tunnel Construction:
To make the low tunnel, I already had some heavy gauge cattle fencing wire (4″ mesh) that I made into two cylinders about 4′ tall and 2 1/2′ in diameter. This is the method some of us have used to cage large tomato plants. I simply cut the cylinders in half lengthwise, giving me four mesh ‘tunnels’ that sat about 2 1/2′ high. I poked the sides of the tunnel wiring into the ground to secure it. I then covered the tunnel wiring with the frost cloth (PHOTO A). TIP: I cut old metal clothes hangers into 10-12″ lengths and bent them to make the pins that secured the cloth to the ground (no need to buy any).
Lighted Wood Base Construction:
1. I placed the two 1″ x 8″ x 6′ wood boards together lengthwise and measured the total width of both pieces. Using this measurement, I cut three lengths of the 1″ x 2″ wood furring strip. I then screwed the furring strip pieces to the boards using 1 1/2″ wood screws (PHOTO B). Again, I want to mention that this lighted structure is designed around holding two standard 10″ x 20″ seed trays, with an extra area left over for holding extra wiring. So I spaced the furring strips on the boards with those measurements in mind.
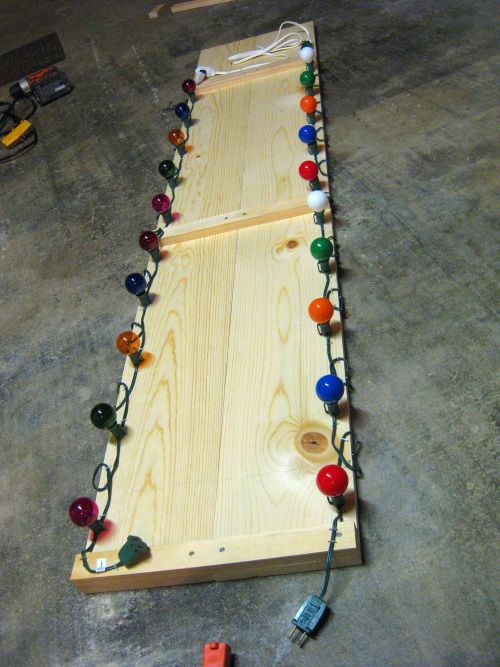
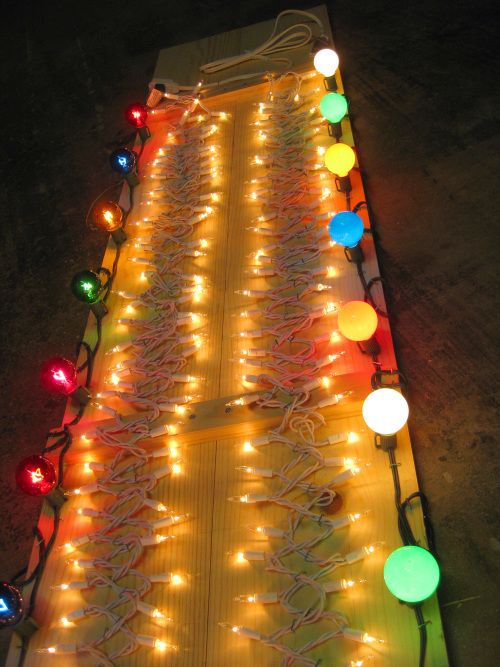
2. I took the two 10-count lengths of C9 lights and placed them around the perimeter of the boards (one length per side in this case). I could then figure out how many bulbs to have on each of the four sides, and space them accordingly. Using the metal staples, I anchored the wiring to the edge of the boards, about an inch from the outside edge (PHOTO C). Note: before you anchor your light strings down, have in mind how you plan to connect the lengths of the light strings together, as well as where on the board you will be connecting the main extension cord going to the house.
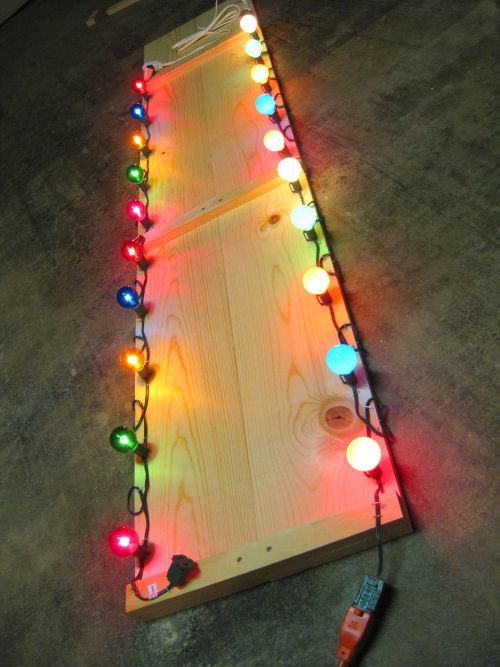
3. With one length of lights on the board, it already looks pretty cool with the lights on (PHOTO D). I know what you’re thinking… having bulbs around the perimeter won’t really heat the soil that’s in the cells of the seed flats the way a standard heat mat would. Got ya covered! That’s where the smaller mini string lights come in. I stapled these down in the inside area, creating four “lines” of heat (PHOTO E).
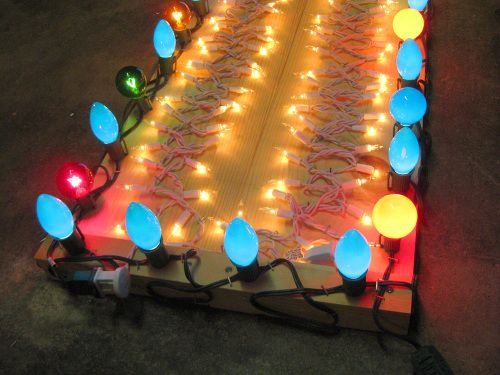
4. I wanted to test the heating capacity at this point to see if I needed to add any more light strings. Using the thermometer, I determined that it could be a little warmer, therefore another length of lights needed. I stapled the 25-count length of C9 lights around the perimeter of the boards, spaced between the bulbs attached earlier (PHOTO F).
Ready For The Tunnel Test
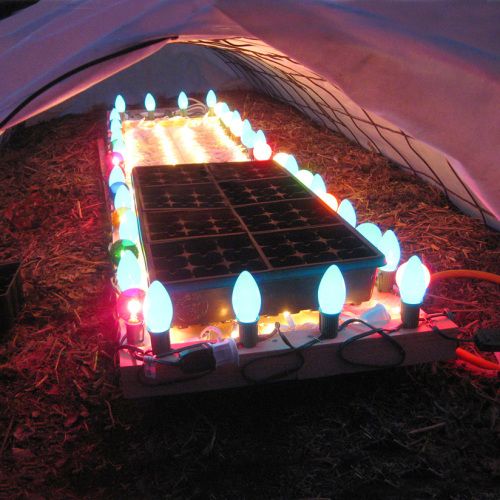
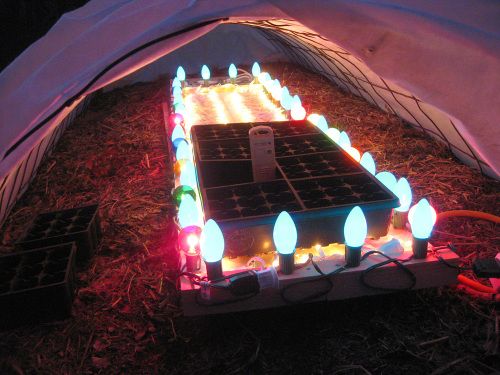
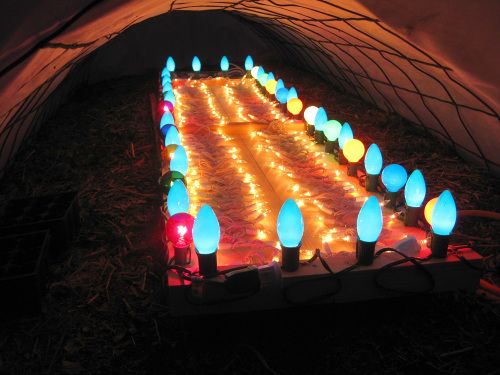
With the lighted board ready to go, it was time to see how effective this unique project would be. I placed the lighted board inside the low tunnel and connected the extension cord leading to the house. I happened to finish building this late at night, so I was in for a nice “light show”. I placed an empty 10″ x 20″ seed tray into position, and hit the lights… wow! (PHOTO G) It looked even more colorful with the tray temporarily removed (PHOTO H). The most awesome view, however, is looking at it from outside (PHOTO I). If it were any brighter, I could work out there at night!
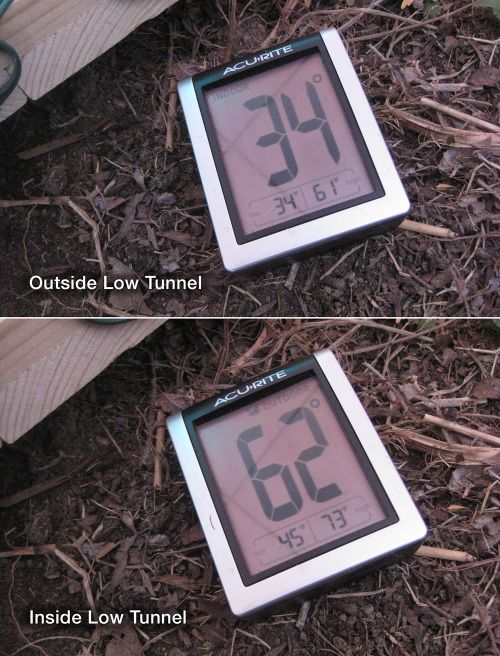
While this was awesome to look at, it wouldn’t mean much if it didn’t do its job of heating the seed trays in the cold weather; especially with the current temperatures being near or at freezing overnight. I sat the thermometer’s sensor on the seed tray (in one of the cells to precisely simulate/match the soil area), placed the thermometer’s remote display outside the low tunnel, and closed the end with the frost cloth.
Since the temperature would be at its coldest near dawn/sunrise, I waited until then to get the results. And the results were amazing! While the outside temperature showed 34 degrees, the temperature in the middle of the seed tray was 62 (PHOTO J)! Almost 30-degrees warmer!!
Mission accomplished! Although our coldest temperatures of the season are still ahead, I am very confident in trusting this device to not only keep existing seedlings sufficiently warm, but to germinate new seeds inside the tunnel.


Comments
Log in or create an account to post a comment.
Sign up Log in