

-
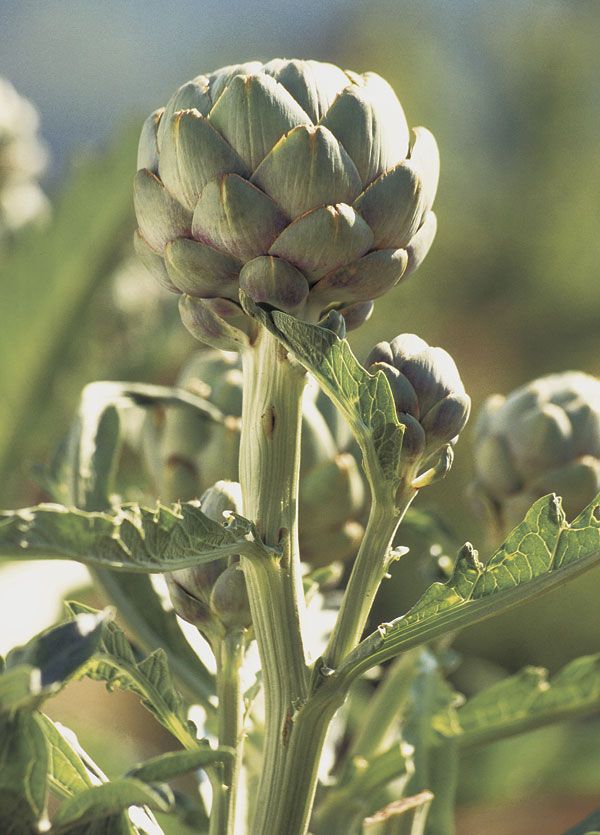
Artichoke plants, which can be grown in many climates, produce spiny buds that hide a tender heart. Photo: Steve Wanke
-
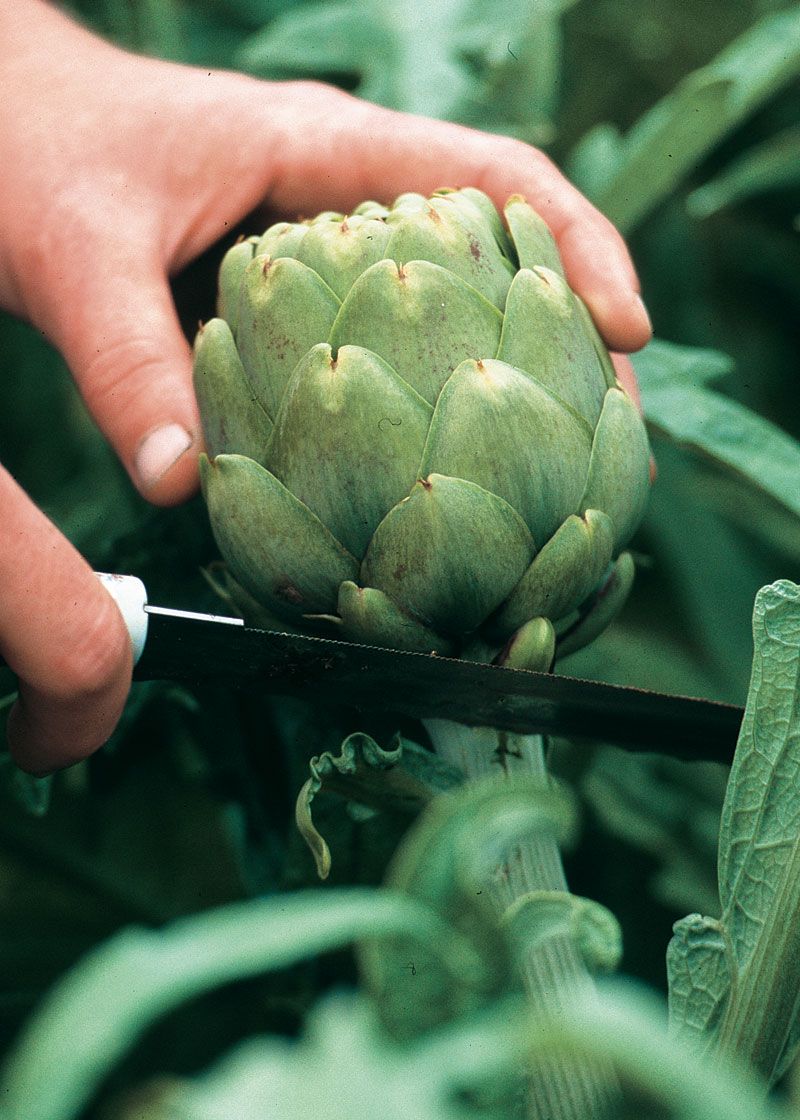
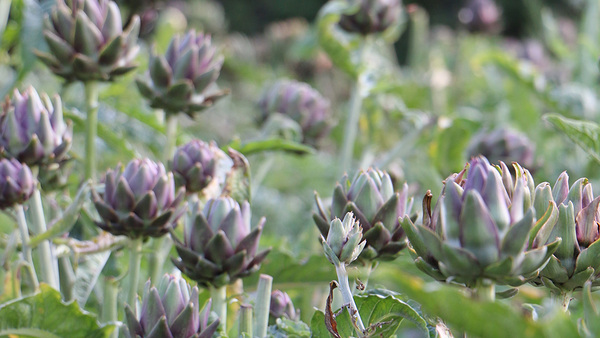
This artichoke bud is ready to harvest.Photo/Illustration: Steve Wanke
-
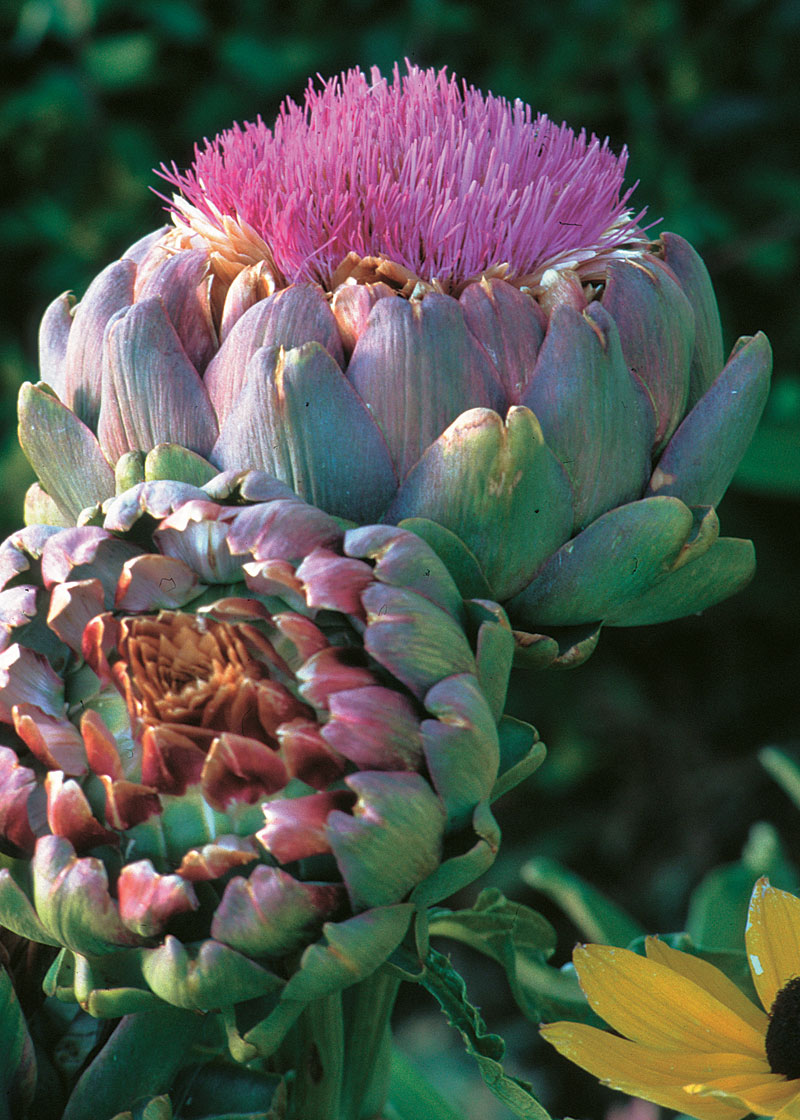
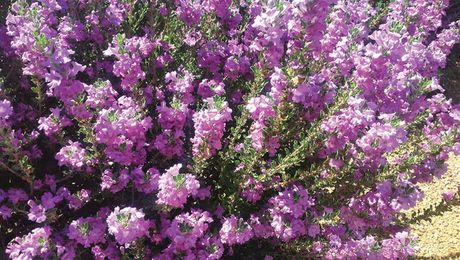
Unharvested artichoke buds will eventually produce stunning purple thistle-like blooms.Photo/Illustration: Steve Wanke
-
Photo/Illustration: Steve Wanke
-
-
-
-
-
Photo/Illustration: Steve Wanke
-


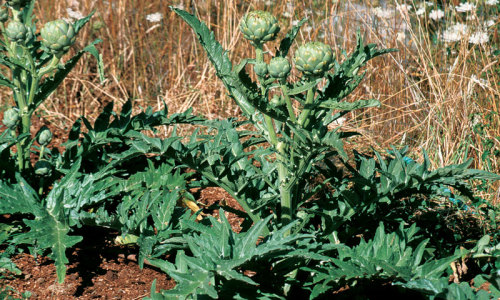
An artichoke plant, which can spread into a silvery green fountain up to 6 feet across, makes a bold, handsome addition to any garden. Best of all, perhaps, this gem of a vegetable can be grown much more easily and in a wider range of climates than you might expect.
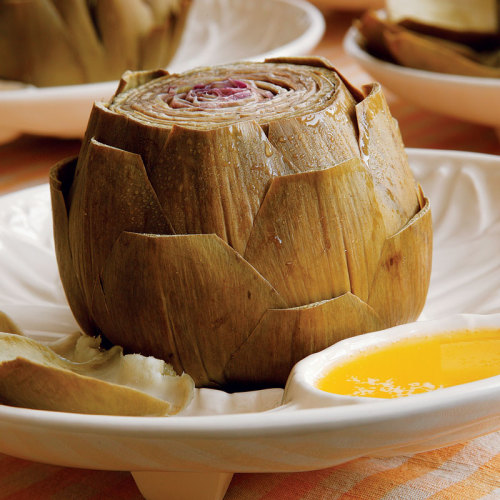
I remember having dinner at a friend’s home and seeing an artichoke on my plate for the first time. I wondered how I was going to eat this intriguing vegetable. My friend’s mom showed me how to approach the task. I plucked the leaves, dipped them in melted butter, and tugged the stem end through my teeth to draw off the tender meat. It was child’s play.
 Love Artichokes? Thank the Italians |
That was a long time ago, but I remember being completely satisfied when all the leaves were gone. Then she told me about the hidden treasure, the tender artichoke heart. The artichoke is a gold mine of rich, earthy, hearty flavor, a vegetable with a taste and texture like no other.
Use the right growing technique for your climate
| Sources for artichoke seeds
Johnny’s Selected Seeds Park Seed Co. Territorial Seed Company |
|
The artichoke, Cynara scolymus, can be grown almost everywhere in the United States, except possibly Florida, where the summer is too hot. The ideal growing conditions are cool and moist summers and mild winters.
If you live in a climate colder than Zone 8, your best bet is to start new plants each year. If you have a mild winter and mulch well, the artichokes may survive as perennials. Remember, it’s the artichoke’s roots that need protection.
Using transplants, you can grow artichokes as annuals in cold-winter climates with 90 to 100 frost-free days. I know people who have grown delicious artichokes in Connecticut, Maine, and Massachusetts. Artichokes you start indoors in late winter or early spring will be ready to harvest from late summer through early fall.
Gardeners who are lucky enough to have the best growing conditions may be able to harvest artichokes throughout the year. For these people, it would not be unusual to harvest 30 artichokes per year per plant.
Artichoke-starting options
There are three ways to begin your artichoke garden: with seed, with shoots taken from existing plants, or with dormant roots. Artichokes are easily started from seed in a greenhouse or under fluorescent lights. Starting in February, I seed directly into 4-inch containers. Getting a head start is a vital step in producing artichokes the first year, whether they are grown as an annual or as a perennial.
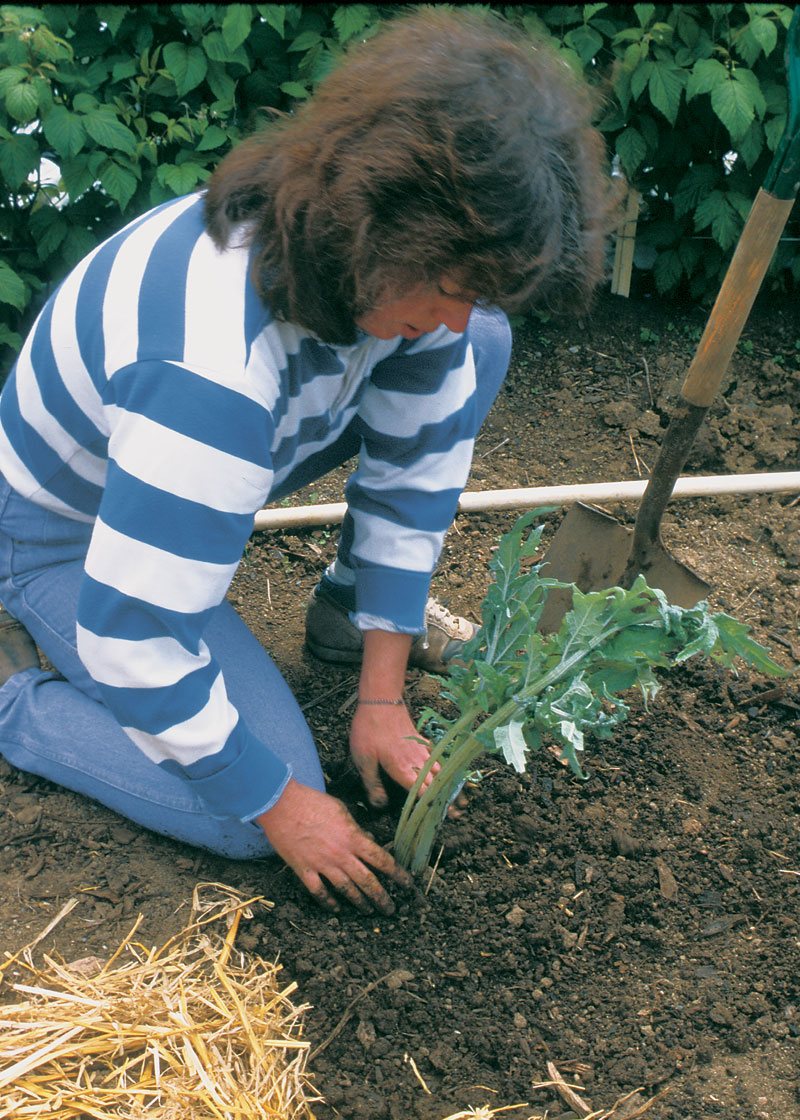
Artichoke seedlings need lots of nutrients as they develop, so fertilize them with fish emulsion or something similar. Transplant the seedlings 8 to 10 weeks later, but only after the soil has warmed and the danger of hard frost has passed. The transplants should be 8 to 10 inches tall, with stocky stems and two sets of true leaves. Because they grow quite large, they should be planted at least 4 feet apart.
Artichokes feed heavily, so for each plant, work into the soil one cup of complete organic fertilizer or a shovel of compost or aged chicken manure just before planting. You can also apply ½ cup each of feather or blood meal and bone meal for each plant. I raise rabbits, so my plants receive a 2- to 3-inch layer of rabbit manure, on which they thrive. A midseason dressing of aged manure benefits the plants, too, if you have poor soil.
As with some other plants, particularly rhubarb, many of the artichoke plants you start from seed won’t turn out to be true to the type described on the seed packet. This happens about 20 percent of the time. I always plant extra artichokes so that I can get rid of the odd fellows and still wind up with the number of plants I want. To do this, I cull the seedlings that don’t appear to be thriving. Then I cull again at the end of the season, so I’m left with only plants that produce great-tasting chokes or show other characteristics I want to preserve.
 |
|
| Artichoke has a wide wingspan, so it’s best to space the plants at least 4 feet apart. | |
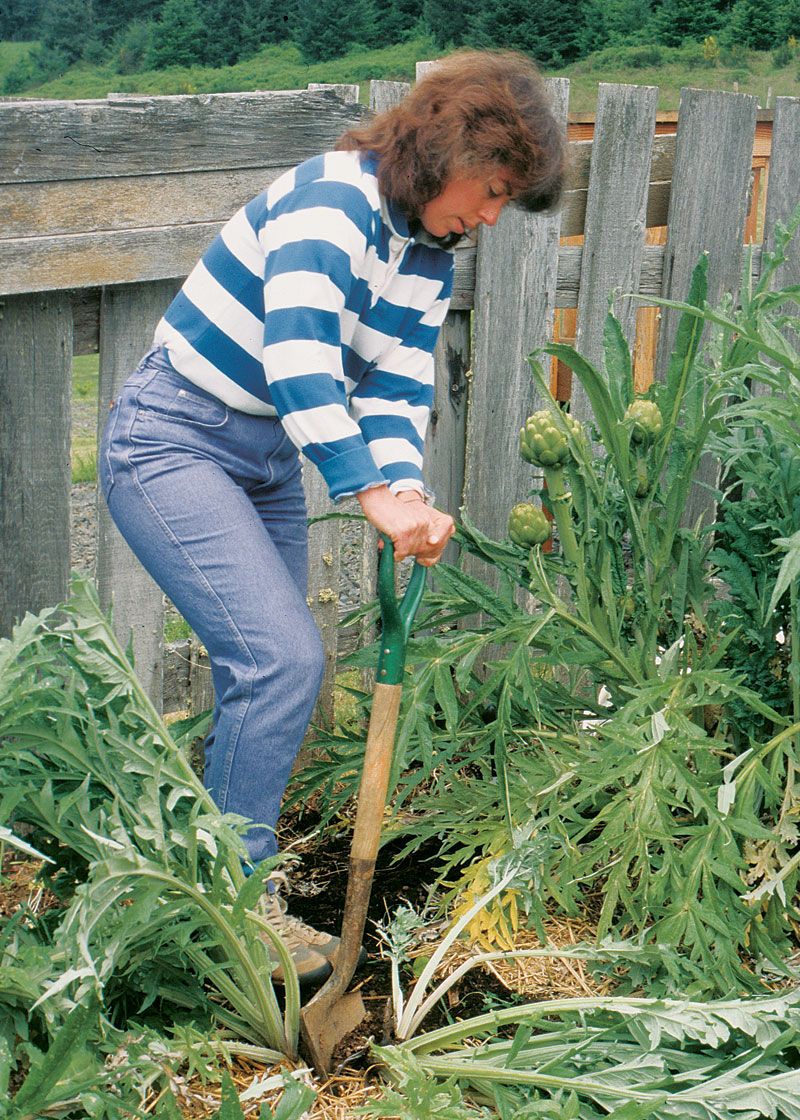
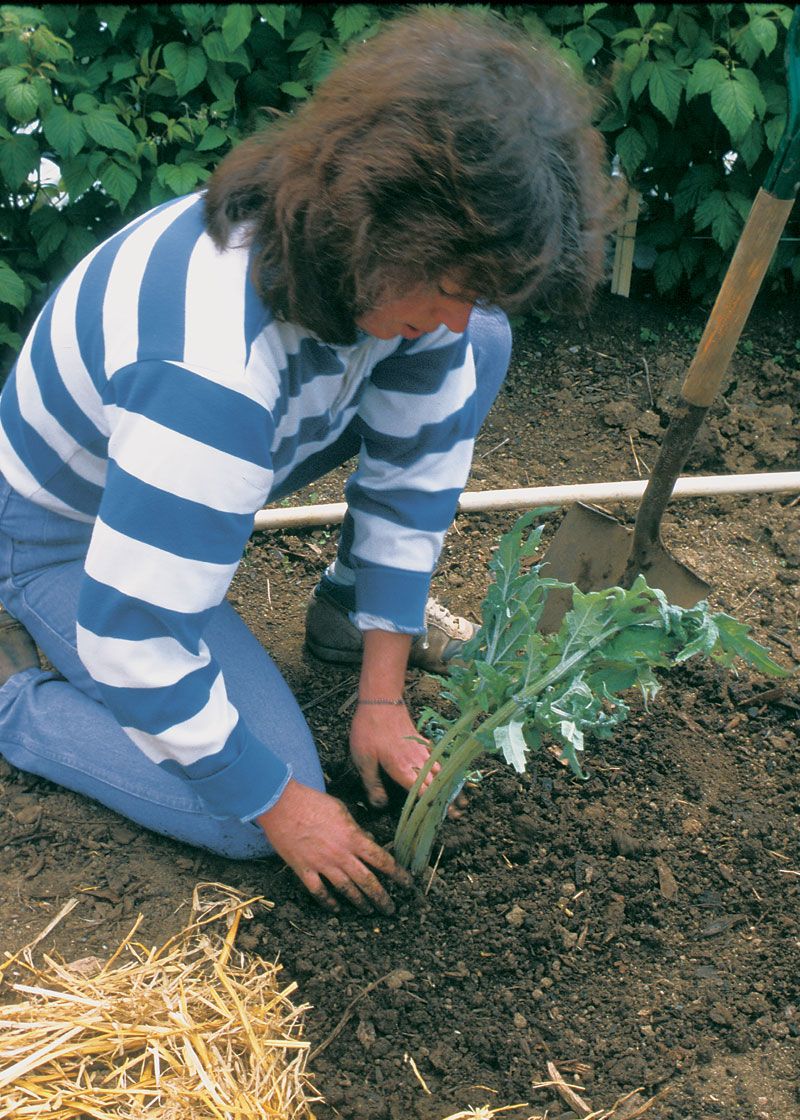
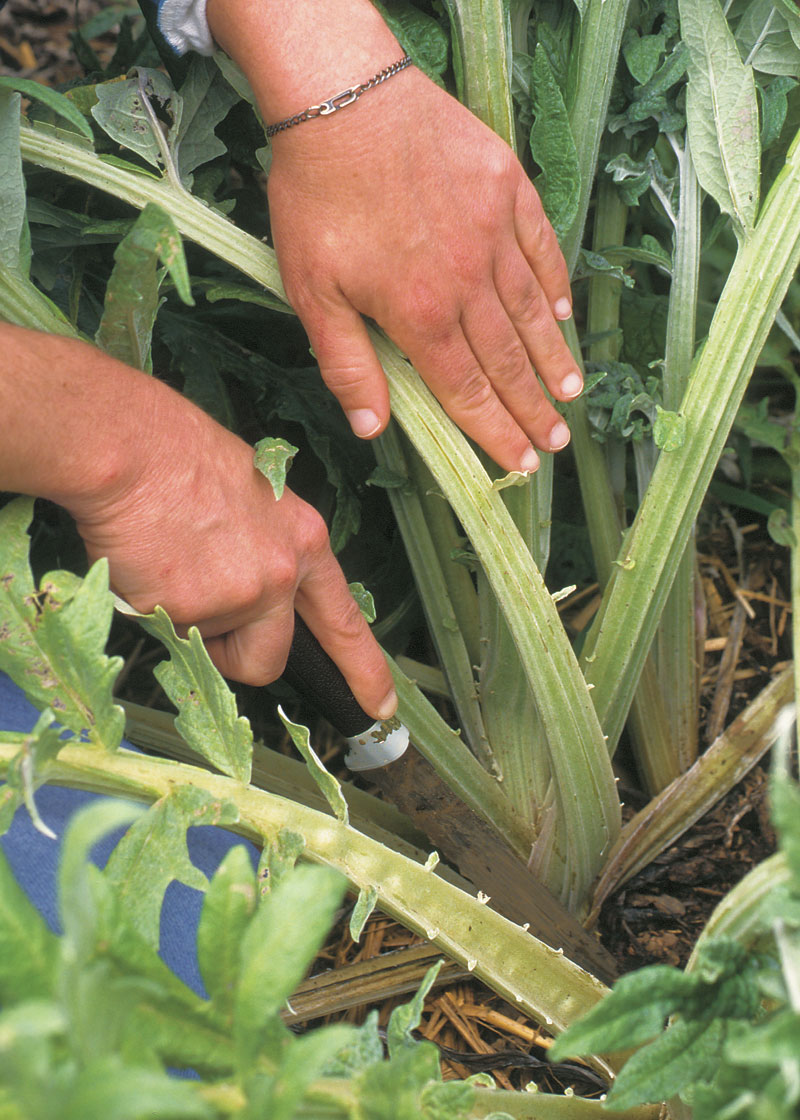
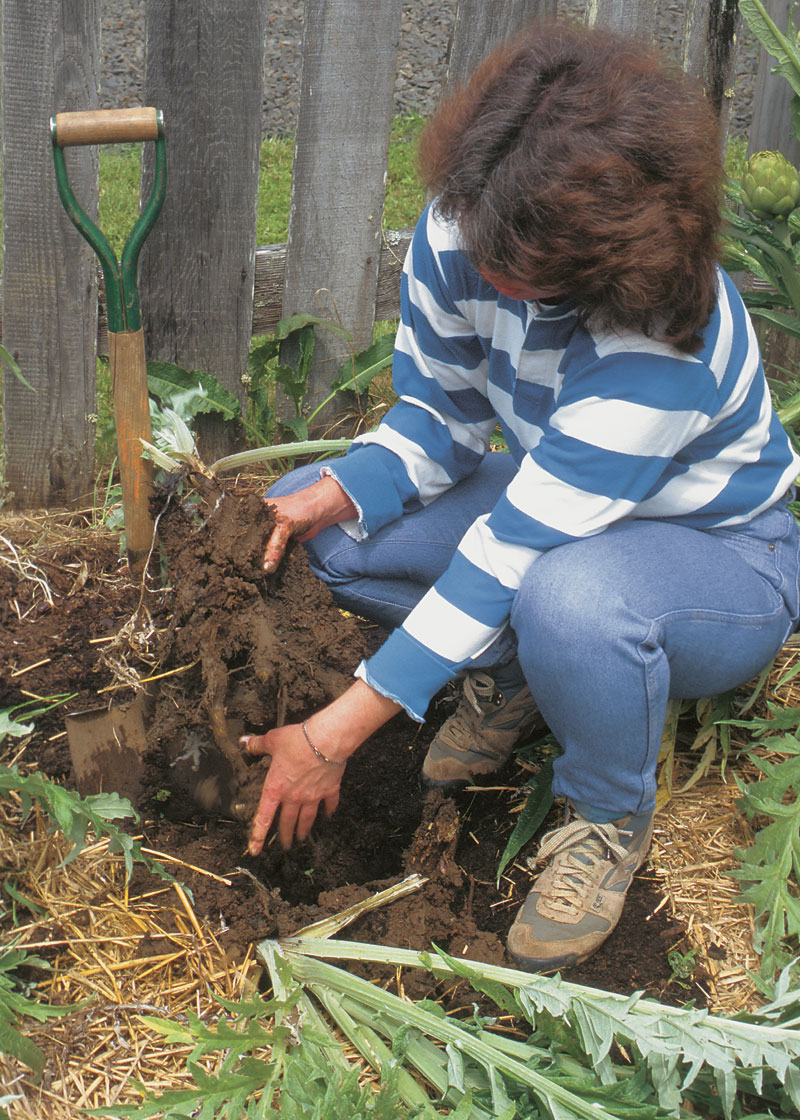
I have also started artichokes with rooted shoots, but for this method, you need a neighbor or friend who has a plant to share. In the early spring, remove a rooted shoot. I do this with a long serrated knife, separating the offshoot from the remaining stems at the base of the plant. Then I cut a ring around the roots of the shoot with a spade, pushing down deeply to get beneath the roots. Ideally, I do this while the plants are still small, preferably less than 10 inches tall. Each rooted shoot can be replanted in a new location, spaced 4 to 6 feet apart.
Divide and share your artichokes |
|||
 |
 |
 |
 |
| To divide an artichoke plant, first use a knife to cleanly separate a rooted shoot. Then dig deeply with a spade to collect the root mass for relocation. You can replant the separated shoot elsewhere in the garden or give it to a gardening friend. | |||
You can also buy dormant artichoke roots at some nurseries. Where you live determines when you plant these. In frost-free climates, you can plant in the fall or winter. In other climates, they should be planted in the early spring, spaced the same as rooted shoots. These root shanks should be set in the ground vertically, with the growth buds just above soil surface.
Whatever your choice for starting artichokes, the plants will prosper in slightly acidic soil that is rich in organic matter. Full sun is best unless you live in an area with hot summers, then afternoon shade may prove beneficial.
Keep the planting bed moist, and water the plants as they grow. New shoots will arise from the ground each year. To encourage large, flavorful buds, remove all but one or two of the strongest shoots.
Water well for tender chokes and strong plants
The artichoke part we relish is the immature flower head of the plant, which is a member of the thistle family. There are varieties of artichokes available to suit just about every situation. For a reliable grower in cold climates, try ‘Green Globe’. This variety produces heavily and matures early enough to be grown in most areas as an annual. ‘Violetto’, an Italian variety, produces beautiful purple heads with a slightly elongated bud. It matures a bit later, however, and I have found it unsuitable as an annual. ‘Imperial Star’ was developed to be grown as an annual. Its tasty buds are round, and they mature about one week earlier than those of ‘Green Globe’.
 |
|
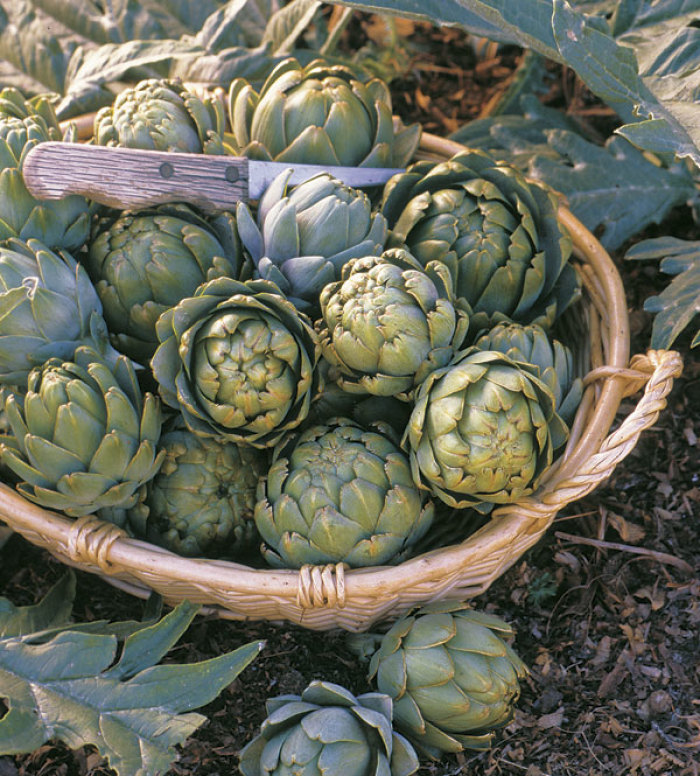
| A basket full of artichokes may look like an impenetrable harvest, but cooks seeking a delicious meal see a feast. | |
Regardless of the variety you plant, you will want to harvest a tender crop. Many factors can affect the texture of the bud we eat, but the most important for bud tenderness is water. Artichokes need plenty of water to produce those big, succulent buds. You may need to water up to three times a week during a hot, dry spell, especially if it occurs while the buds are forming. Like too little water, an unexpected late frost can also toughen or destroy developing buds.
Water also benefits the artichoke plant’s deep roots, which are fleshy and become quite thick. They need to be kept moist, especially during the dry months. I mulch well to conserve moisture. Make sure, however, that all that water is going onto an artichoke garden patch that drains well. Poor drainage can cause the crown of the plant, where the stems sprout, to rot. In my area, it’s not the cold winter that kills the plant. Sometimes it’s the soggy soil.
 |
 |
|
| Harvest artichokes with a cut across the stem when the buds have swelled but are still firm and closed tight. | If you leave some artichoke buds on the stem, they’ll flower into stunning purple thistle-like blooms. |
The buds develop at the tips of 1-inch-thick stalks. The terminal bud is normally the largest and the first to mature. It should be harvested with a slice through the stem just below the bud, which should be large, firm, and tightly closed. If a few buds escape your knife, they will open into spectacular, purple-blue, 6-inch thistlelike flowers. Allowing the buds to flower, however, may reduce the plant’s vigor for the following year’s crop in perennial plantings. And you wouldn’t want that to happen with such a delicious crop.
This article originally appeared in Kitchen Gardener #27 (June 2000).


Comments
Log in or create an account to post a comment.
Sign up Log in