


I’ll start this post with two admissions. First – that I’m divided when it comes to how I want the plants and layout of my garden to look. The obsessive-compulsive, perfectionist part of me wants everything to be near perfect. The laid-back, free spirit part then immediately reminds me that, “the plants could care less if they’re not all straight,” or that “you’re not trying to win an award.”
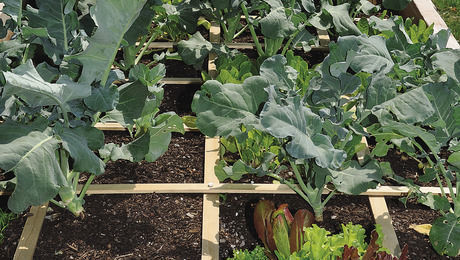
In my attempts to side with the perfectionist in me, I’ve built tools to either save time or fulfill that desire to have all of my seedlings, plants, or rows evenly spaced. My second admission is that I have not yet applied the Square Foot Gardening methodology to my garden plans – at least not completely. As I started to experiment more with planting in squares rather than rows, I immediately saw a need for something that could save me time and help plant seeds evenly. In Square Foot Gardening, the common quantities used in planting are 16, 9, 4, and 1 per square foot. So, to accomplish this, I built a set of four “templates” (or “jigs” in the machinery world). Granted, the holes created by this tool may be too wide or deep for certain seeds; this can be remedied by simply filling in the holes with a pinch or two of soil.
1. Four 1-foot by 1-foot pieces of plywood, either 3/8″ or 1/2″ thick. Use whatever your home center has that will require the least amount of cutting. If you only need to have 2-3 cuts made, they should be able to do that for you free of charge. If you wish to do the cutting of course, you’ll need a saw. 2. Tape measure, square or ruler for measuring 3. Pencil or permanent marker 4. 30 “marker hole makers” – small objects to make holes in the soil. I found some wood “spools” from my local craft store. 5. Wood glue, water-resistent or waterproof 6. Four door or cabinet handles 7. Sandpaper (optional – if you wish to smooth out the edges of the boards) 8. Wood varnish, paint or stain (again, optional if you wish to dress up your new tool) Skill Level: Easy
1. Take the plywood and cut four 1-foot x 1-foot square pieces from it. If necessary, sand the edges or any rough areas (Photo A).
2. Measuring 1 1/2″ from the edge, put 2-3 pencil or pen marks along each side (Photo B). Then, using these marks, draw a guide line around the board. This area is about 9″ square. Then, put a mark at the 3″ and 6″ points along each side of the board. Draw lines connecting these points, from one side of the board to the other (Photo C). The board should now have a 9-square “grid” drawn on it (Photo D).
3. Measuring 2 1/2″ from the edge, again put 2-3 marks along each side. Then, using these marks, draw a guide line around the board. This area is about 9″ square. Then, put a mark at the 4″ point along each side of the board (which is basically the center of the line). Draw lines connecting these points, from one side of the board to the other. The board should now have a 4-square grid drawn on it (Photo E).
5. Measuring 3 1/2″ from the edge this time, put 2-3 marks along each side. Then, using these marks, draw a guide line around the board. This area is about 6″ square. Draw lines connecting these points, from one side of the board to the other. The board should now have a single square drawn on it (Photo F).
6. Measure 6″ from the edge, around each side, and put a mark. Draw two guide lines across the board. The lines should intersect at the center point of the board. Now that we have all of our guide lines drawn, they will indicate where we will be gluing our “marker hole makers”. To make the holes, I found some wood “spools” from a craft store. They are 3/4″ wide x 1″ high, perfect for making a very visible hole in the soil (Photo G). You can also use wooden “beads” or anything else you find that will make a small noticeable hole. If you are planting seeds that require a much shorter depth (i.e. lettuce, spinach, etc.), you can come back and fill the hole with a pinch or two of soil. 7. Using a good water resistant/ waterproof wood glue, glue the spools (in this case) to the boards at the points created by the lines we drew in steps 2-6 (Photo H). 8. You’ll have 16 to glue on the first board (Photo I), 9 on the second board, 4 on the third board, and finally 1 on the last board. Allow those to dry for at least a few hours. 9. Attach one of the door handles to the opposite side of each board. I measured and marked the center point on the board so that the handle would be placed correctly (and because of that ‘perfectionist’ thing) (Photo J). At this point you’re basically done. To use them, you simply place the board in the corner of the bed and press down on the handle (Photo K). Here’s the cool part. It not only makes the holes that you’ll put the seeds into, it also marks the edge of the square foot itself! To add more sets of holes, you line up the marks made in the dirt with the edge of the board. Voila! Mel Bartholomew would be proud. |


Comments
Log in or create an account to post a comment.
Sign up Log in