

Use Branches to Add Color to a Container
This simple technique lends a handcrafted look to a plain wire frame
At Chanticleer, a public garden near Philadelphia, my main job as a horticulturist is to help create and maintain the innovative plantings that have made the garden famous. But members of our horticultural staff also design and build site-specific landscape elements, like bridges, furniture, walls, and gates, incorporating materials from the property whenever possible.
This artisanal approach extends to our container designs. Container-gardening enthusiasts come to Chanticleer looking for inspiration, and we work hard to make sure that our pots and planters push beyond the ordinary and contain an element of surprise.
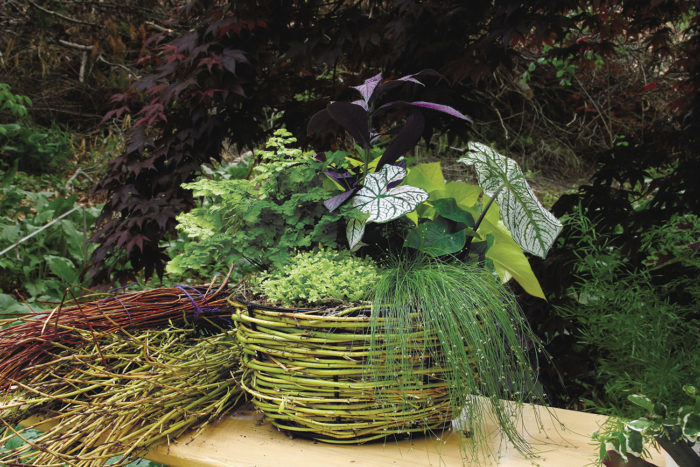
The woven basket is a crowd-pleasing technique that I think of as “success by distraction.” Brilliant red and sap green branches create an instant focal point when the container is newly planted. By the time that the branches’ bright bark begins to darken or fade, your plants will be well established and ready for their turn in the spotlight.
This technique is an easy way to give an ordinary wire basket or planter some early-season interest. Why not try weaving one for your garden?
A handcrafted look from materials at hand
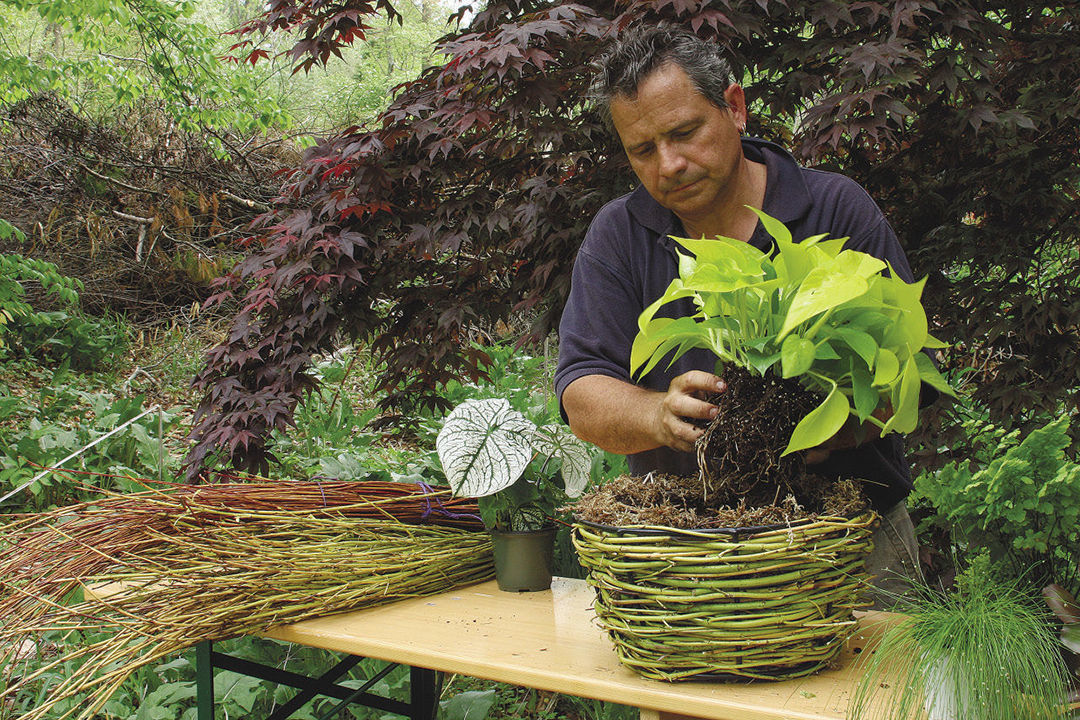
Spring pruning at Chanticleer generates a steady supply of beautifully colored branches. I especially like the bright bark of shrubs such as dogwoods (Cornus spp. and cvs., USDA Hardiness Zones 2–9), willows (Salix spp. and cvs., Zones 4–9), and smokebushes (Cotinus coggygria and cvs., Zones 5–9), but almost any type of shrub could provide the branches you need as long as the twigs are long, straight, and pliable. Looking for a sustainable substitute for sphagnum? This hanging basket replaces a moss liner with an abundant, renewable resource: branches that would otherwise end up on the compost pile.
Step 1: Assemble your materials
Start with a heavy-gauge wire planter. The example shown here is a basket form, but this technique will also work for wall-mounted hayrack planters. I like a sturdy design with widely spaced ribs, like the Classic Ironwork series from Kinsman Company.
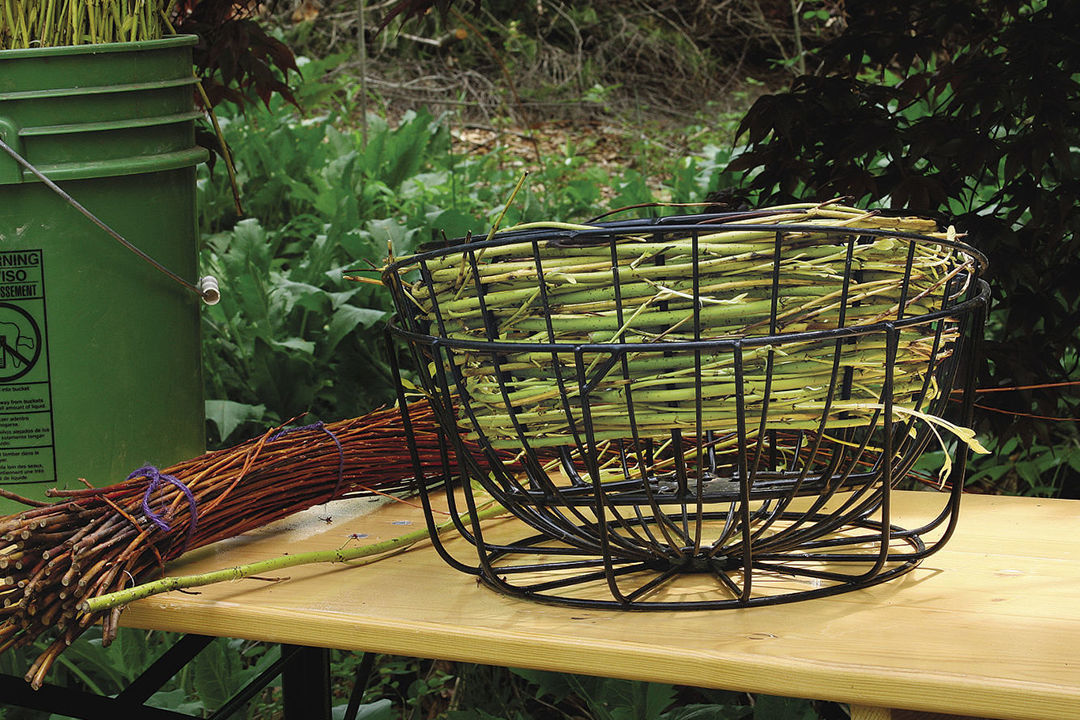
Choose pliable, pencil-thin branches. I find that branches that are about the length of my arm are the easiest ones to work with. If you can’t get the branches you need from your own garden, you can order them from a specialty grower such as Blue Sky Flower Farm.
Step 2: Start weaving
Starting at the top edge of the basket, weave thin, flexible branches over and under the vertical wires. After each new row is added, push it tight against the row above it so that the branches fit snugly against each other.

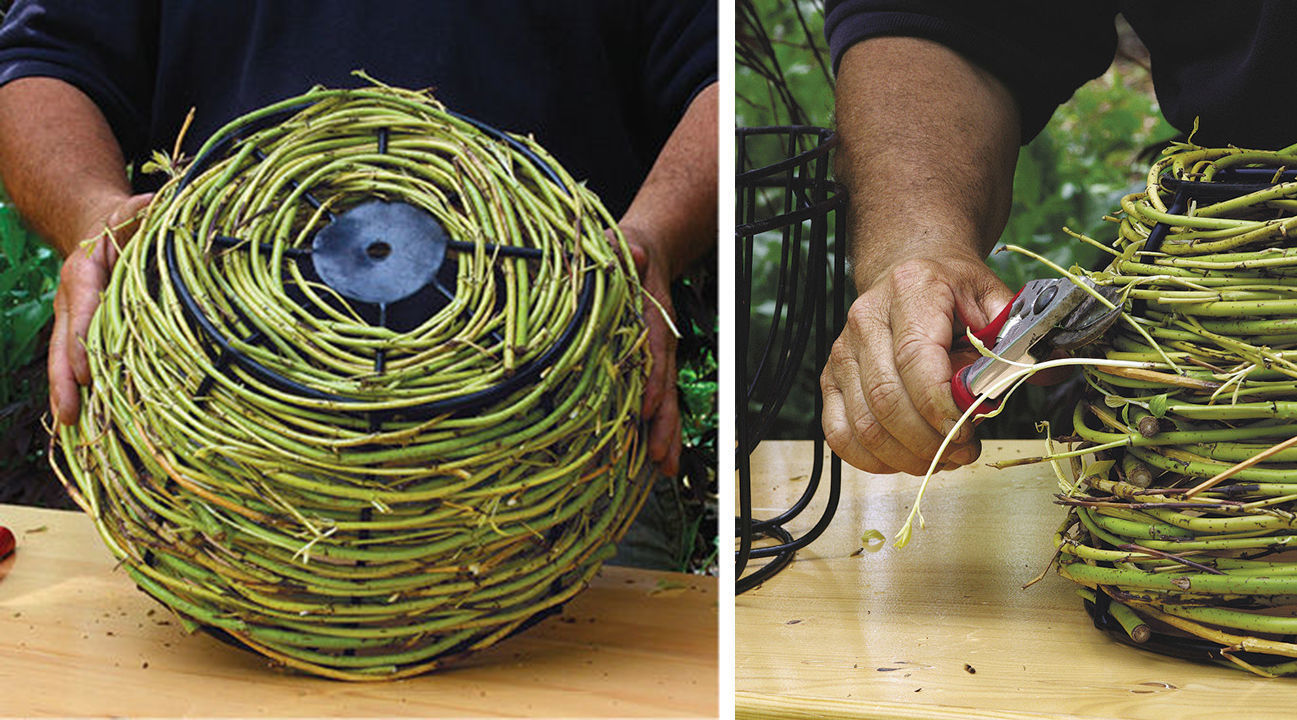
Step 3: Finish the sides and bottom
Soon the basket-weave pattern will start to take shape. Loose ends may be tucked toward the inside and trimmed as needed. It’s all right if your basket looks a bit rustic—irregularities and color variations add interesting visual texture and enhance the handmade feel. If it’s practical to weave branches to cover the bottom (photo below, left), you’ll find that the skinniest branches work best as the wire ribs get closer together. If it isn’t feasible to weave the bottom of your planter, you may line the inside of the basket with burlap to keep soil from washing out. When you’re done weaving, neatly trim any protruding branch ends with pruners (photo below, right).
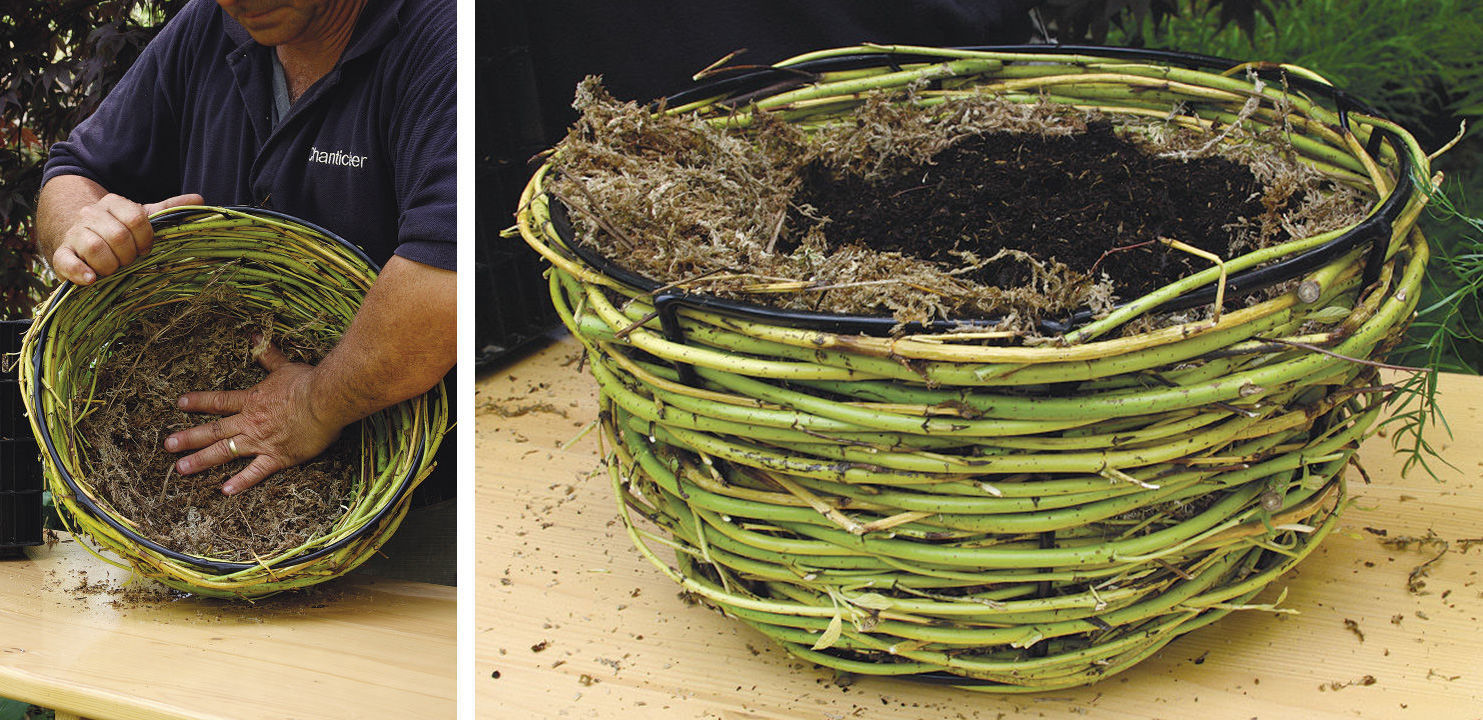
Step 4: Line the basket, and add soil
Before filling the planter, you might wish to line the bottom and sides with moss, burlap, or coir (photo below, left) to keep the soil contained (photo below, right). A bit of soil might still wash out the first few times you water, but after your plants have been in the basket for two to three weeks, the roots will knit together and hold the soil in place.
Dan’s container-garden strategies
Start with good soil
I prefer to use a high-quality compost-based medium for my container plantings. My favorite peat-free mix is from Organic Mechanics.
Keep your plants well fed
I add a slow-release fertilizer to the soil before planting a container. To keep the lush growth coming, I also use a liquid fertilizer periodically throughout the growing season. A balanced formula, such as 20–20–20 or 10–10–10, works best for a foliage-based design.
Focus on foliage
My container designs tend to be based around the texture, color, and interest of plants’ leaves, rather than on flowers. I find that many successful plant combinations can be achieved with foliage alone.
Dan Benarcik is a horticulturist at Chanticleer in Wayne, Pennsylvania, where he oversees the Courtyard Gardens.
Photos: Lynn Felici-Gallant


Comments
Log in or create an account to post a comment.
Sign up Log in