

Tips and Tricks for Growing Basil
This tasty herb needs a few key things to truly thrive each season


When I first fell in love with gardening, my biggest seducer was herbs. I found that herbs were not only one of the easiest types of plants to grow, but they were also the most fun to create a garden with—not to mention the most versatile group of plants out there.
Among the tremendous species of herbs from which I could choose, basil (Ocimum basilicum) was one of my favorites to experiment with. I found that not only was it easy to grow and handy for the kitchen, but storing and propagating it was a snap.
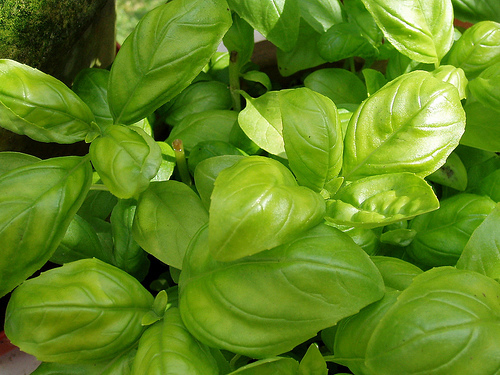
Basil is a bushy, tender annual with glossy-surfaced leaves that reach about 18 inches in height when mature. It’s a fast grower, has a prolific leaf harvest, and produces tiny white or purple flowers on spikes. Of course, the idea is not to end up seeing these flower spikes, which are a signal to the plant that it’s time to stop producing leaves—which is your harvest.
Various cultivars have been bred for different subtleties in flavor, appearance, and size. Basil plants may have the common green leaf color, but they also come in gorgeous purples. There are fine-leaf, broad-leaf, and lettuce-leaf basils, as well as lemon-, cinnamon-, and anise-flavored varieties.
Basils are used in tomato, pesto, pepper, eggplant, soup, fish, and meat dishes. Another popular way to use basil is as an oil or vinegar flavoring.
Homegrown basil (like all other fresh food) has the purest flavor. If you enjoy cooking, you won’t be able to live without fresh basil in the kitchen garden. If you enjoy Italian food (and by “Italian,” I mean “tomatoes”), you’re going to be hooked on homegrown basil for life. You can bet Giada De Laurentiis has freshly planted basil by her kitchen door.
Advice for raising basil in the garden
Most gardeners plant basil seeds directly into the garden bed (or in garden jargon, “in situ”) after the last frost date in their region has passed. As a native Mediterranean herb, basil likes to be planted in full sun (that’s eight hours—or as close as you can get to it) and in well-drained soil with some composted manure or other organic materials. Avoid overwatering the seedlings, as basil is prone to “damping off” disease.
The basil seeds can also be started indoors in individual little pots a few weeks before the last frost date. Your success rate will be greater if they are placed on a plant-growing heating pad or coils, as basil craves the heat and despises cold temperatures. It’s also a perfect candidate for container gardening if you’d like to grow some by the back door like Giada.
Once the plants have grown several inches tall, you can mulch with coarse mason sand. Don’t buy regular playground sand, which is too fine. Mason sand is a great weed barrier and helps regulate temperature fluctuations in the bed. The most useful part of using the sand as mulch in an herb bed is that it reflects the sun and douses the sun-loving plants with heat. While the basil is actively growing, pinch off the plant’s outer leaves to encourage a bushy growth habit.
You may begin harvesting basil as soon as the leaves are plentiful. Cut several inches of stems and leaves off of the plant, especially at the first signs of forming flower spike clusters. You want to beat the signal for the plant to shut down the production of your leaf harvest.
As a companion plant in your flower or vegetable garden, basil plays an intricate role as a repellent against mosquitoes, mites, and aphids. Basil also acts as a fungicide, as it slows down the growth of milkweed bugs.
Start basil from cuttings
Basil is one of the simplest plants in the world to start from cuttings. When you start this plant from cuttings it grows much faster, which means more basil and an earlier harvest.
Just get a long-necked bottle and fill it with room-temperature water. If you have a regular-size basil plant, take a 6-inch cutting off of it; if it’s dwarf basil, take a 4-inch cutting. Now remove the lower leaves from the stem, leaving about three sets of leaves at the top.
Place the lower half of the stem into the water, letting the leaves at the top hold it in place. Keep the water fresh and the level high, and in a couple of weeks you’ll have roots on your cutting.
When you have some nicely established roots going, take the cutting out of the bottle of water and put in into a 4-inch pot with peat-based potting mix. After a couple of weeks, plant the new basil plant outdoors into the garden bed, or keep it as an indoor plant. If you take a cutting or two at the end of the growing season, this could be a great way to bring a basil plant indoors for winter use.
Tips for drying basil for storage
There are a few different ways to store herbs, but this is one of the easiest ways that I have found to hang onto homegrown basil. Herbs dry fairly well when tied upside down and left to hang around your kitchen or other indoor space. However, when herbs are dried this way they tend to lose their lovely color, and it takes quite a while for them to be dry enough to place into jars for later culinary use.
Refrigerators have a dehumidifying action that makes them perfect places to dry herbs quickly while maintaining their rich color. Gather a bunch of basil or any other herb stalks and place them loosely into a paper lunch bag. Close the top of the lunch bag with a chip clip or other such handy item so you can peek at them every so often. Don’t forget to label them.
The herbs will be completely dry within a couple of days. At that point you can either keep them right where they are (just tape them to the inside of the fridge to save space) or break the herbs apart to fit into airtight containers for storage in a cool, dark place.


Comments
Log in or create an account to post a comment.
Sign up Log in