

How to Can Tomatoes Quickly
Fast and easy canning will preserve your bounty for months to come
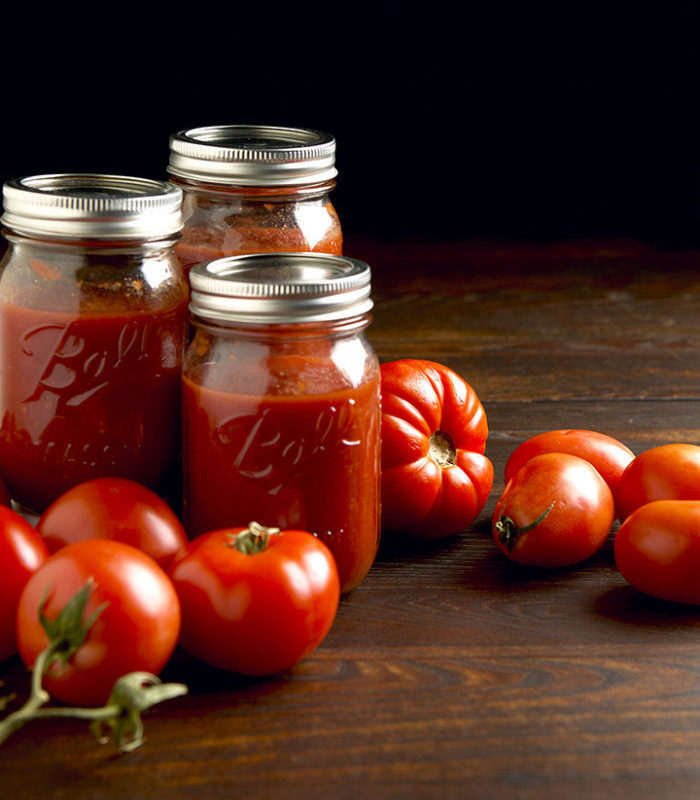
Coming home on one of Seattle’s cold, wet, gray days to the smell of fresh tomatoes stewing in a pot with herbs, spices, and a little onion and garlic is always a special treat. In our house, this tasty indulgence is something we enjoy all year—and so can you. Whether you grow your own tomatoes or have just found a great deal on a case of deep red beauties at a farmers’ market, all it takes is a few hours to can your extra tomatoes for future meals.
The following are basic instructions for preserving your own tomato harvest. Although there are many canning options available, start with water-bath canning for its ease and no-fail results. This method is only possible with highly acidic foods with a pH of at least 4.6.
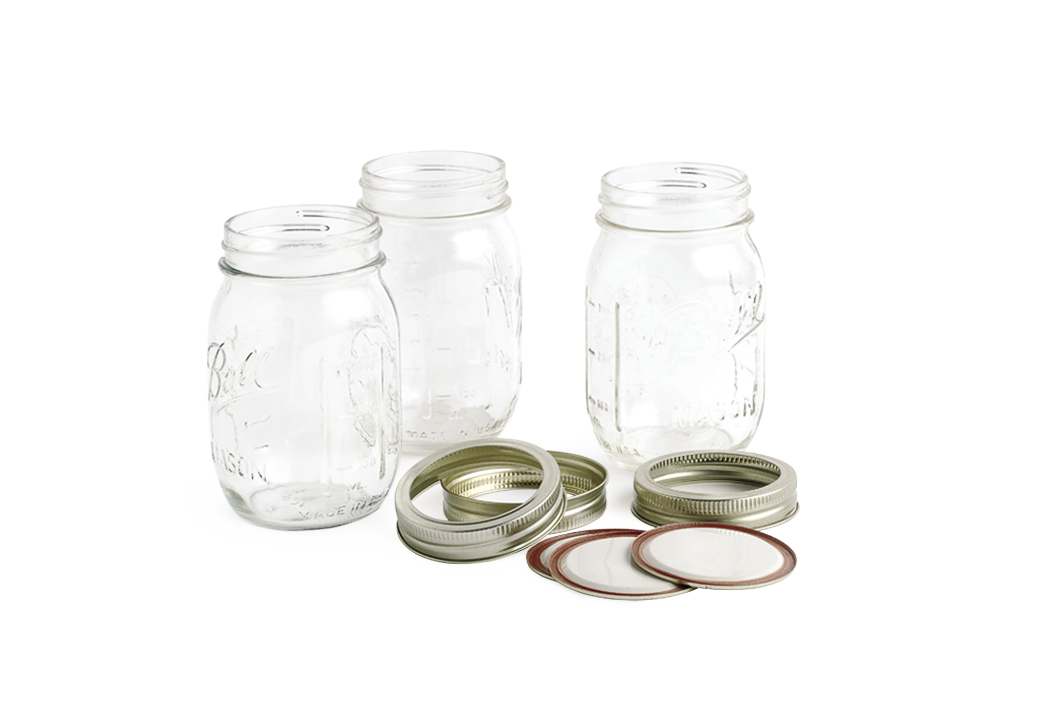
What You’ll Need
These items can be found at your local grocery or hardware store in spring and summer or can be ordered online anytime.
- Pint- or quart-size glass jars: Use only those produced for canning purposes. Don’t reuse mayonnaise or jelly jars: They can easily break.
- Rings and lids (flats): Either regular or wide-mouth lids will work fine.
- Water-bath canner or large stockpot: A water-bath canner is larger than most stock pots and has a rack the jars sit on. Any lidded stockpot will work as long as it can be filled with enough water to cover the jars plus 2 inches of water.
- Funnel, nonmetallic spatula, wand magnet, and jar lifter: All can be purchased in a single kit. Don’t attempt canning without these, particularly the jar lifter.
- Fresh, fully ripe tomatoes: You’ll need roughly 18 pounds of tomatoes for a canner load of 6 quarts or 13 pounds for a canner load of 8 pints.
- Clean kitchen towels
- Bottled lemon juice
- Timer

1. Clean and heat your jars and lids
Check your jars for cracks or nicks, and discard any jars that show signs of wear. Prepare jars, rings, and utensils by washing them in hot soapy water and rinsing them well, or if you are lazy (like me), run them through a hot wash cycle in your dishwasher. Fill the jars with water, and place them on the rack of your water-bath canner or on a towel in a stockpot. (Placing the jars on a cotton dishtowel in the bottom of the stockpot keeps the jars from cracking against the metal. Don’t use your best towels; these will be boiled with the jars.) Fill the canner or pot with water until the jars are submerged with at least 2 inches of water resting above the lids, and boil gently for 10 minutes. Leave the jars in the hot water, removing them only as you need them.
About 10 minutes before using the lids (aka flats), place them in a small saucepan filled with water. Bring the water to a light boil, then reduce the heat to low. The idea is to keep the lids hot, not to cook them. Leave the lids in the hot water, and remove them as needed.
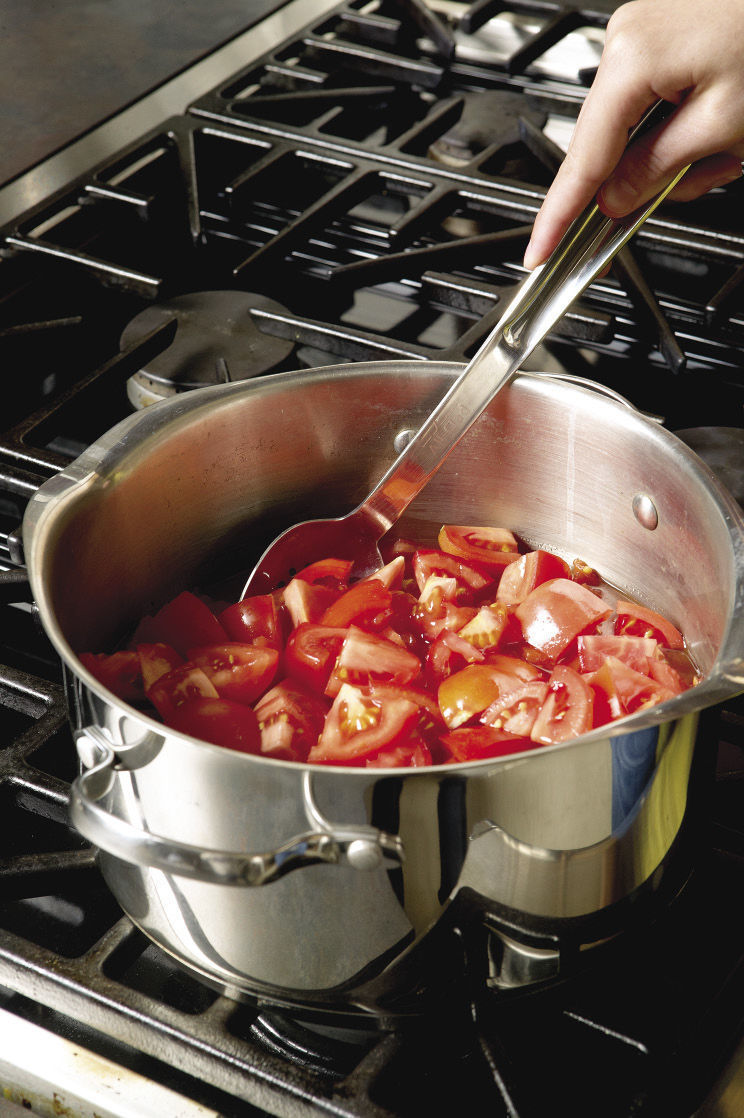
2. Blanch and boil the tomatoes
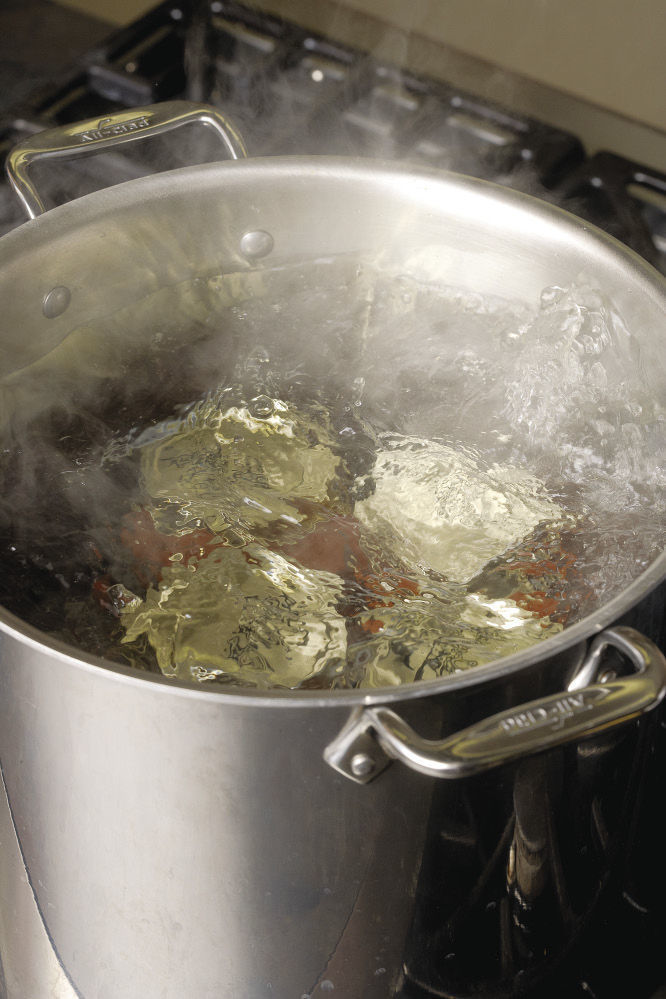
While the jars are heating, bring a large pot of water to a boil. Cut an X on the bottom of your fresh tomatoes, and dip four or five of them in the boiling water for about one minute or until the skins begin to loosen. Remove the tomatoes from the boiling water with a slotted spoon, and plunge them into the icy water. I fill the sink partially full of water and ice for this cold plunge. Wait for the tomatoes to cool, then slip the skin off.
To can chopped tomatoes, core and cut the tomatoes into chunks and place the chunks into a pot. Boil for five minutes, stirring frequently but gently to keep tomato chunks whole. For crushed tomatoes, core the tomatoes and then squeeze them over a pot. This is a great way to take out your frustrations—really get your hands in there, and mush them all up. Boil for five minutes, stirring frequently. Use a potato masher to stir and squish at the same time.
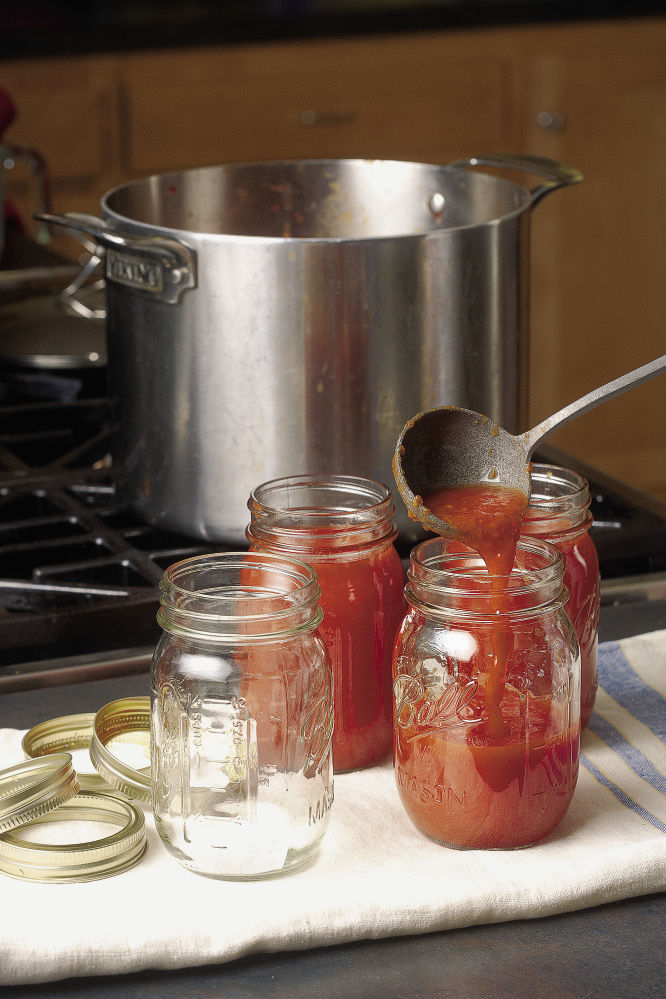
3. Begin filling the jars
Using the jar lifter, remove one jar from the canner, empty the water from the jar, and place the jar on a towel next to the hot tomatoes. Ladle in chopped or crushed tomatoes with juice, filling the jar roughly halfway.
Kick up the acidity by adding bottled lemon juice (1 tablespoon per pint or 2 tablespoons per quart) to ensure that all food-borne pathogens are destroyed. While other recipes may call for citric acid or vinegar, bottled lemon juice adds no discernible flavor and is readily available. Fresh lemon juice is not an acceptable alternative. The pH of natural lemon juice can vary from one fruit to the next. Bottled lemon juice will always give you the required result.
Fill the jar with more tomatoes to half an inch from the top. This is known as “headspace.” Most jar manufacturers have a glass ring on the outside of the jar just below the top to indicate the half-inch mark.
Using a nonmetallic spatula or bamboo skewer, move the contents of the jar to release any air pockets. Add more tomatoes to correct the headspace as needed. Notice that I’m not including any salt, spices, or herbs. My feeling is that you can always add the flavors you want later. If you add oregano and thyme now, you are stuck with those flavors.
4. Screw on the lids, and boil the jars
Use a damp towel to clean the jar rim. Using your magnet wand, grab a lid from the simmering saucepan and place it on the mouth of the jar. Screw on a ring, only as tight as your fingers will let you; too tight and you will not get a proper seal. Using the jar lifter, place the jar back in the canner. Continue until all jars are filled.
Make sure you have at least 2 inches of water above the jars, place a lid on the water bath and bring the water to a full boil. Once at full boil, start your timer.
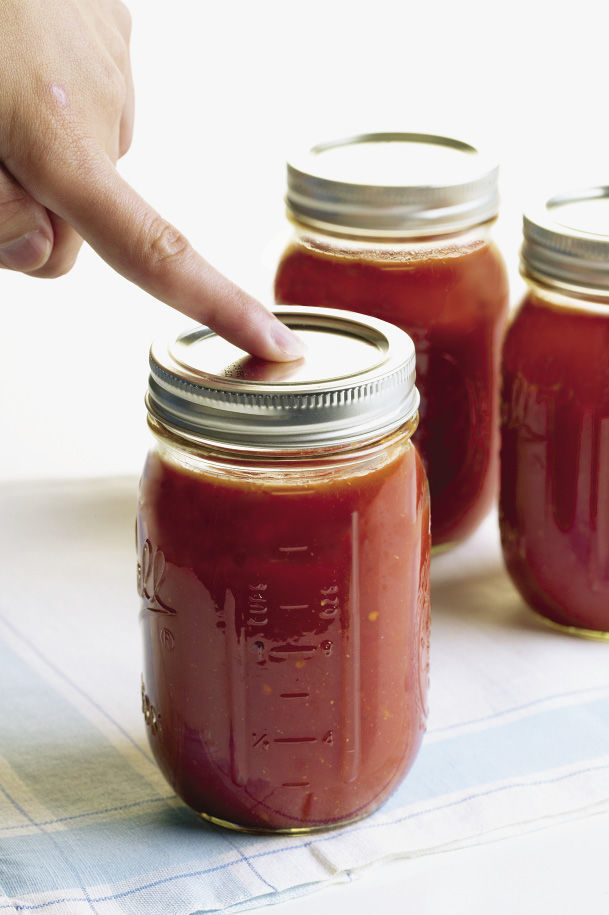
5. Wait, check the seal, then store
When the time is up, turn off the heat and wait five minutes. Using the jar lifter (aren’t you glad you bought it?), remove the jars from the canner and place them on a towel away from any drafts. Wait four to 12 hours, and check that they’re properly sealed. Follow the lid manufacturer’s guidelines: Lids should not flex up and down when the center is pressed. Lids of ringless jars should not budge when pulled up by the fingertips.
If the seal did not take, you can process the jar again within 12 hours using a new jar and lid. Results, however, will be poor. A better choice is to refrigerate the jar of tomatoes and use the tomatoes within two weeks. For the processed jars that have been sealed properly, store them in a dark spot, such as a pantry, and use them within one year—like that’s going to be hard!
Safety First
With any kind of preservation, there are risks if you do not follow the proper guidelines. Such risks include but are not limited to: burns, food poisoning, or death from improperly used or maintained cooking equipment. Always use caution and the highest degree of sanitation when preserving food. Remember, you will eat this stuff. Follow the accepted guidelines established by the U.S. Department of Health and Human Services. No shortcuts allowed!
Watch out: Before using your canned tomatoes, check to make sure the seal is still secure and that there are no signs of spoilage (bubbles in the jar, an odd color, or smell). If something seems off, do not eat the contents. Open the jar, place it (including the contents) in a pot, cover it with water, and boil for 30 minutes to kill any bacteria present. Discard of the contents. The jar may be washed and used again.
Consider Altitude When Canning
| Feet | Minutes |
| 0–1,000 | 35 |
| 1,001–3,000 | 40 |
| 3,001–6,000 | 45 |
| 6,001–8,000 | 50 |
Tasty Varieties Make the Best Sauce
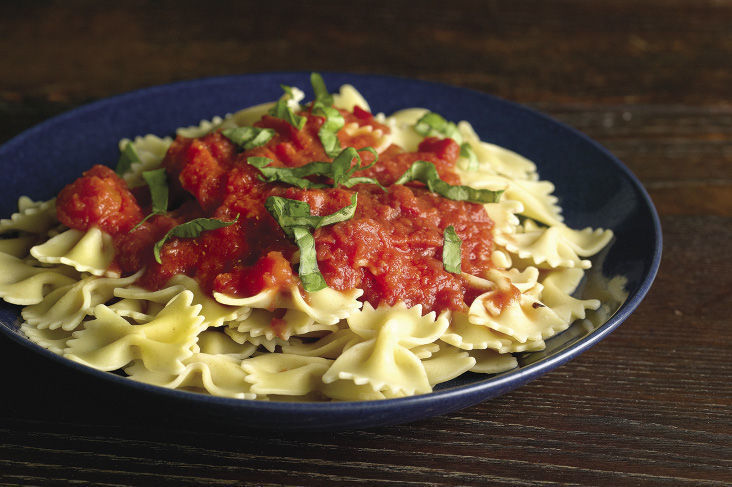
You can use any tomato variety for canning, but do not use tomatoes from dead or frost-killed vines, which may harbor bacteria. For the best results, look for large, round tomatoes with a deep color and firm flesh. The flavor is the key—canning a dull tomato now will give you dull tomato sauce later. Heirlooms, such as ‘Amish Paste’ and Roma varieties, are great for chopping and using in salsa. ‘Black Prince’, ‘Cherokee Purple’, and ‘Paul Robeson’ have a deep, smoky flavor and make a dark purplish-red sauce. Yellow tomatoes are brighter in flavor and beautiful when crushed and canned. Last year, I made a sauce from ‘Green Zebra’ tomatoes; it looked like pesto but tasted like sweet tomato sauce. Whichever flavorful tomato you choose, it will taste great when used in the recipe below:
Quick Pasta Sauce
Recipe courtesy of Jason and Shannon Mullett-Bowlsby
|
Heat the olive oil in an ovenproof skillet on medium-high heat. Add the onion, carrots, and celery. Sauté until the onion becomes translucent. Add the tomatoes, herbs, garlic, salt, and pepper. Place the skillet in a 325°F oven for 45 to 60 minutes until the sauce is reduced. Serve over pasta, with some freshly grated hard Italian cheese. If you don’t have an altimeter handy (and you probably don’t), contact your local extension center for assistance in processing time. |
Jason Mullett-Bowlsby teaches classes on basic canning skills and is a member of Canning Across America. He resides in Seattle.
Photos: Scott Phillips


Comments
Log in or create an account to post a comment.
Sign up Log in