

Grow Your Own Microgreens
Produce a crop of flavorful, nutritious edibles in no time flat
Since I have been growing microgreens commercially, I have seen their popularity take off. Countless fine restaurants have added them to their menus, and customers have started seeking them out at farmers’ markets and specialty grocers.
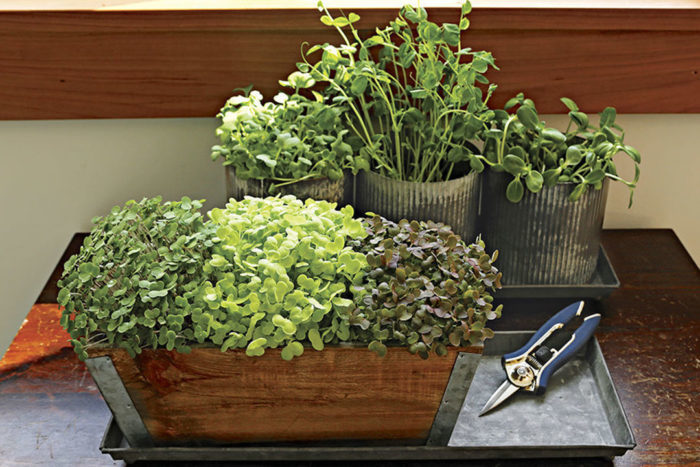
Microgreens are the edible leaves of herbs and vegetables harvested at the earliest stage of plant life. People love their fresh, vibrant flavors, colors, and textures. Although they are undeniably beautiful on the plate, microgreens are more than a garnish. They also are nutritious ingredients. The University of Maryland and U.S. Department of Agriculture researchers studied nutrient levels in microgreens and found that they contain four to 40 times more nutrients than their mature counterparts.
You may not find microgreens at your local supermarket just yet. Fortunately, you can grow a crop of fresh, organic greens easily at home on your windowsill in under two weeks. Here’s how to do it.
Microgreens Step-by-Step
Unlike sprouts, which are germinated in water and eaten roots and all, microgreens are grown in soil and only the leaves and stems are harvested. For the best flavor and nutrition, skip the soilless mix and use a high-quality compost-based soil like Organic Mechanics Premium Blend (organicmechanicsoil.com).
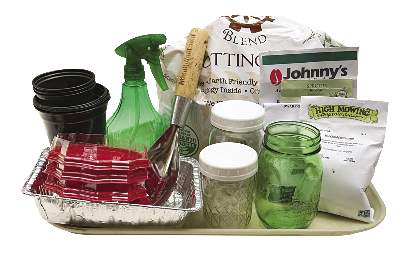
Materials needed
- Organic, compost-based soil (like Organic Mechanics)
- Clean, organic seed
- Jars for soaking seed
- Shallow planting containers with drainage holes, like 4-inch nursery pots, cell packs, egg cartons, or yogurt cups
- Spray bottle
Step 1: Soak for better germination
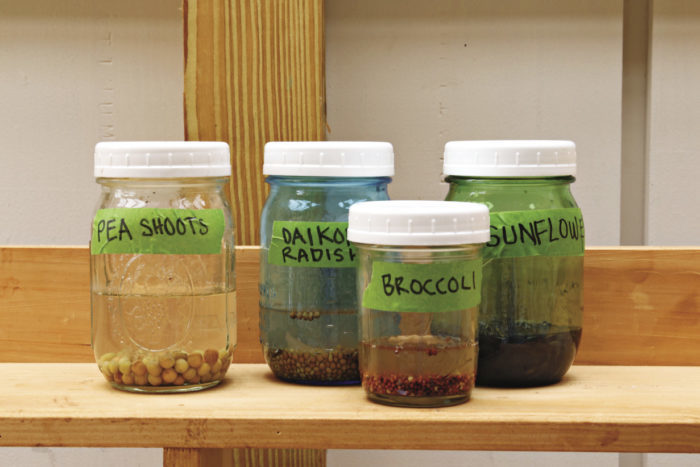
Many seeds will germinate more quickly and evenly if they are soaked in water before planting. I typically soak pea, daikon radish, sunflower, kale, and broccoli seeds for 8 to 12 hours. Then I drain and let them sit for another day in the jar before planting. The seed will be starting to show roots and will be dry enough to handle. Bok choy, arugula, mustard, chard, and tiny seeds like basil and sorrel don’t need to be presoaked.
Step 2: Plant, mist, and cover
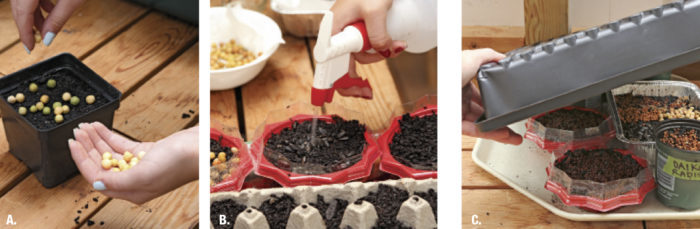
Moisten the soil just enough that it forms a ball when squeezed. Fill the containers to about 1 inch below the rim, gently tap to settle the soil, and pat the surface smooth. Spread the seed liberally across the soil’s surface (A). Do not cover the seed with soil—this will help keep your greens clean. Using a spray bottle or the mist setting on your hose, wet the seeds to help settle them into a single layer, and give them good soil contact (B). Covering the containers with an overturned nursery tray or cardboard box for two or three days will conserve moisture and provide the darkness that most roots need to get a good start (C).
Tip: Once you’ve harvested a container of greens, you can pull out the remaining stems and roots and use the soil to grow a new crop. If larger greens like peas or sunflowers have consumed most of the soil, toss the root ball into the compost, refill the container, and you’re ready to go again.
Step 3: Add light and water

Once the seeds have put down roots and are starting to sprout, move them into the light. A bright windowsill will work; just be sure to keep the containers close to the glass, and avoid direct sunlight. A fluorescent shop light hung about 6 inches above the greens’ leaves also is a good light source. Irrigate by setting each container into a shallow basin of water for about 20 minutes; water will wick up into the soil while leaves stay clean and dry. Move the seedlings back to a dry tray after they are watered. Do not allow your seedlings to dry out. You will likely need to water them every day or two until they are ready for harvest.
Step 4: Harvest when you’re ready

Most microgreens are ready to eat in eight to 11 days when they are 1 to 2 inches tall. Slower-growing varieties like herbs and sorrel may take a month or more. Microgreens can be eaten at any stage, so experiment to figure out when they taste best to you. To harvest, snip the stems and lift away the greens, leaving the soil and lower stems behind. Once greens have grown to the optimal size, pop the whole container into the fridge, where the greens will stay fresh for up to two weeks.
Types to Try
The best microgreens are often smaller versions of herbs or greens traditionally eaten full-sized. Use clean, organic seed to avoid the chance of pesticide or fungicide contamination. This is a great way to use up leftover seed from the gardening season. Feel free to experiment, but do your research to be absolutely sure that everything you grow has edible leaves. Here are some of my favorite varieties.
 |
 |
 |
 |
| ARUGULA has a distinctive, pungent flavor with a bit of spice. | BOK CHOY is soft and subtle, with a fresh crunch. | BROCCOLI has a bright, satisfying veggie flavor. | CABBAGE greens may be grown from any variety. ‘Tokyo Bekena’ Chinese cabbage is pictured. |
 |
 |
 |
 |
| CHARD is earthy and substantial, with a rainbow of colors available. | CILANTRO will develop bold, full flavor in about two weeks. | DAIKON RADISH offers a sweet crunch with a peppery kick. | KALE is a super-tasty “superfood.” ‘Red Russian’ (pictured) has beautiful pink stems. |
 |
 |
 |
 |
| MUSTARD is pleasantly spicy. Try red mustard for a pop of color. | PEA SHOOTS are tender, with a fresh flavor similar to a sugar snap pea. | RED-VEINED SORREL has a lemony flavor. It may take two months for the leaves to reach a usable size. | SUNFLOWER produces fast-growing, juicy shoots with a sweet, nutty taste. |
Brendan Davison is the founder of Good Water Farms, which supplies certified organic microgreens to restaurants and retailers in Long Island and Manhattan.


Comments
Interesting information and love to share it. Planting your own organic food is good move and it will surly help our health as well. Lots of companies like https://supersupplements.shop/ is also providing organic nutrition's and proteins which helps in increasing your health.
Log in or create an account to post a comment.
Sign up Log in