

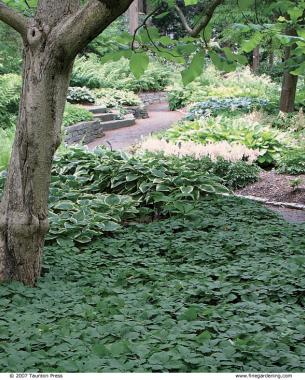
Nothing fills a vacant space and minimizes garden maintenance like herbaceous ground covers. Steadily gaining ground in the first few seasons, these plants can transform a dull space into a rich tapestry of leaf shapes, textures, and colors. They can spruce up challenging areas under trees, accent transitional locations along paths and foundations, and add visual interest to expansive sites. Plus, unlike turf, ground covers can provide a seasonal show of flowers, fruits, and colors. But where do you begin when transforming a blank slate into a lush planting? To get my ground covers started off on the right foot, I plant them in spring or early summer so they have a chance to root well and are less likely to heave out of the ground in winter. I make sure to take time to assess the conditions of my site and prepare the soil before planting. Spacing plants properly and providing them with a little TLC until they’re established is important, too. Although it may take some time and diligent care, following these basic guidelines is well worth it. Before long, you will be rewarded for your efforts as your barren, weedy trouble spots are converted into billowing waves of greenery.
Assess your conditions
The first and most essential step in establishing ground covers is to assess your site and soil. Look at your soil to determine its texture (sandy and dry, a lovely loam, or wet, soggy clay), and test its acidity level. Once you’ve determined if you will need to amend your soil to raise or lower its pH or add organic matter or gravel to modify its texture, assess the sun and shade patterns and the degree of winter protection the site offers. Is it protected from prevailing winter winds and sun, or is it fully exposed to the winter elements? Once you’ve gotten to know your soil and your site, you can better select plants suited to their texture, drainage, pH, and degree of sun, shade, and exposure.
Choose the right plants
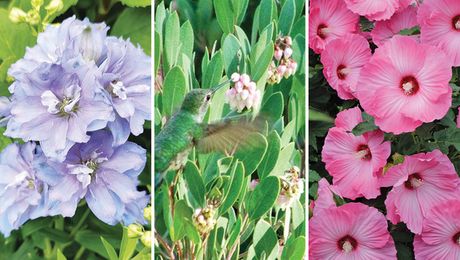
While most of us have heard the gardening adage “right plant, right place,” I like to take this idea a step further. Although I’m careful to select plants that are suited to the conditions of my site, I also factor in the growth habits and growth rates of the plants I am considering. This is especially important if you plan to use more than one kind of plant in your massing or if your ground-cover area is adjacent to mixed beds or borders. The aim is a peaceful coexistence among the plants in your garden community. In other words, by placing rambunctious runners next to staid growers, you will be creating a gardening nightmare.
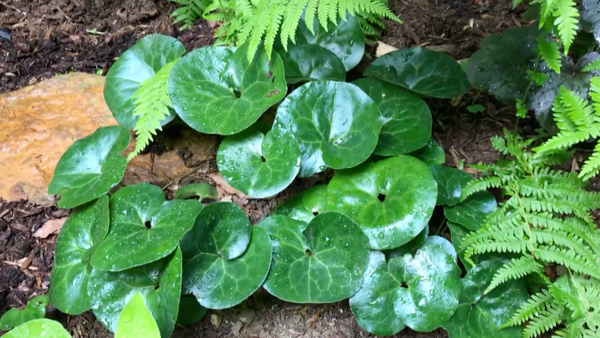
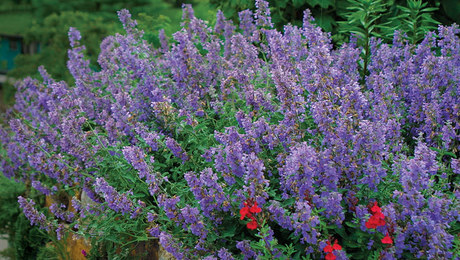
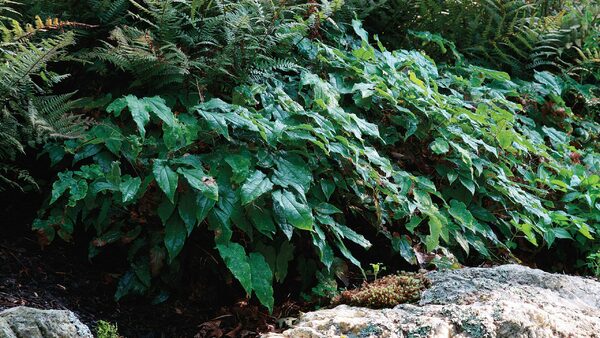
A good ground cover requires minimal maintenance to look its best and can be characterized as either a clumping spreader or a carpeter. Clumping spreaders, like Hosta cultivars, increase in size as they send out their outward-arching leaves each spring. Good clumpers rarely need division. Carpeters (or creepers), like spotted deadnettles (Lamium maculatum and cvs.) and Allegheny spurge (Pachysandra procumbens), spread by underground stems (rhizomes) or move across the soil surface, rooting at points where leaf nodes touch the ground. The best rhizomatous carpeters never require division unless they wander outside of their boundaries. Ideal surface-rooting carpeters only need occasional division to keep them vigorous.
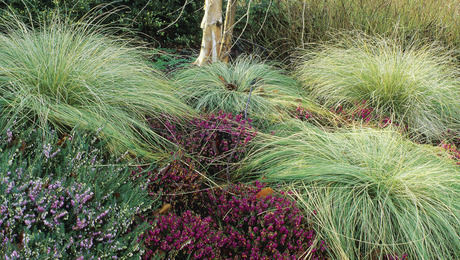
Clumpers tend to be more polite, while carpeters generally cover an area fairly quickly. Clumpers and carpeters can coexist together, but you should do your homework on their growth rates. Plant references can be helpful, but I often observe amicable combinations in garden settings. Observation is also helpful when deciding which plants are visually appealing together. Using too many disparate heights and textures can look chaotic, while using too few can lead to a mass of nondescript green.
How many plants will you need?
Calculating the number of plants you’ll need is easy if your space is regular—for example, a rectangle or a square. Simply draw a plan of the space, using an appropriate scale (like 1 inch representing 1 foot) for the size of the bed, and pencil in your plants according to their mature size. We always say that a foot on paper is not the same as a foot on the ground, so don’t be surprised if, despite your best calculations, you end up with a few too many plants or not enough.
If your space is irregularly shaped, has curved lines, or contains trees or shrubs, calculating will be more difficult. In these situations, I usually resort to marking out the plants on the ground, using 6-inch-long pieces of green bamboo to mark each plant. Then I define each group with a different color of flagging tape tied to a stake.
Prepare your site
Before you begin planting, you will want to rid the site of as many weeds as possible and judiciously apply Roundup to the site to kill any existing vegetation such as turf. Once everything has died back, turn in (with a spading fork or tiller) a 2- to 3-inch-deep layer of compost, manure, leaf mold, or other organic matter. This is also a good time to add amendments like lime or sulfur if you need to modify soil pH.
Turning up the soil will bring to the surface dormant seed and bits of weed rhizomes or taproots. Allow the site to green up and then apply a second spray of Roundup to eliminate the second flush of unwanted vegetation. Avoid any further tilling to prevent more dormant seed from surfacing.
Two alternatives to using herbicide are digging out the vegetation by hand or smothering it. Digging is backbreaking, but when armed with perseverance and time, it is effective. Smothering also takes time and may not be entirely effective, depending on the nature of the weeds you are trying to suppress. Heavy layers of newspaper laid on top of the soil work—an entire daily New York Times is a good thickness. It will have to be checked and added to as rain and sun cause the paper to deteriorate. Black plastic also works well and is a lot easier to put down than layers of newsprint.
It takes an entire season to prepare your site by smothering. Leave the area covered until everything has died back, till it to bring up taprooted weeds that will not be killed by one application of newspaper or plastic, and cover again. If you have Canadian thistle, burdock, dandelion, or other deep-rooted weeds, however, you’re not going to kill them unless you keep the site covered for a couple of years.
Start planting
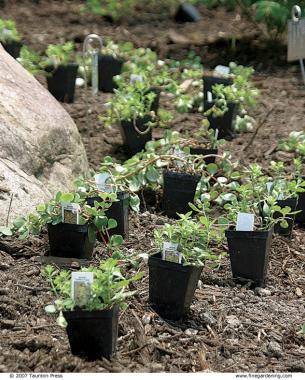
Once your planting area has been prepared, lay out your plants in staggered rows according to your design. How far apart you space your plants will depend on how quickly you want to cover your ground, the type of growth habit each plant has, and the size of the plants you purchase—a 1-gallon plant will fill the area more quickly than a 3-inch plug. Carpeters can be spaced as close or as far apart as you would like. The closer the plants are placed, the faster they will cover the ground and eliminate follow-up weeding. I’ve found that a spacing of 8 to 12 inches apart works well for carpeters of all types. Clumpers, on the other hand, should be spaced to reflect their width at maturity. If a hosta, for example, measures 12 inches across at maturity, place the center of each plant 12 inches apart. The aim is to have the foliage of adjacent plants just overlap, keeping the ground shaded and discouraging weed seeds from sprouting.
Once your plants are set in place, step back and make any spacing adjustments that you deem necessary. Planting sites can look quite different live than on paper, so be prepared to make modifications based on what your eye tells you. Also, if trees and shrubs are to be part of your plan, place and plant them first because you will need to disturb a good-size area to get them in the ground.
Keep up on maintenance
After planting, top the bed with a 2-inch-deep layer of mulch to help keep down weeds and hold in moisture. Getting the plants to grow into a solid stand of ground covers will require a bit of effort and diligence in the first couple of years of establishment. This is the critical time to keep up on weeding and watering and to monitor plants for nutritional needs.
You may find as the community begins to knit together that some plants are not growing as well as expected or not accomplishing your design vision. Gardens are living entities that are constantly changing, so don’t hesitate to remove or shift plants around until you have achieved an assemblage that is satisfying.


Comments
Prepare your site
"2- to 3-inch-deep layer of compost, manure, leaf mold, or other organic matter. "
So we'll add it to the old soil and then we'll flip it.
How much compost is required for 1 square feet ?
Keep up on maintenance
"After planting, top the bed with a 2-inch-deep layer of mulch to help keep down weeds and hold in moisture."
i wonder if we mulch the soil, will we prevent the plant we planted from closing the soil?
How much mulch is required for 1 square feet ?
Thanks.
Log in or create an account to post a comment.
Sign up Log in