

I got a look of disbelief when I told a friend I’d planted a tree that had been shipped from a nursery 3,000 miles away. When I explained that the tree had arrived “bareroot,” I could see the term bring on a shudder. Disbelief and shuddering passed once I showed off my exuberantly growing young plant.
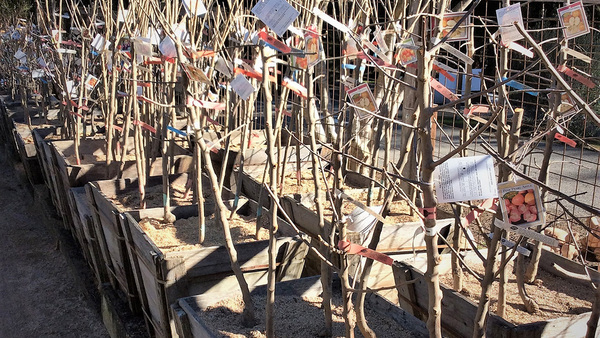
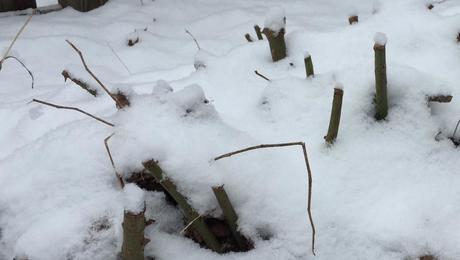
Bareroot trees are so named because the plants are dug from the ground when they’re dormant (leafless), usually in fall, and their roots are shaken free of soil. Kept cool, with their roots packed in moist material, such as damp sawdust, bareroot plants are easy to store and ship in good condition. They can be ordered for either fall or early spring shipment. Mail-order nurseries selling bareroot trees often have wider selections than do local nurseries. Such trees may cost from one-third to one-half as much as a same-sized container-grown tree. If you’re buying a named variety of a plant, it will be genetically identical and will grow equally well in other regions where it is hardy.
I have bought and planted countless numbers of bareroot trees for the past three decades, and with only one or two exceptions, they all have grown well. Of course, it’s not only high-quality plant stock that has been responsible for the good growth of the bareroot trees I’ve planted. As with any plant, proper care of the nursery stock on arrival, appropriate siting, and careful planting have been equally important. And before buying any tree, I evaluate the site, especially for water drainage and sunlight, to make sure my new tree will have a good home.
Keep bareroot trees moist and cool until planting
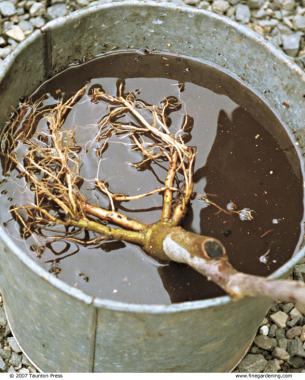
Photo: Linda Wesley
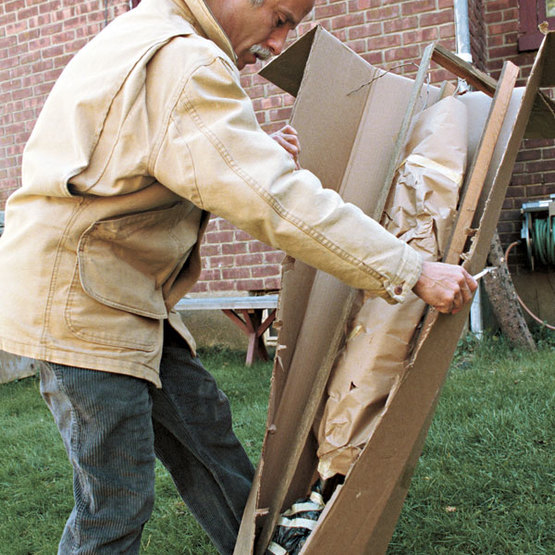
Immediately upon receiving a bareroot tree, I remove it from its packing to make sure the roots are still moist. Roots that seem at all dry need to be soaked in a bucket of water for about eight hours. It’s best to plant bareroot trees as soon as possible. One advantage of fall planting is that the buds will not awaken until spring, after the tree has experienced enough cool weather to sense that winter is over. In spring, a tree may be ready to grow before you are ready to plant it.
If I’m not ready to plant, I keep the roots moist. One way to keep roots damp is to repack them in moist material, perhaps the same packing material in which they arrived. Otherwise, moist autumn leaves, wood chips, or even shredded newspaper will suffice.
To prevent the tree from breaking its dormancy, you must keep it cool (ideally between 30° and 40°F). So, after wrapping the roots in packing material and plastic to hold in moisture, I put the plant in my unheated garage or against the north side of my house. Another way to hold a tree in good condition before planting is to heel it in. Simply dig a shallow hole—just deep enough for the roots—on the cool, north side of your house, and temporarily plant the tree there. I also have successfully held trees for planting by laying their roots on top of the ground and then covering them with a few inches of moist wood chips or leaves—once again, on the north side of my house.
Just before planting time, I inspect a tree’s roots once more, cutting off any that are dead, diseased, or broken. Cleanly cutting frayed ends reduces the surface area of wounds, so that healing is quicker and risk of root disease is reduced. I also shorten any roots that will be too long to splay out into the planting hole. Or else I dig a bigger hole to accommodate them. If the tree has been in storage, I immerse the roots in water again for a couple of hours before planting. To keep the roots from drying out when taking a tree to its planting site, I carry it in a bucket of water or with its roots wrapped in moist burlap.
Dig a shallow, tapered hole
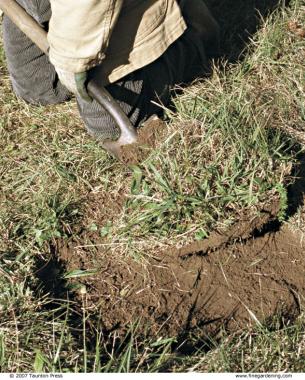
Photo: Virginia Small
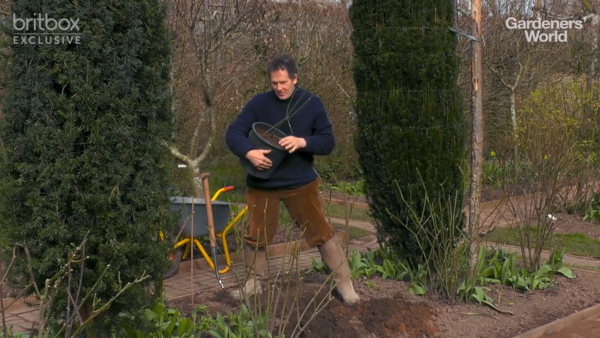
Before digging a planting hole, stop a moment to assess whether the soil is ready for digging. Scoop up a handful and squeeze it. If it’s ready for digging, the soil will be just moist enough to crumble readily. If the soil is too wet, wait for it to become drier. Digging soil that is too wet, especially one that is high in clay, ruins its crumbly structure. If it’s too dry, water it.
Digging holes for trees is easier than it used to be, thanks more to research than to tools. The traditional advice was to dig a hole as large as possible— better a $50 hole for a $5 tree than vice versa. Recent studies have shown that tree roots establish more quickly with a planting hole dug only two to three times the diameter of the root spread and just deep enough that the tree stands slightly higher than it did at the nursery.
Do not dig the full depth right out to the edge of the hole. Instead, taper the depth from ground level at the edges to full depth at the center, so the hole resembles a wide, shallow cone. To provide for easy root penetration, rough up the inside of the hole by poking it with a shovel and giving it a few twists.
If lime or sulfur is needed to change the pH of the soil, this is a good time to thoroughly mix it into the bottom of the planting hole. Both materials move slowly through soil and would otherwise take too long to work their way down to the roots. Beyond the planting hole, I just spread these amendments on top of the ground; by the time roots extend this far, the lime or sulfur will have leached into the soil. Do not mix fertilizer into the planting hole, since it could burn new roots. And don’t add peat moss, compost, or other organic materials, or the roots won’t venture beyond the amended soil.
Plant, water, and pamper your new tree

Photo: Linda Wesley
Shovel enough loose soil back into the planting hole to create a mound on which to set the tree. Spread the roots atop the mound, adjusting the mound’s height so that the top of the root ball stands slightly higher in the soil, to allow for settling, than it stood before it was dug up (photo right). Once you have the tree in place, throw a shovelful of soil over the roots to steady the trunk.
Now it’s time to backfill the hole. As you do this, use a stick or your fingers to work the soil in among the roots. Slightly bounce the plant periodically to settle the soil, and adjust the positioning of the tree as necessary. When you have finished backfilling, build up a slight ridge of soil around the outer edge of the planting hole to help contain water. Step back and look at the tree to make sure it’s standing straight. Then remove any dead, diseased, or crossing branches.
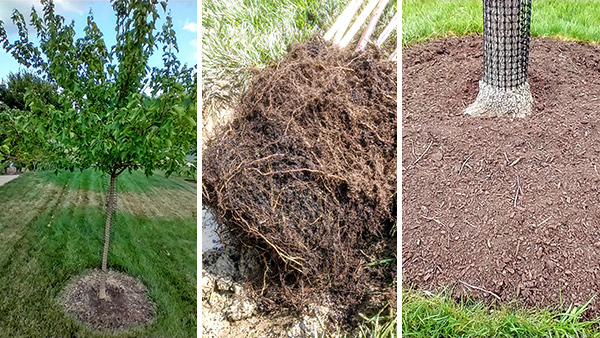
If rodents in the area might chew on the bark of your new tree, surround it with a cylinder of 14-inch mesh hardware cloth that is 18 to 24 inches high (photo below left). Press the bottom of the cloth a couple of inches into the soil.
Next, spread 3 inches of wood chips or straw over the bare ground to within a few inches of the trunk. Keep mulch away from the trunk to prevent the trunk from rotting. This insulating blanket will keep roots of fall-planted trees warm and growing on into fall; prevent freezing and thawing of soil (which could heave plants out of the ground in winter); and keep roots of both fall- and spring-planted trees cool and moist through summer.
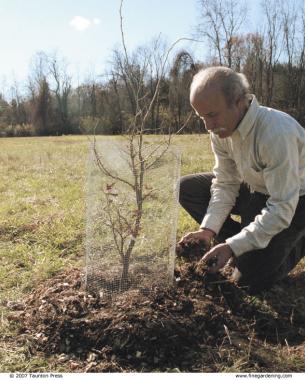
Photo: Virginia Small
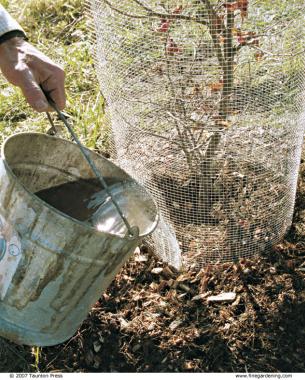
Photo: Virginia Small
Trees over 3 feet high or in very windy sites should be staked for a year until their roots grab firm hold of the soil. Tie the trunk to one or two stakes set beside the tree, using some soft material or padded wire. Allow for some movement of the trunk to thicken it up more quickly.
Watering your new tree is critical. Slowly and thoroughly soak the ground beneath the plant, and allow the water to seep in. Then soak the ground again. Don’t turn your back on your sapling after you finish planting. Throughout its first growing season, diligently maintain a weekly watering schedule. Figure on about a gallon per week per square-foot-spread of the roots. And keep that mulched circle weed-free, adding more mulch as needed, for at least a few years. You may even want to keep it permanently mulched or planted with a ground cover to keep lawn mowers and weed whackers—hazards to trees young and old—at bay. With proper planting and care, buds will soon push out new stems, the future limbs of your young tree.


Comments
This is a very helpful essay. I'm looking to add as many native trees and shrubs to my property as possible, and as you mention, I'm finding I can order plants online for much less if I choose a nursery that sells bare root trees, but like you said, the term made me a little nervous (I think something about the words "bare" and "root" together conjure up images of a fragile exposed root system that couldn't possibly be hardy enough to transport well, but I guess that's not true). I am a total beginner to all this having just relocated from a city apartment to a home with a real backyard, so I also wouldn't have known NOT to add compost to my planting hole for the new tree. I'm saving this page on my laptop so that when I'm ready to plant in November I can refer to these tips.
can you amend the soil around the hole in order to encourage the roots to move outward?
Log in or create an account to post a comment.
Sign up Log in