

There’s no such thing as a free lunch, even in the garden. Depending on your soil’s native fertility and what you grow, your plants might perform for years without needing additional fertilizer. But sooner or later, the free lunch ends. Hungry plants won’t squeal like starving pigs, but they eventually will show their unhappiness by displaying stunted growth and, depending on the particular nutrients they lack, off-color leaves. A periodic soil test lets you catch nutrient deficiencies before they progress that far. Besides indicating nutrient deficiencies, a soil test can also provide information on soil acidity, the percentage of organic matter in your soil, and your soil’s texture. But it will not tell you anything about poor soil drainage, insufficient sunlight, or insects and diseases. These threats to plants also can cause off-color leaves and stunted growth, so rule them out first before moving on to a soil test.
Know what to test for


Whether you’re testing the soil at home or sending it to a laboratory, you’ll have to decide what to test for. At the very least, test your soil’s pH, which is a measure of how acidic your soil is. If the pH level isn’t in the correct range, plants cannot take up nutrients in the soil. You should also test for phosphorus and potassium because plants require both of these nutrients in relatively large amounts. A complete checkup would include tests for nutrients that are essential but needed only in minute quantities, such as iron, manganese, and zinc. If you regularly enrich your soil with an abundance of compost and other organic materials, micronutrient problems are unlikely.
Some laboratories are also set up to test soils for toxic elements. For example, if your house is more than 50 years old, you might want to test the soil for lead from lead-based paint that has flaked or was scraped off the siding. On former farm sites, you might want to test for DDT or arsenic. Although neither is approved for home agricultural use, both are persistent pesticides that were widely used in the past.
A proper sample is critical
Proper sampling technique is an important part of soil testing. Even in a modest-size garden of 1,000 square feet, 1 cup of soil—the amount typically used for a test—represents only about one one-thousandth of one percent of the top 6 inches of ground. So that 1-cup sample had better be representative of the whole area.
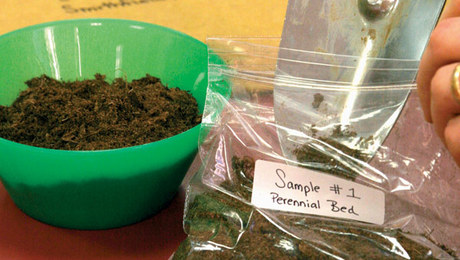
To get a truly representative sample, dig in a few random spots around the test area and mix the soils together. Avoid sampling any anomalous spots such as near a fence or where you fill your fertilizer spreader or once had a compost pile. If the test area itself seems insufficiently uniform because of, say, a large, wet, sunken portion, then divide the area into two or more separate test areas. Areas devoted to different kinds of plants, such as vegetables and lawn, require separate samples. Vegetable and flower gardens, though, may be sampled together.
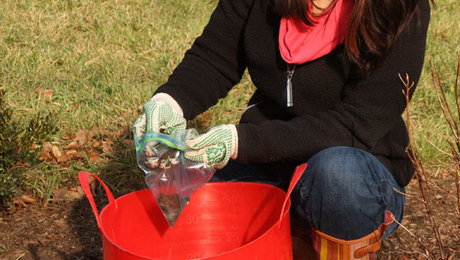
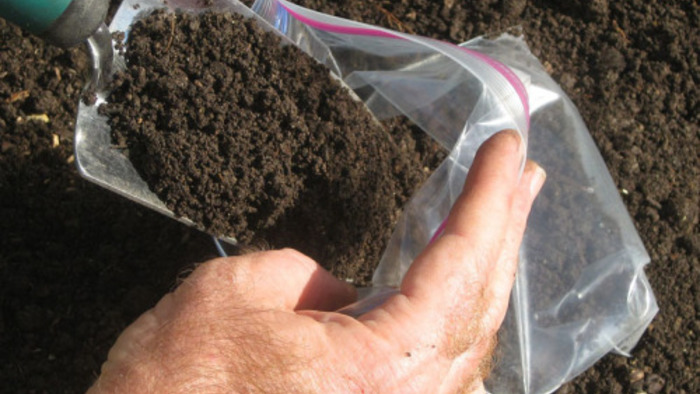
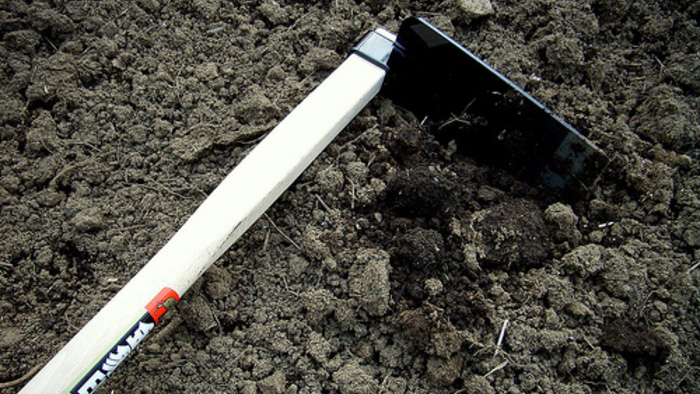
Collect soil to a depth of 6 inches, which is approximately the depth of most plants’ feeder roots. Before you dig, remove any surface debris such as wood chips, compost, plant residues, or sod, then make a hole to the required depth. Discard the first shovelful of soil. It’s a cone-shaped slice, so it contains a greater proportion of soil from the surface than from lower down. Take another slice, uniformly thick from top to bottom along the edge of the hole you just made.
Throughout your sample preparation, avoid contamination from dirty hands or utensils. Gather together samples from each test area into a clean, plastic bucket, then mix and crumble them, discarding stones, sticks, insects, and other debris as you mix. Spread the soil on a clean baking pan to air-dry for a day, then remove about a cup for testing.
If you are sending your samples to a lab for testing, you will get a recommendation for fertilizer and for amounts of lime or sulfur needed to adjust the pH level. Fertilizer recommendations are based on what is in the soil and the kinds of plants you intend to grow. Follow these guidelines closely because too much of any nutrient can be as harmful as too little, causing nutrient imbalances, even death, to plants.
Nitrogen skips the soil test

Soil tests rarely determine nitrogen levels, even though this is the nutrient for which plants are hungriest. Nitrogen is readily lost from soil, puffing away as a gas or leaching from rainfall beyond the reach of roots. The stuff is simply too evanescent to make testing for it meaningful at any single point in time.
Most soil nitrogen is locked up in organic matter, so determining the percentage of organic matter in your soil offers an idea of the amount of nitrogen potentially available. I say “potentially” because nitrogen becomes available as soil microbes chew away at organic matter; the amount that plants actually get waxes and wanes as weather conditions influence microbial growth. If your soil contains about 4 percent organic matter, you probably have an acceptable level of nitrogen.
Soil-testing laboratories
Your local cooperative extension office can tell you how to get a soil test. Find the branch nearest you at www.nifa.usda.gov/land-grant-colleges-and-universities-partner-website-directoryrural/cooperative-research-and-extension-services
The following private laboratories also offer soil testing.
Midwest Laboratories
13611 B Street, Omaha, NE
68144; 402-334-7770
www.midwestlabs.com
Peaceful Valley Farm Supply
PO Box 2209, Grass Valley, CA
95945; 888-784-1722
www.groworganic.com
Wallace Laboratories
365 Coral Circle, El Segundo,
CA 90245; 310-615-0116
www.bettersoils.com
Woods End Research Laboratory
PO Box 297, Mt. Vernon, ME
04352; 207-293-2457
www.woodsend.org


Comments
Very informative! I was especially interested to learn about nitrogen being locked up in organic matter, as I have been reading about Mycelium and Mycorrhiza and their role in good soil. Thanks for a great article.
Why is so important nutrients & PH soil testing I have to write for Dissertation Proofreading Service and I need Recommendations for soil testing could anyone can tell me how to bring into use soil testing solutions kits?
Soil-testing provides engineering firms and construction companies information with which to predicts the mechanical behavior of soils that will serve as the base of building foundations, support for roads or other infrastructure.
Equipment is suitable to characterize soil samples in the laboratory or in-situ testing at construction sites. Systems can support the collection of samples, soil classification, mechanical property evaluation and also testing of completed road base and sub-base on site. MBA Dissertation Help
it's such an amazing article Cyberpunk 2077 Merch Keep this Work On...
A Good Article Just like Michael Jackson Thriller Jacket now i have a nice article to read this...
Those rules moreover attempted to turn into a decent method to perceive that other individuals online have the indistinguishable enthusiasm like mine to get a handle on incredible arrangement more around this condition.
Regards
Dissertation Help London
Log in or create an account to post a comment.
Sign up Log in