

I used to dread the arrival of cold weather, knowing that a frost would put an end to the time I spent outdoors coddling my flowers. But I’ve gotten over that. Now, instead of mourning the seasonal change, I sit by the applewood fire, sip hot cocoa, and devote the time I used to spend tending my garden to thinking of imaginative ways to use all of the flowers I’ve pressed. Drying flowers in a press is a simple operation. In fact, when I decided that I wanted to begin pressing flowers, I didn’t even own a flower press. A frost was coming and I had to move quickly, so I hastily picked a basketful of blossoms, arranged them on sheets of paper, and stuck them into a heavy textbook that I weighted with a cinder block. Weeks later, my purple and yellow pansies were still colorful, just as exquisite as they had been growing in the garden.
Harvest flowers when they’re dry
The newest and freshest flowers are the only ones worth saving, so I allow myself to be choosy when harvesting them. Since I never know when I’ll come across one, I keep a small basket and a pair of scissors handy in the garden at all times. That way, when a flower worth saving does appear, I merely snip it and let it fall gently into my basket. And since the process of harvesting flowers is really a form of deadheading, the more flowers I pick, the more new flowers are created. That way, I can continue to harvest the flowers on some of my plants throughout the entire growing season.

The drier the flowers are, the better they will press, so the best time to harvest flowers for pressing is in the morning after the dew has dried or in the early evening before it returns. I never harvest flowers when it’s raining, and I like to give my flowers at least a day or two to dry out after an extended summer rain before picking them.
I get picked flowers into the press as soon as possible, before they start to wilt. There’s no need to run back to the house, but I wouldn’t retire to the hammock for a midday snooze either. Also, I keep my flowers, once picked, out of direct sunlight to keep them fresh.
Group similar flowers together
Once I’ve collected a batch of flowers, I sort them by type. I dry like flowers together because they dry at the same rate, and it also simplifies the labeling process. With my flowers sorted, I then arrange them, face down, on sheets of white paper. It’s important that none of the flowers touch; otherwise, when they dry, they will be stuck together.
I use sheets of smooth white typing paper to sandwich my blooms during the pressing process. The paper draws the moisture out of the petals, and also keeps the occasional problem blossom from sticking to the pages of the book I’m using or the cardboard layers of my flower press. I once made the mistake of using textured paper towels to layer my flowers, which resulted in dried flowers with the same texture. Now I use only smooth typing or blotter paper.
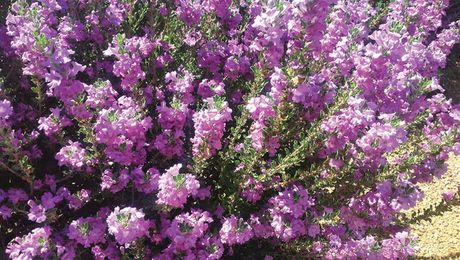
Flowers that press best
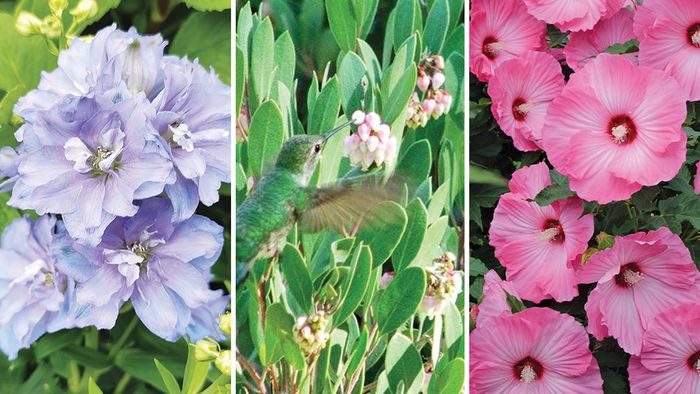
| Two factors determine which flowers press best. Since pressing blossoms is a way of drying them, flowers that contain less moisture when fresh dry quicker, whereas the thick and fleshy petals of impatiens and begonias will become moldy after a few weeks in a flower press. The second factor is color retention. Undesirable flowers lose their color during the drying process or become muddy, whereas desirable flowers retain their color and sometimes intensify in color. Here are a few of the author’s favorites.
*These flowers don’t press well whole because their centers are too thick to flatten. The trick is to remove the petals from the center, press each separately, and reassemble the petals without the center. |
|


Two Methods for Pressing Flowers
A heavy book works just as well as a flower press
There are two ways to press flowers, and both methods have worked well for me. The method you choose depends on what’s more convenient for you. In a pinch, I have gotten excellent results using the “big book method” that I’ve already described.
A flower press is another option. Store-bought flower presses can be expensive, and considering that the cost of the supplies needed to build one is cheaper than buying one already made, I’d rather build one myself. Two pieces of plywood, four lag screws, washers, and wing nuts, and a few pieces of cardboard are all that’s needed. My homemade version works just as well as the store-bought kind, and I decorated mine with a few pressed delphiniums to personalize it.
Before inserting any flowers into a book or my press, I write on the top edge of a small piece of paper the name of the flowers enclosed and the date I laid them to rest. When I insert my flower sandwiches into a book or press, I make sure the label is still visible so I’ll know what I’m pressing and how long the flowers have been drying. That way, I won’t accidentally disturb the flowers before they’re fully dry.
Assembling a flower press

The size of your flower press will depend on the size of the flowers and plants you want to preserve.
Step 1
Cut two pieces of plywood for the top and bottom layers of the press. These pieces can be as big or small as you want them to be. They just need to be the same size.
Step 2
Drill holes through the four corners of both the top and bottom pieces of wood. The holes must be large enough to accommodate the lag screws.
Step 3
Insert the lag screws through the holes drilled into the bottom piece of the press.
Step 4
Layer alternate pieces of cardboard, white paper, and flowers inside the press. The number of layers depends on how many flowers you have to press.
Step 5
Place the top piece of wood onto the press, threading the lag screws through the holes.
Step 6
Tighten the layers together by spinning the wing nuts down the bolts onto washers to create even pressure.


It’s important to keep the flowers evenly weighted during the drying process. If you choose the book method, a cinder block or a flat piece of sandstone that covers the entire surface area of the book will do the job. The blooms in a flower press are weighted by tightening the wing nuts on the long bolts at each corner. Tightening the nuts creates evenly distributed pressure between the top and bottom layers of the press. To ensure that the distribution of pressure is even, make sure that each of the wing nuts has been tightened to the same level on each bolt.
Do not disturb the flowers for at least a month
It’s hard for me to resist the temptation to peek, but I learned the hard way that the flowers should not be disturbed during the pressing period. Past experience has taught me that taking a peek before a month has elapsed can rip the flowers apart. Also, at that stage, they tend to wrinkle when closed back up. I resist the urge to peek by grabbing a good book and a tall glass of lemonade and heading for the hammock.
After a month has passed, my patience pays off as I open the press and inspect my bounty. Beautifully pressed flowers of all shapes, sizes, and colors grace the pages. Now my creative juices really start to flow. Some of these I can glue into my garden journal as a record of what I grew. I can paste some into my scrapbook that will remind me of warmer days, come January. Some will decorate my business cards and stationery, while others will find homes on Christmas ornaments and candles. The best option is combining my pressed flowers into framed designs that I can enjoy myself or give to friends as gifts.
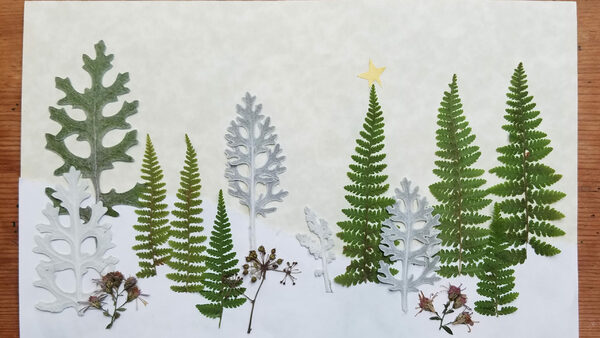
Turn pressed flowers into garden art
The supplies needed for creating a framed pressed-flower design—tweezers, white school glue, mat or poster board, and a frame—can be found at craft and hardware stores. I first create an arrangement of pressed flowers on a piece of poster board, construction paper, or material cut to the size of the frame I’m planning to use. A typical design might include some fern fronds as a background with a few choice blossoms layered alongside. Once I’m happy with the design I’ve created, I glue all the components into place.

Using tweezers, I pick the petal up, carefully apply a small dab of glue to the back of the petal with the end of a toothpick, and gingerly place the petal back where it came from. An all-purpose household glue is fine for this type of work. While gluing the petals down, do not sneeze, cough, or laugh until all the components are glued into place. I also make sure my very friendly dog, Emma, takes her wagging tail outside before undertaking any design.
With my design completed, I place the cleaned glass from the frame over the design and put it into the frame. I hang my designs out of direct sunlight to keep the flowers from fading, and I store unused pressed flowers between the pages of books or back in the press for the same reason.
With a stroke of her brush, Nature creates beauty that no artist can copy. When frost threatens my perennial beds and annual gardens, I can save a little piece of summer by pressing the blooms so that I’m able to enjoy each garden for years to come.


Comments
Many many thanks for the great post here you can need to play Mahjong dark dimensions free and create the best score forever.
good work.
Good work. check
Log in or create an account to post a comment.
Sign up Log in