

Jump-Start Your Seeds
Use these tricks to speed germination, then plant up some pots
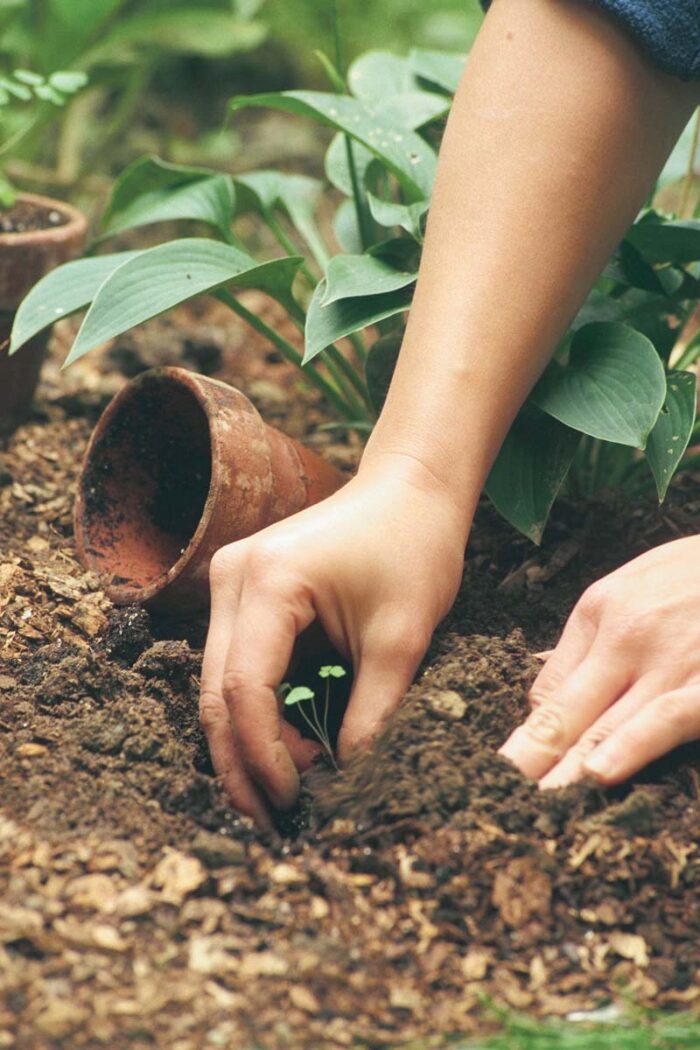
Columbines brighten both sides of my shady, front-yard path. The little congregation on one side came as plants from a catalog, while those on the other were nurtured, by me, from a palmful of shiny, black seeds to a drift of long-spurred flowers. Guess which ones give me the most satisfaction? Maternal pride isn’t the only reward that I get from starting seeds. I’ve also gained a greener thumb and a fatter wallet—a packet of seeds provides 20 or more plants for the price of a single potted plant. Learn more: 8 Ways to Save Money at the Garden Center
For the best results, consider the plant’s natural habitat
Many seeds are simple to grow. Scratch up a patch of open soil, scatter the seeds, and there you go. But other seeds will do best under more controlled conditions, or with special treatment that mimics the conditions of their native habitats.
The seeds of many plants that are native to regions with cold winters, for example, germinate most readily after a period of moist chilling in a dark place. In the wild, that’s what winter provides them. It’d be wasted energy—and very anti-Darwinian—if the seeds sprouted in late summer or fall only to be laid low by winter cold. Instead, they wait out the inhospitable winter. During the seeds’ deep sleep, their seed coats soften, until the warmth and moisture of spring make them explode into growth.
For other seeds, especially many desert dwellers, a period of rain (or synthesized rain, a.k.a. the garden hose or a good overnight soak) may be all that is necessary to burst that seed coat wide open.
On the other hand, more extreme treatment may be necessary to get the most out of wildflowers from hot places. In the Southwest, it can be fire that turns the key. I had a lot of trouble getting Texas bluebonnets (Lupinus texensis) to sprout with abandon until one year when a kitchen fire scorched an envelope of seeds. That’s the end of them, I thought, tossing the charred seeds out on the bank. Naturally, every last one sprouted into a vigorous, healthy plant.
How do you know which seed needs what? Read the package, for starters. The information that is crammed onto the back of a seed packet is like having a plant encyclopedia at your fingertips. Planting dates, time until bloom, instructions, special needs—it’s all there, even if you do need a magnifying glass to read it.
When seeds are harvested commercially, they don’t get to experience the natural cycle of the seasons—the cold, the heat, the rain—and they may need to be tricked into growth. Here are three easy techniques that will fool just about any reluctant seed.

Speed sprouting by presoaking seeds
Presoaking is my number one secret for success in starting seeds. This simple procedure exposes the seed embryo to moisture, which is the primary impetus for making it grow. I pour hot tap water into a shallow container, empty a packet of seeds into the water, spread them out, and let them stand for up to 24 hours. Soak the seeds for any longer and they might rot. The seeds swell as water penetrates the seed coat and the embryo inside begins to plump up.
I presoak just about everything except for the tiniest seeds. But I’m always careful not to presoak my seeds until the night before planting them in pots or in the garden. Once the seeds have swollen, get them into moist soil immediately, then keep them watered well until they’re up and growing. This simple technique can shave several days off the usual germination time.
The other two techniques that are sometimes needed to break the dormancy of stubborn seeds have names so big that they frighten many gardeners off: stratification and scarification. But these are just fifty-dollar words that describe simple techniques.

Some seeds need moist cold; others need nicking
“Stratification” means supplying a period of moist cold to trick seeds into thinking that they’re experiencing winter. If you’re sowing indoors in spring, presoak the seeds, then place them in a zip-top, plastic, sandwich-size bag filled halfway with moist, seed-starting medium. Top off the seeds with another inch of moist medium, and then put the bag in an undisturbed corner of the refrigerator (at 34°F to 41°F). Check weekly for signs of germination. When the seeds begin to sprout roots, carefully transfer them to pots, fishing each seedling out of the bag with a spoon to keep soil around the new roots and to avoid disturbing delicate new growth. Then, care for them as you would any other seedlings.
Seeds that require cold treatment can also be planted outdoors in fall or stored in a refrigerator through fall and winter, and then, in spring, planted in pots and started indoors or out. For outdoor seed starting in fall or winter, plant the seeds in pots as usual, but spread a thin layer of very fine gravel over the top of each pot so the soil won’t get washed out by rains. Washed, natural-colored (undyed) aquarium gravel works well. Wherever you overwinter the pots—in a cold frame or against the wall of a garage—make a level layer of moist sand. Bury the pots to their rims, keeping them close together. This insulates them from severe cold and prevents them from tipping over and spilling. When seeds germinate, move the pots to a sheltered nursery area.
The third process, “scarification,” means nicking the seed coat with a knife or sandpaper so that life-giving moisture can reach the seed’s embryo. If a seed is big, and I can’t dent it with a fingernail, I give it the knife. A small, sharp, pocketknife blade or a rat-tail file is ideal. Don’t go at it too zealously; you need to remove only a very small slice or section of seed coat. You can also line a jar with a sheet of sandpaper cut to fit, screw on the lid, and shake the jar like a maraca until the seed coats are abraded. Scarify seeds just before planting. Seeds nicked too long before planting may dry out and be worthless when they finally reach the soil.

It’s easy to care for seeds planted in pots
I plant most of my seeds—especially slow-growing perennials and annuals— in pots. It’s easier to care for the seedlings and there’s no weeding. You can identify a slow-starting plant by checking the seed packet. If it advises starting the seeds indoors 8 to 10 weeks before the last frost date, you have a slow starter.
Traditional advice is to plant seeds thickly in a flat or tray, then “prick out” individual seedlings for repotting into larger containers. But I prefer to start just a few seeds in 2¼-inch or larger pots, eliminating the need for transplanting altogether. I thin the emerging seedlings with scissors or just plant the whole cluster in the garden.

Soilless mixes help prevent seedling disease
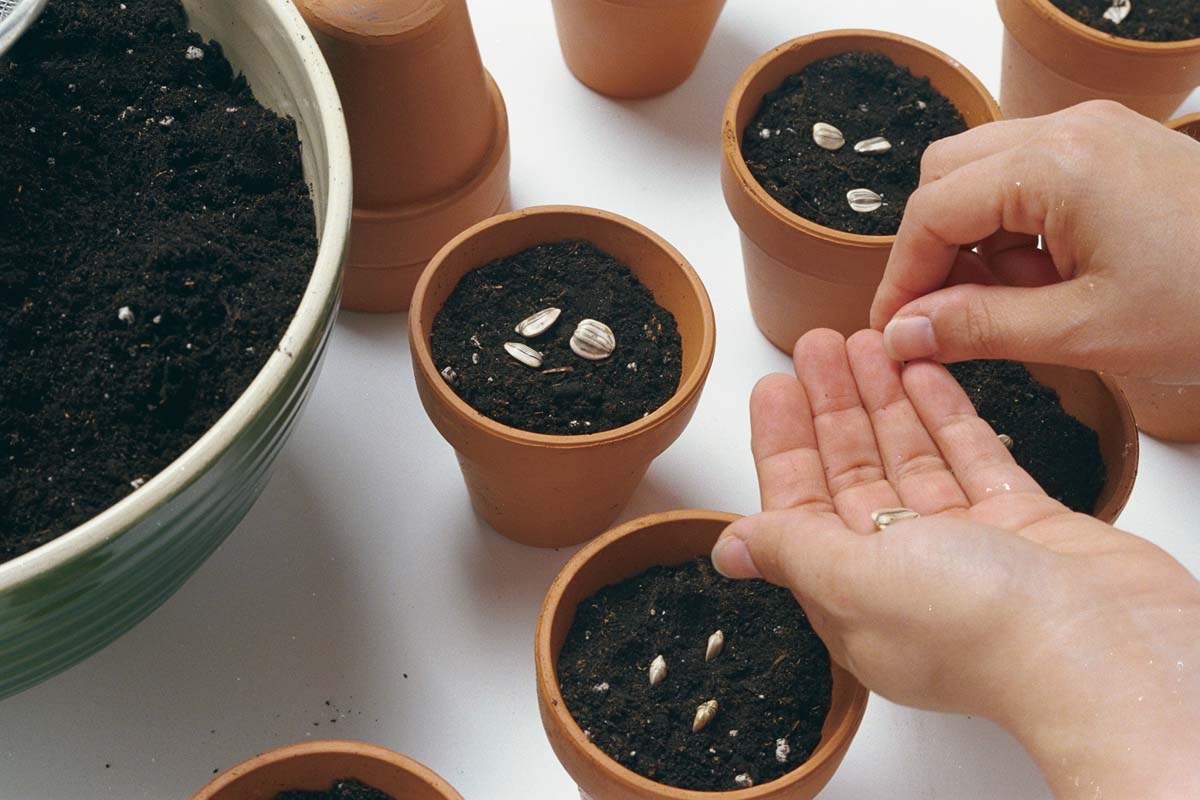
I use a commercial “soilless” seed-starting mix—a blend of milled sphagnum moss, vermiculite, and other sterilized components—so I rarely have trouble with damping-off disease, a fungal problem that causes seedlings to wither and die. To prepare for planting, I pour all but a small portion of the mix into a large bowl and moisten it thoroughly with warm water. Next I fill the containers—plastic pots saved from my periodic nursery buying sprees—to ½ inch below the rim and gently pack the medium to eliminate air pockets. Containers recycled from previous uses should be first sterilized by soaking in a solution of one part bleach and nine parts water.
When the pots are ready, I snip off a corner of the seed packet (or its interior glassine envelope of seeds) and carefully shake three or four seeds into each pot, allowing at least ½ inch between each of them. The tiniest seeds can slide out too quickly so, for better control, I fold a small piece of stiff white paper in half, pour the seeds into the strip, and dole them out by lightly tapping the paper strip. If the seeds are large enough to easily see, I use my fingertip (making sure it’s dry so seeds don’t adhere to it) to push each seed gently against the moist, soilless mix, so it makes good contact. Instead of burying the seeds, I use a sieve to cover them with a thin layer of the reserved seed-starting mix. If the seeds require light to germinate, I don’t cover them at all. I then make a label with the plant’s name and date, and push the marker into the pot so that it doesn’t protrude above the rim.
If I expect the seeds to germinate within a few days or weeks, I cover the pots with a sheet of plastic wrap, glass, or clear plastic to preserve moisture, and check daily. When sprouts appear, I remove the covering. I start a lot of seeds, and don’t worry about providing them with bottom heat to speed germination—I just try to keep things simple. If the seeds are likely to take a long time to germinate—some stratified seeds may spend months in a pot before sprouting—I don’t bother covering them and just take care to keep the soil moist.
Once the pots are planted, I set them on a cookie sheet or other shallow tray for easy transport to a cold frame or other seed-starting area. The trays also make bottom watering easier. It’s important to keep the seed-starting medium moist to speed germination; I use a very fine mist to water the pots from above, or pour water into the tray and let the pots soak it up from the bottom.

Young sprouts need light and a little fertilizer
Since seedlings need light, I place trays of pots on south- or east-facing windowsills. I’ve started as many as 800 pots of seedlings in a season, so windowsill space can be gone before all the pots are placed. If that happens, I move to the basement, or anywhere else indoors, and rig shop lights with fluorescent tubes. Some books recommend tubes that emit specific kinds of light, but standard inexpensive fluorescent tubes also work well. To keep the light source close to the seedlings, I mount the lights on chains so they can be easily moved up or down. Seedlings need 12 to 16 hours of artificial light daily. As for temperatures, room temperatures in the mid-60s are adequate for young seedlings. Warmer temperatures would be fine too. If I’ve sown the seeds in pots outdoors in or out of a cold frame, I don’t worry about providing additional light or fret about the temperature.
After seedlings emerge, I use a water-soluble fertilizer weekly to encourage growth. Fish emulsion or any type of fertilizer will work, but I use Peters or Miracle Gro. If the label doesn’t recommend a strength for seedlings, I mix at the ratio recommended for container plants. If the directions specify “outdoor plants” or “indoor plants,” I follow the recommendations for indoor plants. If there is only a recommendation for outdoor use, I cut the amount of fertilizer in half. For my fertilizers of choice, that is about 1 teaspoon per gallon of water.

Toughen up seedlings, then plant them in the garden
As soon as the seedlings have two or three pairs of true leaves, they’re ready to go out to the garden. But before pampered seedlings go out into the big, wide world, they need toughening up. The aim is to gradually acclimatize plants raised indoors to the rigors of outdoor life. Without this step, known as “hardening off,” tender plant tissues may be damaged by the unaccustomed stresses of sun, wind, and weather.
Begin by moving the seedlings outside to a shady spot protected from the wind and leaving them there for no longer than a couple of hours on the first day. Gradually lengthen their outdoor stays and move the plants into a sunnier spot, if that’s the exposure that they will eventually be planted in. After a week or so, the plants should be ready to go in the ground. A drizzly, gray day is perfect for transplanting—plants will be protected from the desiccating effect of the sun and the moisture will help them settle in quickly. If the weather won’t cooperate, plant late in the afternoon so seedlings get their start in the cool of the evening.
Water your plants well before transplanting them, and water the garden soil until it’s well-moistened but not sopping wet. Slide the plants out of their pots and into place, firm the soil around each with your fingers, and water with a fine mist. Be sure to keep the soil moist until the plants start growing well.

Make a seedbed for sowing seeds in the garden
Most annuals, and perennials that bloom the first year from seed, are easy to grow from seed sown in place in the garden. They sprout fast and grow quickly, so that you don’t have to spend much time separating husky weed seedlings from puny flower seedlings. If plants can’t hold their own until I get around to pulling weeds, I plant them in pots.
Once you’ve chosen a spot that suits the plant’s needs, clear away any existing vegetation and loosen the soil to at least one shovel’s depth. Spread a 2- to 4-inch layer of organic matter—such as compost or aged manure—atop the loosened soil, then work it in thoroughly with a hoe so that the soil texture is light and moisture-retentive. Rake the surface to a fine texture, breaking up any lumps with your hand. If you are planting annuals or biennials among existing plants in a perennial garden, use hand tools to prepare a small seedbed that won’t disturb the roots of neighboring plants.
Scatter seeds directly onto the prepared soil. Be sparing: try to space small seeds at least 14 inch apart, and larger seeds, like purple coneflower (Echinacea purpurea) or nasturtium (Tropaeolum majus), ½ to 1 inch apart. Then, rake a thin layer of soil over the seedbed. In tight spaces, just scatter a few handfuls of fine soil over the seeds. Use weather-proof labels to mark the seedbeds. Lastly, water with a fine mist. It’s vital to keep the soil moist while the seeds germinate and until the seedlings are established.


Comments
I am getting a bit of a late start in germinating lima beans for a summer school class that starts on 8/1, just 5 days from now. I am looking for the best way to speed up germination. Do you think I should do the sandpaper in a jar shake to scarify them and then soak overnight? The plan is to put a lima bean in a ziplock baggie with moist paper towels and tape to window. The goal is to have some seeds ready to dissect on 8/1 and other seeds to germinate and be replanted into soil on that same day. Please advise. Thank you!!!
Is there a way to "hurry up" un-stratified seeds in order to plant them now and not have to wait?
Thank you for your straightforward narration of how you grow your plants. I am very encouraged!
Log in or create an account to post a comment.
Sign up Log in