

Everything You Need to Know About Espalier
This space-saving technique makes it possible for almost anyone to have fresh fruit

My interest in espalier began when my wife, Beth, and I visited Mount Vernon. I remember being taken by the way the paths in the vegetable garden were lined with plants shaped into low hedges. As I bent down to inspect them, I discovered they were actually espaliered pear trees that bore fruit. On the two walls that bordered the garden, there were more espaliers trained into fan shapes that served as focal points. The way these trees were artfully trained made the garden seem so inviting, while also lending structure and balance to the garden’s overall design.
After returning home, I read all the books that I could find on espalier and spent long hours in the hot Tennessee sun with pruning shears in hand, trying to recreate the shapely trees that I had seen at Mount Vernon. Since then I’ve mastered many designs and even opened a nursery that specializes in espaliered trees. And through the years, I’ve learned that all it takes to create beautiful espaliers is a good plan, some judicious pruning, and a little patience.
Espalier designs dictate placement in the garden
There are many different espalier designs (see illustrations), each with a specific use in the garden. The more elaborate designs like the candelabra and the fan are best used as focal points in the garden, while the cordon and the Belgian fence are good for screening views.
The cordon, with its horizontal tiers, is the most common espalier design because it is so versatile. When used as a focal point, cordons typically measure 6 feet tall by 6 feet wide, but their design can be modified to fit into any space. The ones trained to the wall in my side garden that serve as a living fence are three-tiered and measure 6 feet wide by 4 feet tall. Those at Mount Vernon were made up of one horizontal tier about 3 feet tall by 8 feet long.

The candelabra is a more dramatic espalier. Its height and design command attention (photo top). One adorns the entryway to our house, and serves as the focal point in our side garden. It is 80 inches wide and stands 8½ feet tall, which is typical for this design. The space between each branch is 16 inches. This spacing may look too wide when the plant is young, but it fills in quickly as the tree matures.
To divide our driveway from our side garden, we planted a Belgian fence (photo above). This living wall functions as a see-through screen. Its real interest occurs in winter when its bare branches display its unique shape. Light and air pass through the diamond-shaped gaps in all seasons, and this design blends into our landscape well without seeming as big and bulky as a stone wall or a wooden fence would.
Espalier designs for every taste and style
The cordon, the candelabra, and the Belgian fence are three designs that the author has used effectively in his garden. The cordon and the candelabra are the easiest to master.
|
|
|
|


Fast-growing trees are good for espalier
Originally, espaliers were trained to brick or stone walls because the masonry absorbed the sun’s heat and allowed for quick ripening of fruit. This practice evolved in climates not particularly suited to fruit production, such as the monasteries of Northern France. Although espaliers are created more for their ornamental value today, the tradition of tethering espaliers to masonry persists for good reason. Brick and stone backdrops require minimal maintenance. When using a painted wooden surface as a backdrop for an espalier, I allow 4 to 6 inches between the tree and the wall for maintenance purposes.
Although a number of trees can be espaliered, I prefer the Kieffer pear (Pyrus ‘Kieffer’) for its vigorous growth and lateral habit. Also, it does not require a pollinator to produce fruit and will usually fruit by its second season. In addition, Kieffer pears have high resistance to disease and are hardy to USDA Hardiness Zone 4. One disadvantage is that their growth hardens fairly quickly, so they require weekly attention during the shaping process.
Other good pear cultivars (Pyrus cvs.) for espalier include ‘Magnus’, ‘Bartlett’, ‘Red Sensation Bartlett’, and ‘Harrow’s Delight’. For apples (Malus cvs.), I recommend ‘Arkansas Black’, ‘Red Delicious’, ‘Golden Delicious’, ‘Liberty’, ‘Freedom’, and ‘Empire’. Good ornamental crabapples (Malus cvs.) include ‘White Cascade’, ‘Prairiefire’, and ‘Golden Raindrops’. Other ornamental plants such as magnolia (Magnolia grandiflora ‘Little Gem’), rose of Sharon (Hibiscus syriacus), and weeping Yaupon holly (Ilex vomitoria) can also be espaliered.
Since most of the plants I use for espalier produce fruit, I plant them in spaces that receive at least six to eight hours of sunlight, the minimum sun required for proper fruit production. Soil and drainage are also important considerations when I am choosing a site. My espaliers all benefit from southern exposures and well-drained, loamy soil.
 |
1. Trace an outline of the espalier design with chalk to use as a guide. |
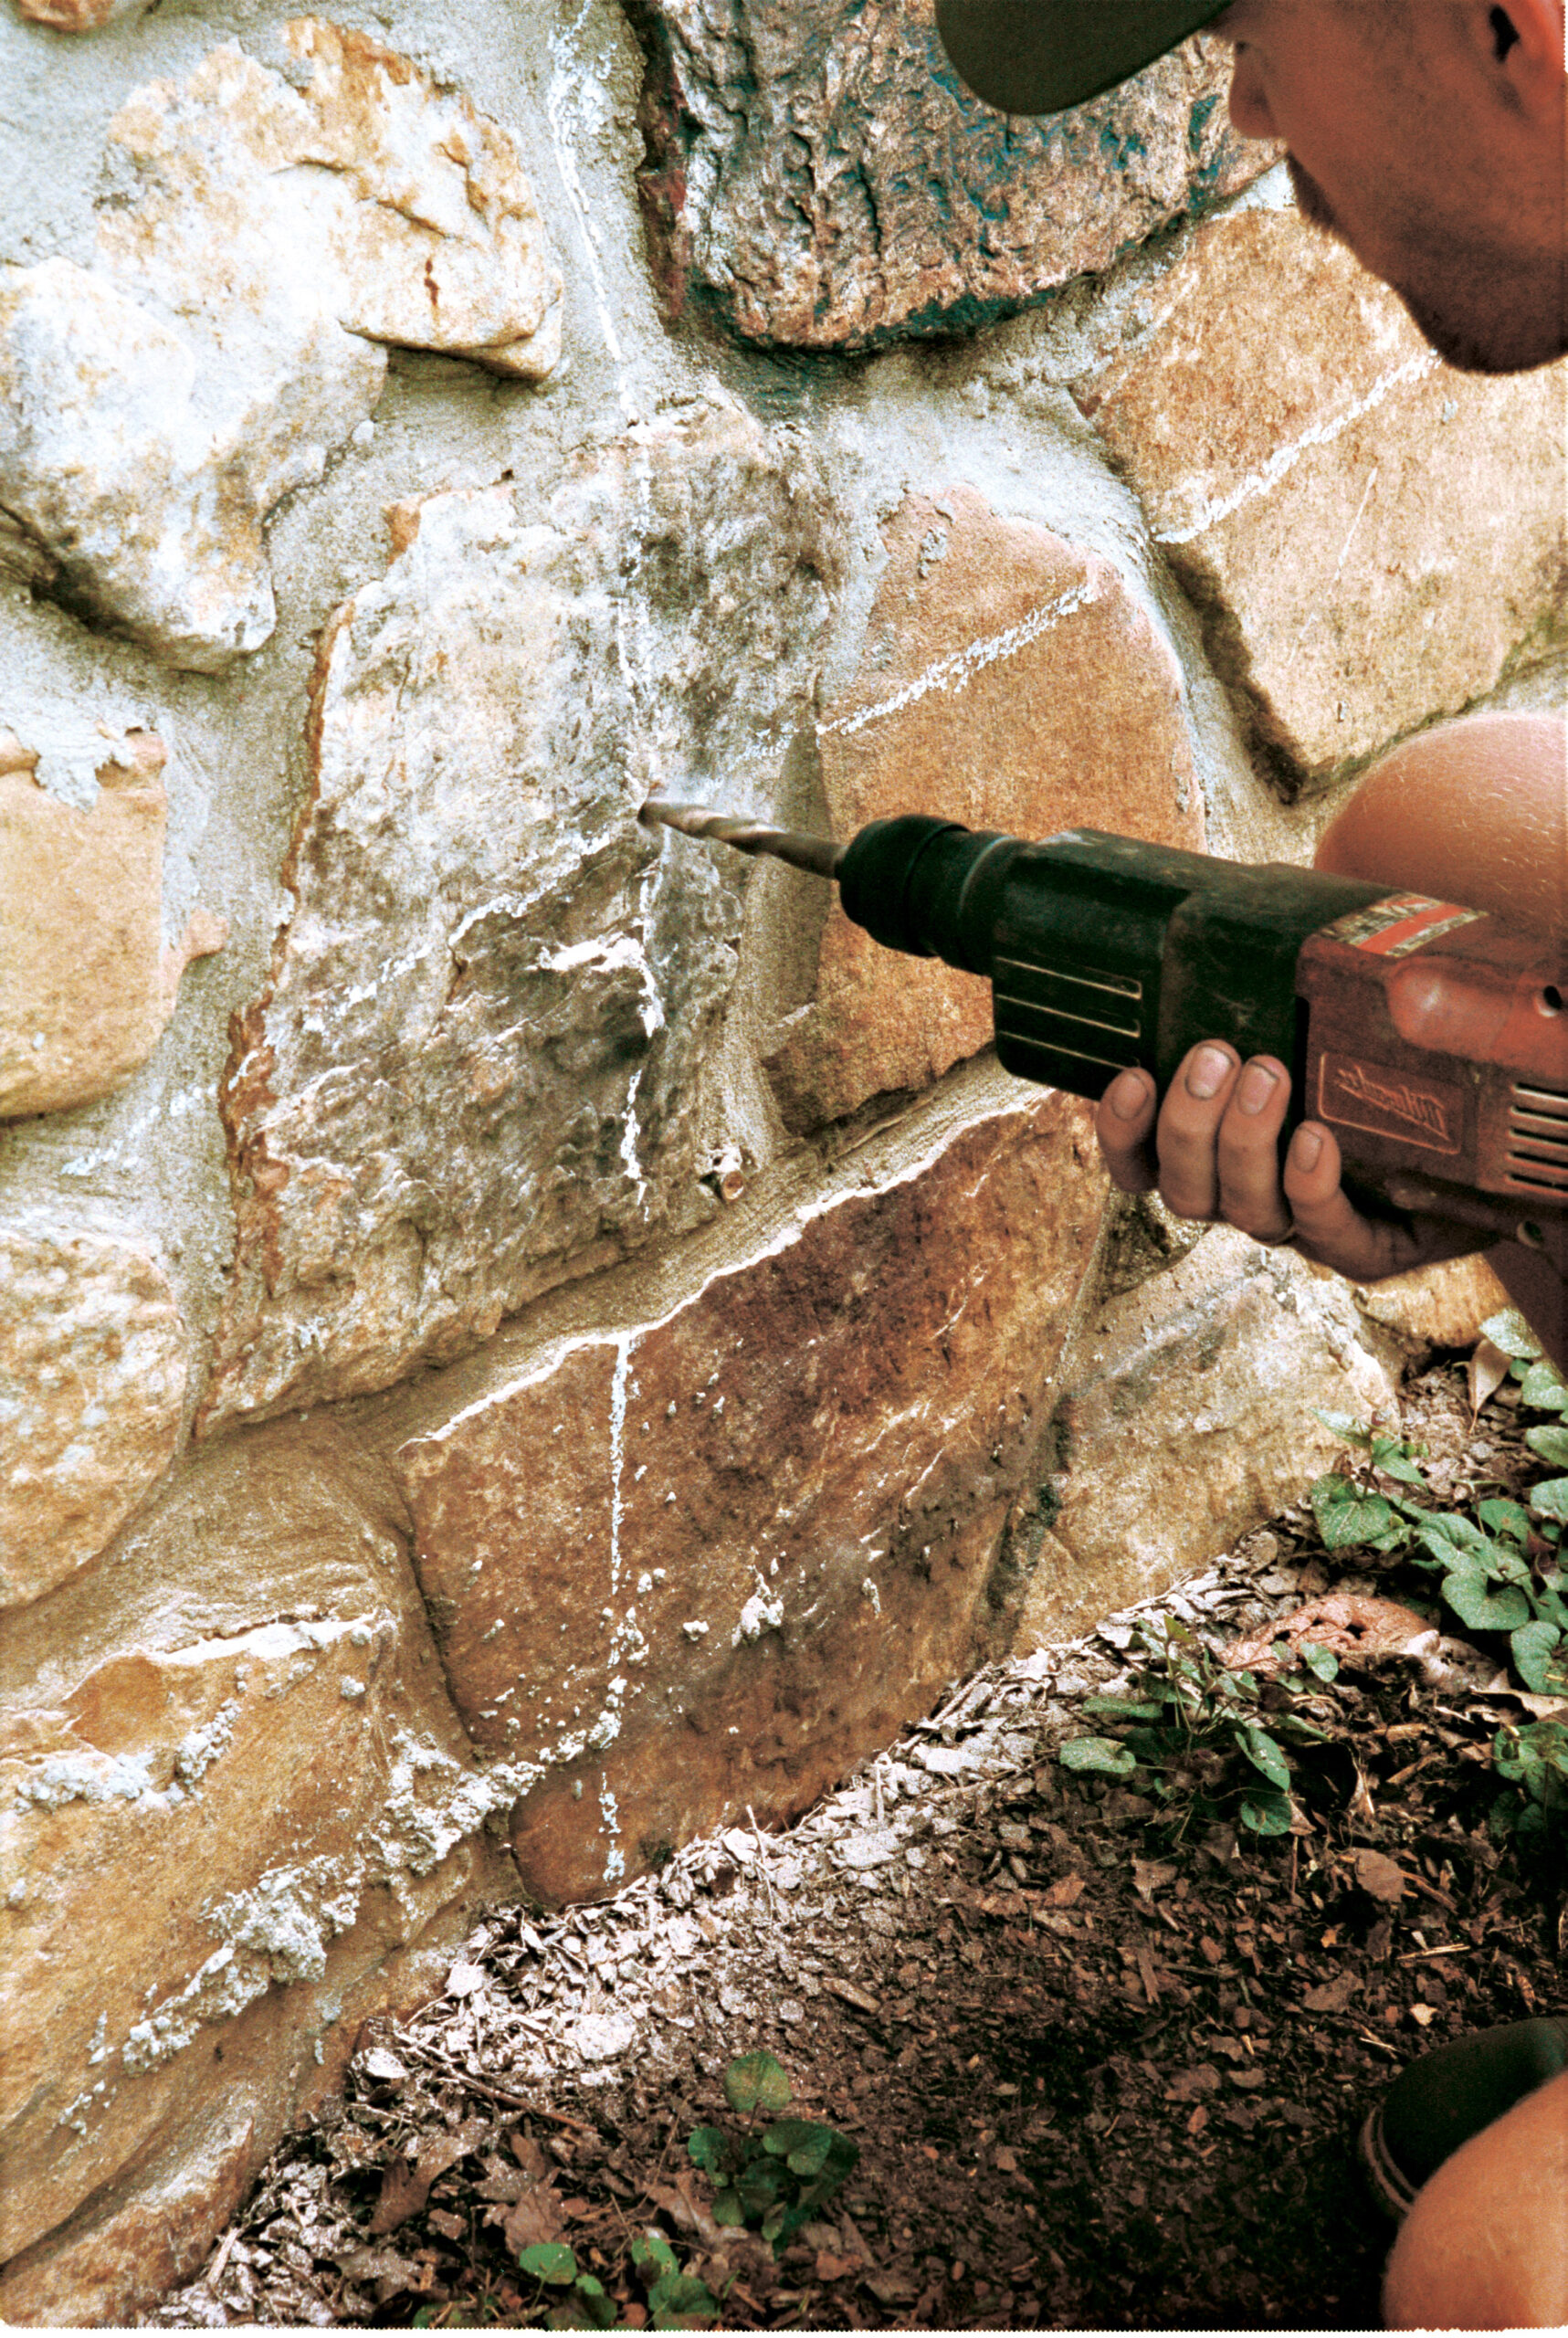 |
2. Drill holes 2 inches deep with a masonry bit, and insert the lag shields. |
 |
3. Screw eyebolts into the lag shields. The lag shields expand as the bolts are screwed in. |
 |
4. Thread wire through the eyebolts to form a tight network of guide wires. |
 |
5. Position the tree’s rootball so that the trunk is about 4 inches from the wall. |
 |
6. Attach the trunk to the guide wires with ¼-inch plastic nursery tape. |
Install a wire support system
Once I’ve chosen a site, selected a design to fit the site, and purchased a tree, I use chalk to draw an outline of the espalier design on the surface where I plan to train the tree (photo #1 above). This outline measures the exact mature height and width of the design, and serves as a guide when drilling the holes for the eyebolts that hold the guide wires.
Using a masonry bit, I then drill holes at evenly spaced intervals along each tier, usually 16 to 24 inches apart (photo #2 above). For example, I would drill nine holes spaced 16 inches apart for an 8-foot-long horizontal tier of a cordon. Each hole should be about 1½ to 2 inches deep.
Once the holes are drilled, I place 2-inch-long lag shields into each hole flush with the wall. Lag shields are small metal cylinders with threading that eyebolts screw into. There’s a code on most lag shields that tells what size drill bit to use. These lag shields expand and become snug in the wall once the eyebolt is screwed into it. They are only necessary when attaching guide wires to masonry. When training an espalier onto a wooden structure, I screw the eyebolts directly into the wood.
Once the lag shields are in place, I screw in the 6- to 8-inch-long eyebolts, leaving the head of the bolt 4 to 6 inches out from the surface of the wall (photo #3 above). I then thread 14- or 16-gauge wire through the eye of each bolt several times (photo #4 above), being sure to pull the wire tight before threading it through the next eyebolt. These wires will form the structure that the espalier will be trained to and must be taut to support the weight of the tree as it grows. The 4- to 6-inch space between the wall and the tree allows for air circulation and prevents fungal and bacterial diseases from plaguing the leaves.
Plant the tree close to the wall
After getting the guide wires in place, I dig a planting hole twice the size of my tree’s rootball. As I place the rootball into the hole, I line the trunk up with the center vertical wire, placing the trunk as close to the wire as I can get it (photo #5 above). If the tree’s rootball is too big to allow this, I shave off a few roots on the side facing the wall. The tree should be planted about 4 inches from the wall, with the bud union 2 to 3 inches above the soil level.
I then firm the soil around the base of the tree once it is in place, secure the trunk of the tree to the guide wire with 14-inch nurseryman’s tape (photo #6 above), and water it well. The ideal time for planting is fall; this gives the root system time to acclimate itself before the growing season begins in spring.
Prune the tree to produce branches
In late winter or early spring, I cut the top of the tree off (step 1, illustration below) to stimulate branch development at about 2 inches above where I want the first tier of branches to emerge. A few days after I make this cut, small branch buds will start to swell all along the tree’s main leader. I then gently rub off all the buds except for the six located closest to the first-tier wire.
As these buds start to grow, I select the branch with the most vertical growth habit to become the new main leader, which will eventually become the second tier. I choose two other branches based on their proximity to the guide wires and how straight they are growing to become the first horizontal tier. I don’t remove the other three branches until I’m certain that the two I’ve selected are well on their way to become tiers (step 2, illustration).
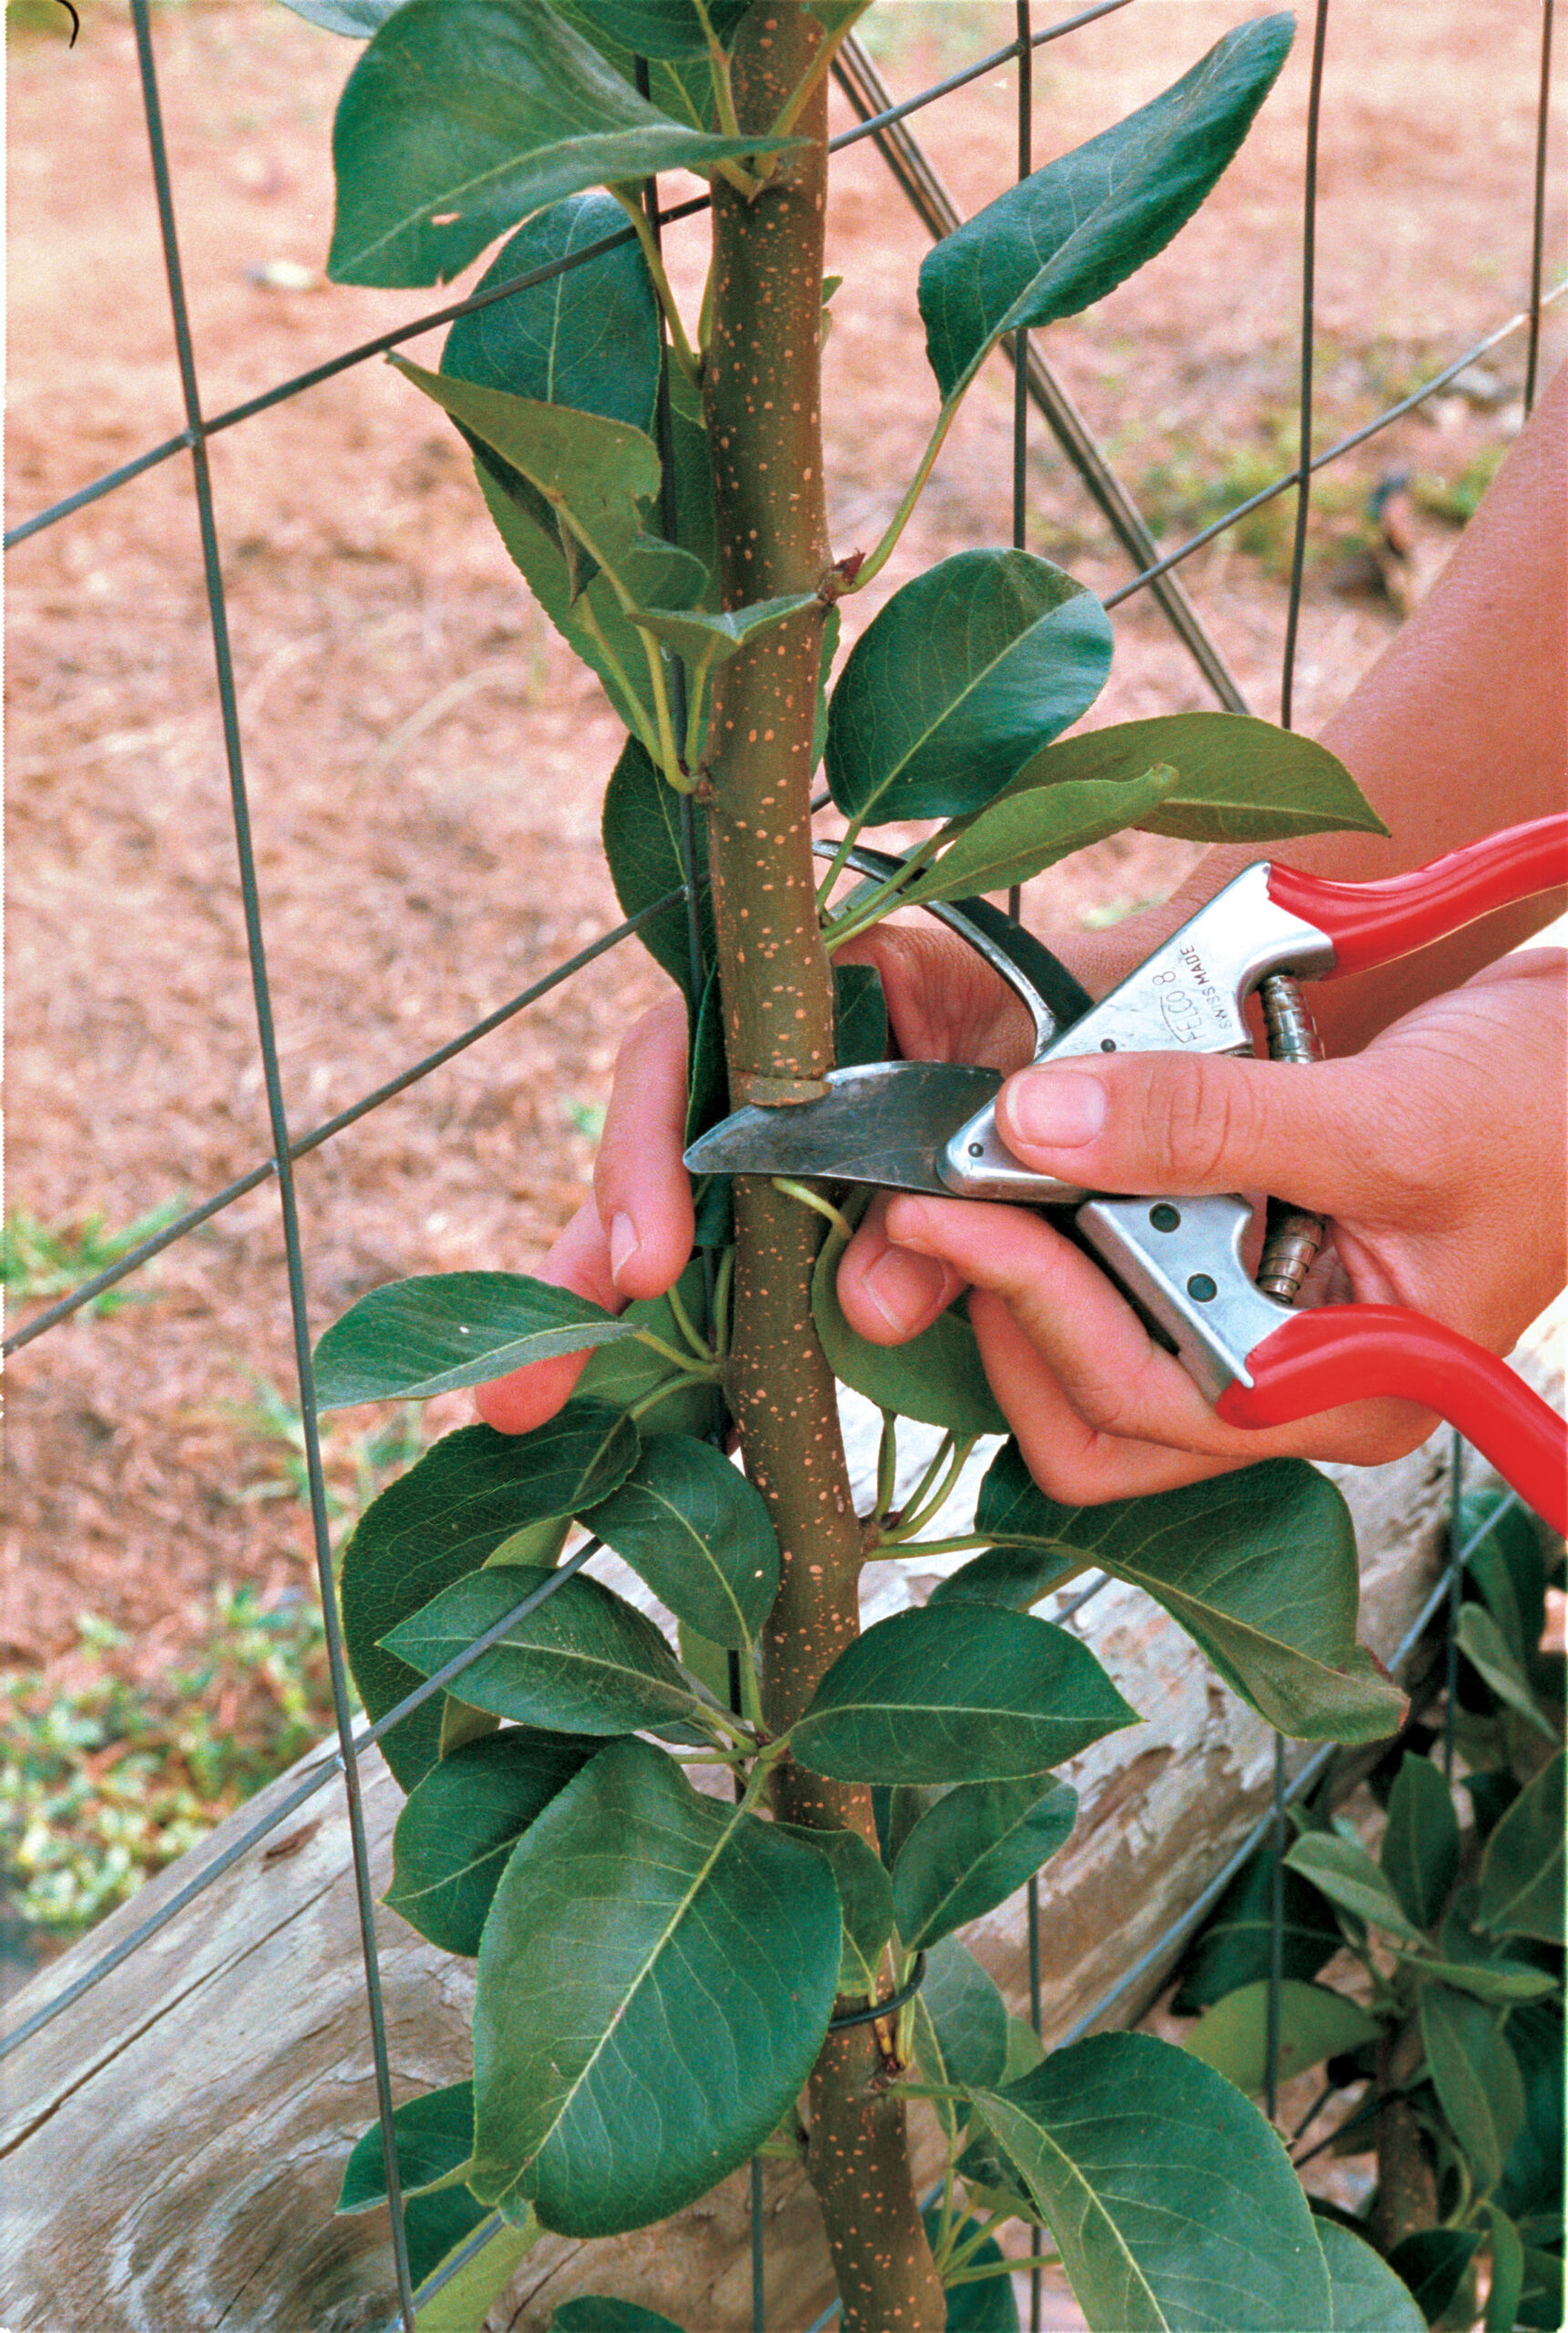
Sometimes one or more of the six buds I’ve selected for a tier refuse to grow. In that case, I use a technique called notching to stimulate bud growth. With a sharp knife or pruning-shear blade, I carefully cut a wedge out of the cambium layer of the bark right above the lazy bud (photo right). This allows nutrients to pool at the bud notch. When used in early spring, this technique usually triggers buds to grow.
I let the branches grow 6 to 8 inches long before bending them to meet the guide wires (step 3, illustration). If the branches are bent while the wood is still too green, they are likely to break off, and I’ll have to start over. I don’t worry if the branches are not exactly horizontal because they will straighten out as they grow.
As the branches grow, I gently tie them to the wires at 6- to 8-inch intervals. The length of a cordon’s tier can vary depending on how much space you have, with some growing horizontally for many feet. The tiers on candelabras, though, need to be bent upward at a certain point to form the vertical sides. I usually make my turns when a branch has grown 6 to 8 inches past the location of the desired turn. At that point, I secure the upright part of the branch to the guide wire to keep it growing toward the end of the candelabra’s vertical arm. With all espalier designs, when a branch reaches the desired height or length, I simply cut the growing end off and keep the branch pruned to that height or length.

Prune regularly to keep espalier shapely
It’s important to remember that an espalier is a living sculpture, and it will never be perfect. I like to look at the crooks and turns on my trees as part of their character and charm. The saving grace when practicing this art is that even the most glaring mistakes can be corrected by manipulating new growth.
Since the new growth of the Kieffer pear hardens quickly, it may be possible to miss the opportunity to turn and tie down a branch while it’s still flexible. When this happens or when a branch accidentally breaks, I cut the branch back to a nice straight portion at the point of a downward-facing bud where a new branch will quickly grow to replace the lost one. When pruning, I always make cuts right above a bud. I stop making cuts six to eight weeks before the first frost is expected. Any new growth stimulated after this point would be susceptible to frost damage.
As the tree continues to grow, side shoots, or spurs, will sprout from the trunk and branches. To keep my espaliers looking neat, tidy, and at the desired height and shape, I prune them back regularly about once a month during the growing season until six weeks before the first frost is expected. On trees that produce fruit, I wait until the fruit has set to do any pruning. The optimal length for spurs is 4 to 6 inches. Pruning the spurs back too short will result in fewer flowers and less fruit.
Fertilize and water to keep espalier healthy
Patience is a virtue when training trees into espalier. They take some time to grow from gangly whips into the centerpiece of your landscape. Within the first year of growth, its form will start to take shape, but its growth will still be leggy. During the second year, the design becomes recognizable and you might get fruit if you’re lucky. It may take up to five years for a tree to reach its desired height, so just rest assured that with each year of growth, your espalier will look better and better. To keep my trees looking their best, I diligently water during dry spells, and I feed them once a year in late February or early March with a 180-day time-released balanced fertilizer such as 12-12-12 with micronutrients. I use a jeweler’s loupe to inspect the leaves of my trees (a magnifying glass would do). Signs of insects such as mites, thrips, aphids, and white flies, as well as the beginnings of fungal and bacterial problems, are hard to spot without magnification. If my scouting uncovers any diseases or insects, I immediately take steps to address the problem.

Sources
You can order whips as bare-root plants or in 1-gallon, 3-gallon, or 5-gallon containers. These plants should be from 4 to 6 feet tall. Fruit trees are budded to a variety of different rootstocks, each with a number denoting the mature size of the tree. M7, M9, M27, M111 are all good rootstocks to use. Ideally, trees with 1/2-inch to 3/4-inch caliper trunks (the thickness at 6 inches above soil level) are best, but smaller-size trees can be used. Trees for espalier can be purchased at your local nursery or garden center, or ordered from mail-order nurseries.


Comments
A superb article (best I read so far after 3-4 days of research) giving espalier newbies an entire picture of the growing process. It deserves to be the starting point for anyone interested in establishing their own micro orchard.
Really knowledgeable and inspiring article
Very informative post!
Excellent work you done here.
It is a very useful article for those, who want to decorate their garden's wall.
Wonderful info
Really an interesting post.
Very informative post
Nice Idea share with us.......Keep it up
Great Idea, I will try it on my plants. And follow the steps from here http://passwordsinmicrosoftedge.com/ to remember password in microsoft edge.
Well written. It's informative https://papas-burgeria.com . Big thanks.
Your blog is very helpful for taking care of my seterra plants.
It's also great for me.
Log in or create an account to post a comment.
Sign up Log in