
Clean tools last longer
If nothing else, tools should be cleaned after each use. Doing so keeps diseases, fungi, insect eggs, and weed seeds from being unwittingly spread around the garden. Cleaning also extends the life of a tool by removing moisture-laden, rust enhancing soil from steel surfaces. For tools with a keen edge, a good cleaning keeps rust from eating the edge away.
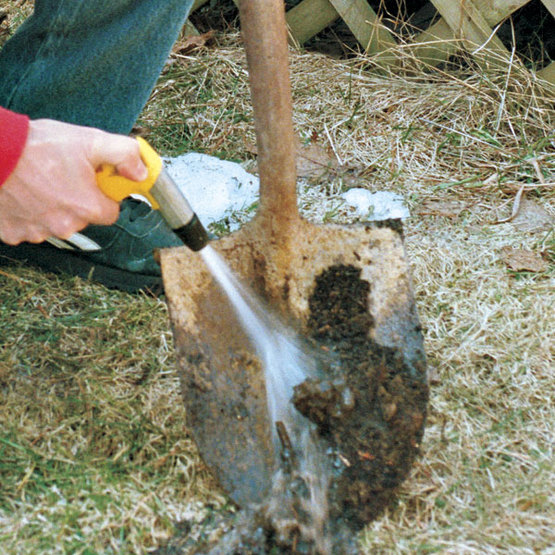
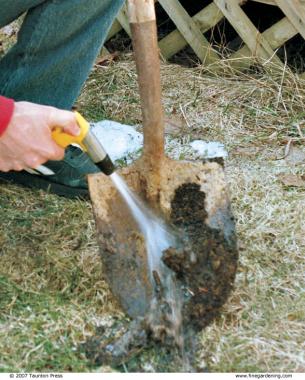
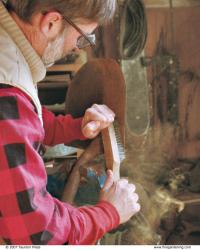
Spades, rakes, hoes, trowels, and any other tools that come into contact with soil should be hosed off with water after each use. With the garden hose nozzle adjusted for maximum pressure, average garden soil washes away easily. To remove heavy clay soil, some scrubbing with a hard bristle brush also may be necessary. After washing any tool, dry it with a cotton rag before putting it away.
Tools that don’t come in contact with soil, particularly those with sharpened edges like axes, pruning shears, and knives, should be wiped down with a thick, rough cotton cloth to remove any gums and saps from their blades. When working on pitch-producing plants like conifers, dampen the cloth with a little paint thinner before wiping. In all cases, once dirt and residue are removed, dry the tool with a clean cotton rag.
Apply oil to prevent rust
Even after washing and drying, steel tool heads are still susceptible to rust when exposed to oxygen. In fact, as a general rule, the better the grade of steel used, the more vulnerable it is to rusting. So, considering the high cost of quality gardening tools, it just makes sense to keep rusting to a minimum.
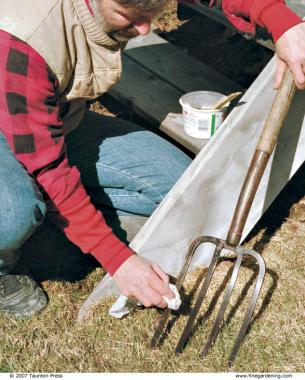
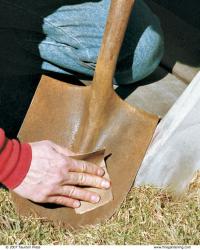
Motor oil is an inexpensive and effective rust preventer. When applied to steel surfaces, the oil insulates the steel and prevents it from oxidizing. To thin the oil out and make it easier to work with and to better coat both porous and smooth steel surfaces, I mix one quart of nondetergent 30W motor oil (any brand will do) with a pint of kerosene or lamp oil. This 2:1 ratio of oil to kerosene can either then be wiped onto the steel surface with a clean cotton rag or sprayed on to metal surfaces—a recycled household-cleaner spray bottle works for me. Store the mixture away from heat sources and dispose of it as you would any motor oil.
Whichever way the oil is applied, keep the coating thin so it won’t drip off the tool head and onto the floor. Because oil is organically based and breaks down rapidly in soil, you don’t have to worry about this small amount of oil adversely affecting your soils.
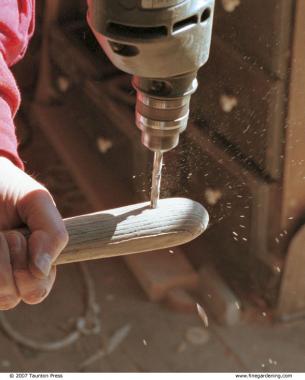
Remove rust with a wire brush

Extremely rusty tools require special attention. I use a sheet of 80-grit sandpaper to remove light coatings of rust. For a slightly heavier coat, a stiff wire brush can be effective. But, when rust has turned a steel surface rough, like the texture of medium-grit sandpaper, a heavy-handed approach is needed. On badly pitted steel surfaces like those on tools you find at yard sales, the quickest and most sensible option is an electric drill with a wirebrush attachment.
Before taking any kind of wire brush to a tool, always put on a pair of safety glasses. The rust particles or the wire bristles can fly off at high speeds and in unpredictable directions.
Once I’ve removed as much rust as possible, I then apply a coat of my oil mixture to the newly exposed steel to stop the oxidation process in its tracks and keep in check the almost-invisible residual rust that I couldn’t remove.
Sharpen tools for peak efficiency
Sharpening tools is a slightly more complicated procedure than removing rust. Some tools like shovels, axes, hoes, and trowels are best sharpened with a hand file, while other tools like pruning shears and knives call for a honing stone. Depending on how dull an edge is, some tools may require a session with a high-speed grinding stone.
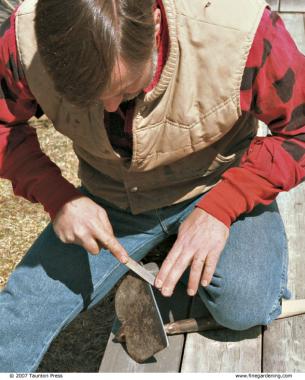
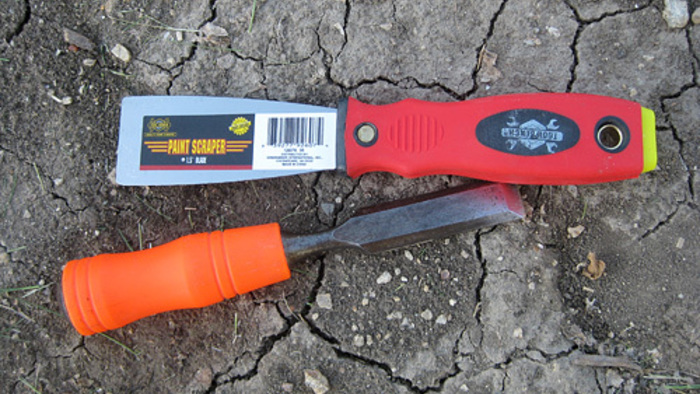
The tools needed for basic sharpening are neither expensive nor complicated. The most basic sharpening tool is an 8-inch-long mill file with a bastard cut (photo below, left), which you can purchase at any hardware store for about $8. When sharpening a tool with a mill file, work by drawing the cutting teeth in one direction over the edge being sharpened. For best results, hold the tool steady in a clamp, vise, or other bracing system, keeping the file at an angle from the plane of the tool’s working surface as you push it along the edge you are sharpening. And since sharpening edges with a mill file requires two hands, get one that has a handle on one end. This makes it easier to maneuver and get a good edge.
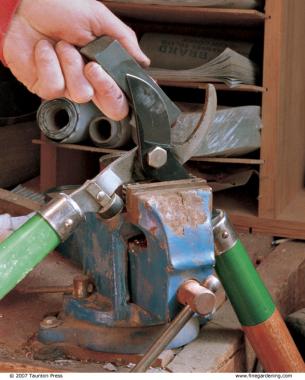
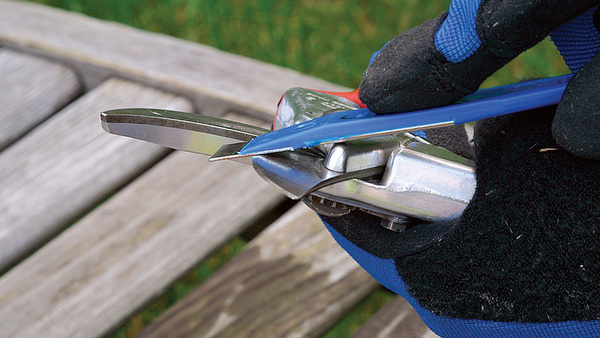
For pruning shears and knives, it’s possible to get good results with any of the diamond, ceramic, or high-carbon steel honing devices that are on the market. However, my experience with honing knives and pruning shears is confined to oil stones, which I find easy to use. When sharpening a blade on a stone, simply slide the blade over the flat surface of the stone in one direction until you reach the desired sharpness. No matter which device you choose to sharpen your cutting blades, it should come with directions for use.
How sharp is sharp enough?

Photo/Illustration: Kim Jaeckel
How sharp you make your tools is a matter of personal taste. I like my shovels to be sharp enough to cut through minor roots, but with my rocky soil, I won’t redress an edge to razor sharpness every five minutes. On the other hand, when I’m trimming back my lilacs, a razor-edged pair of pruning shears makes the job quick and easy.
A good guideline to use when sharpening is to follow the bevel already on the tool’s blade. Recommended sharpening angles range from 10 to 45 degrees depending on the tool and its use. In general, the angle of sharpness determines the length of the blade’s beveled edge, so it’s easy to tell by looking at a blade the angle to use as a guideline when sharpening.
For example, blades sharpened at low angles have relatively wide bevels. Knives and pruning shears, tools that need finer edges for cutting, should be sharpened to between a 10- to 25-degree angle. Tools used for heavy-duty chores that dull the blades quickly, like hoes, shovels, and mattocks, only need to be sharpened to a 30- to 35-degree angle. The bevel on these blades is relatively short (illustration, below). Understanding this relationship is the key to successful sharpening.
Grind battered tools into shape
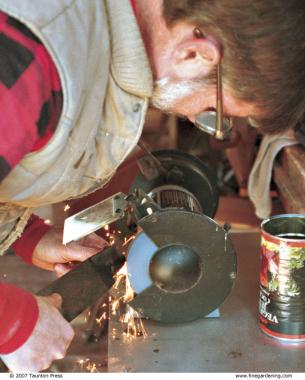
Since the grinding process removes metal quickly, only the most battered tools are candidates for regular grinding. Tools like lawn-mower blades and grub axes usually merit an annual trip to my grinder. An electric bench grinder is the best way to retrieve a keen edge because it has an adjustable tool-rest platform that allows for more exacting edges.
With a grinding wheel turning at several thousand rpm, the chances of overheating the steel are high. Overheated steel will lose its temper, which means its hardness becomes compromised and the tool will never be able to hold a sharpened edge for very long. So during grinding it’s very important to keep the tool from getting too hot, preferably keeping the surface cool enough to touch. Periodically immersing it in water is the standard cooling procedure.
High-speed grinding should be done with caution. Even with the extra eye shields provided on some machines, you should always wear safety glasses when grinding tools. A bench grinder/buffer can be purchased for around $40. You can also do some basic touch-up grinding with a small grinding wheel (less than $10) made to fit an electric drill.
Store each tool in its own space
It’s important to store your clean, oiled, and sharpened tools properly. I organize my tools according to when and where I use them. Weeding tools are near the door closest to the garden; cutting and pruning tools are near the door closest to the shrubs and woods. And I return them all to the same spot when I’m finished to save time looking for tools when it’s time to work.
Hanging your tools by their handles on a storage shed or garage wall not only keeps them out of the way but also prevents damage to sharpened edges. A 10-penny finish nail driven into a handy two-by-four is the easiest way to keep tools aloft. I drill 1/4-inch holes through the handles of my axes, shovels, hoes, rakes, and other long-handled tools so I can hang them on the nails. I like to keep the business end of the tool hanging toward the floor so when I pull the tool off its nail, it won’t swing down and hit something or someone.
I’ve seen the light—or at least have become more aware of my own dimness— as far as tool maintenance is concerned. Without being too compulsive about it, I now clean, sharpen, and repair all my gardening tools, even if they are only being set aside for a couple of weeks.


Comments
Good Technique!
Log in or create an account to post a comment.
Sign up Log in