

Winter is a time of forced inaction for many gardeners. The beds and borders, lawn, and vegetable garden are either wet with winter rains or buried beneath a mantle of snow. We spend our time musing over colorful catalogs and gardening magazines and dwell on daydreams of temperate days, blossoming flowers, and hands immersed in the earth. When the weather breaks and spring creeps into the flower beds, we champ at the bit to be outdoors again, even though the weather can be chilly. But don’t let that stop you. A few days spent outdoors tending to the following chores will get your garden off to a great start.
Groom your tools
If you haven’t already done so over the winter months, now is the time to spend a few hours grooming the gardening tools stored in the basement, garage, or shed. Cutting tools, such as hand pruners and flower shears, can be sharpened on a high-quality Arkansas (pronounced R-kansas) sharpening stone, then lightly oiled with penetrating oil, which cleans and prevents corrosion.

Many digging tools work more efficiently after being cleaned, sharpened, and oiled. To sharpen a hoe, spade, trowel, or other digging tool with a single beveled edge, use a mill file about 8 inches long equipped with a strong, comfortable handle. Set the tool in a vise or hold it securely on a flat surface. Hold the file at about a 30° angle and draw the file across the beveled surface of the blade, pushing the file away from your body. When the cutting edge is sharp, turn the tool over and use the file to remove any burrs from the back edge. Lubricate the blade lightly with penetrating oil and wipe with a clean rag.
More on tool care
Plant woody plants
Planting can be done throughout the growing season, yet some planting is best done in the early spring once the ground has thawed. This is the preferred time for planting bare-root shrubs, trees, and roses as well as many container-grown shrubs and trees.

To plant a bareroot rose, shrub, or tree, dig a hole about twice the diameter and depth of the root ball. Mix the excavated soil with compost in a ratio of 3:1. Fill the hole, creating a pyramid of soil with the peak of the mound almost level with the lip of the hole. Gently press the plant into the mound of soil so that the roots are evenly fanned over the slope. Fill the hole with the remaining soil and compost mixture.
When planting roses in colder regions, be sure the graft (the swollen area of stem near the base of the plant) is covered by an inch of soil. In warmer regions, the graft should be an inch above the soil.
Leave a shallow depression around the root area to catch water and allow the moisture to seep into the soil rather than run off. Apply a layer of mulch, such as bark chips, around the plant and fertilize with a water-soluble fertilizer once every two weeks through July.
For container-grown roses, shrubs, and trees, dig a hole about twice the diameter of the root ball and slightly deeper than the height of the root ball. Position the plant in the hole so the top of the root ball is about an inch below the level of the surrounding soil. Again, mix the excavated soil with compost in a 3:1 ratio and fill the hole with the mixture. Complete the process by following the guidelines for bare-root plants.
This is also a good time to relocate shrubs and trees, using the same guidelines. Be sure to dig up as much of a root system as possible and keep handling of a root ball to a minimum to avoid root damage.
More on planting trees and shrubs
Clean up winter debris
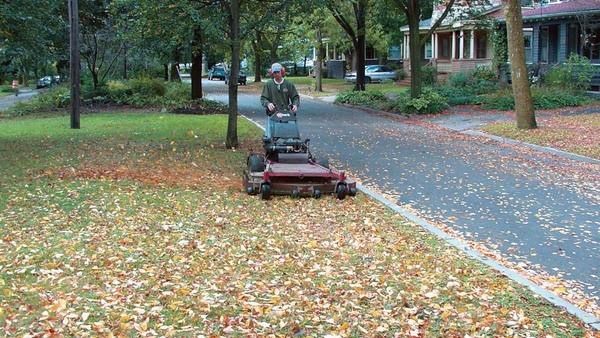
The long weeks of winter can leave the yard littered with debris, the lawn matted like uncombed hair, and the beds and borders dotted with winter protection and old foliage from the previous fall. The first task of spring cleanup is to walk the yard picking up twigs and other debris while being on the lookout for more serious problems, such as cottonlike snow mold covering portions of the lawn or large broken branches in trees.
Once large fallen branches and other debris have been removed from the yard, rake the lawn to fluff the grass, improve aeration, and remove thatch. Fertilize warm-season grasses a week or so after they begin to grow.

Many gardeners place evergreen boughs atop perennial beds in fall. The springiness of the branches helps to keep the weight of winter snows off the crowns of dormant plants and the dense needles help to protect root systems from frost heave. This is the time to remove the boughs and any other winter protection from beds and borders.
Early spring is also a good time to clean out wind-blown leaves tucked away in beds and borders and to remove last-season’s foliage and flower stalks. To cut back old foliage, gently work your fingers through it to expose any tender green shoots, which often hide within the brown sheaths of old foliage. Use pruning shears to cut off the dead material an inch or two above the new growth.
Start new plants
Early spring is the ideal time to put propagation techniques to work, such as grafting flowering shrubs and fruit trees and sowing annual flower seeds, vegetable seeds, and some perennial seeds indoors. But out in the garden, the primary propagation practice of early spring is dividing perennials.

Division is a method of propagation by which a clumping perennial is separated into smaller clumps or individual plants, each with roots and buds. The smaller clumps or plants, called divisions, are then replanted.
To divide many herbaceous perennials, such as Shasta daisies, daylilies, and hostas, wait until a clump breaks dormancy and the new leaves are an inch or two long. Use a garden fork or spade to loosen the soil around the outside edge of the clump. Slip the tines deep into the soil and rock the tool forward and back, going around the entire perimeter of the clump twice. Repeat this procedure once more using the fork to lever the plant free from the soil.
To divide a large clump, place the tines of two garden forks back-to-back in the center of the clump. Drive the forks into the clump and push the handles apart to separate the plant into two clumps. Smaller clumps can be divided by gently separating individual plants with your fingers or a gardening knife.
Very large clumps can be heavy and are often best divided while still in the ground. Use a garden fork or spade to loosen and lift manageable divisions from the outside edge of the main clump.
Once the divisions are separated from the main clump, it is best to replant them as soon as possible. Immediate replanting is the best way to ensure healthy, robust growth and hasten the plant’s establishment in the garden.
To replant a division, dig a hole about as wide as the spread of the plant’s roots. Make the hole half as deep as it is wide. Fill the center of the hole with a mound of soil and set the plant atop the mound so the base of its crown is level with the surrounding soil. Fill the hole by adding soil from the edges, working your way toward the crown of the plant. Settle the soil by watering gently but thoroughly.
More on dividing perennials and starting seeds
Rejuvenate your soil
Winter weather, from cold rains to ice storms to sub-zero cold, takes a toll on garden soil. Mulches become compacted and soaked through, soils are saturated, soil nutrients are leached away, and soil structure is damaged. Early spring is an ideal time to repair winter damage, rejuvenate the soil, and add new mulch to provide garden plants with a fertile foundation for months of healthy growth.

First, rake away any old mulch so the spring sun can smile upon the winter-worn soil, and put the mulch in the compost pile. Then tidy up the boundaries of beds and borders with an edging tool. Spread a 1- to 2-inch layer of compost over the soil, avoiding the crowns of plants.
Select a fertilizer with equal proportions of nitrogen, phosphorus, and potassium (N-P-K), such as 10-10-10. Keep in mind that some plants need special fertilizers. For example, many broad-leaved evergreens and needled conifers need a fertilizer that acidifies the soil and supplies iron. Apply the fertilizer over the raked and compost-blanketed area, following the recommended amounts listed on the label, again being careful to keep the fertilizer away from the crowns of the plants.
Use a garden rake or cultivator to mix the compost and fertilizer into the top few inches of soil. To add the finishing touch, cover the area around the plants with a fresh 1- to 2-inch layer of organic mulch.
More soil help
Prune and shape woody ornamentals

No matter what the time of year, something always seems to need pruning. Early spring is the best time to shape evergreen hedges with a light shearing and to rejuvenate old vines and shrubs with a severe pruning. It is also the time to trim and shape shrubs that flower in summer and fall.

Start by inspecting all shrubs and trees and removing diseased or damaged branches. Use pruning shears or loppers when removing branches smaller than 1 inch in diameter; larger limbs should be cut with a pruning saw. When removing diseased branches, it is a good practice to disinfect pruning tools with isopropyl alcohol between each cut.
Spring-flowering shrubs that blossom on the previous season’s growth, like viburnums and lilacs, should be trimmed and shaped just after they bloom. Shrubs that flower later in the spring and blossom on new growth, such as some types of hydrangeas, should be trimmed and shaped in the early spring.
Before you start cutting back a shrub, step back and observe the plant, taking time to notice the branch structure and form. First, remove thin branches, branches that cross others, and those that grow contrary to the overall shape of the plant. Then, to encourage new growth, remove a few of the oldest branches at the base.
More on pruning trees and shrubs


Comments
Log in or create an account to post a comment.
Sign up Log in