
For the past 20 years, I have supplied local chefs with vegetables, herbs, and especially garlic. One chef in particular, a garlic aficionado, anxiously awaits the first bulbs of the season. When they arrive, he peels off the moist bulb wrappers and pops a raw clove into his mouth—then he savors every bite. His eyes tear and a big smile appears. “Ah, that’s good!” he exclaims. Fresh garlic really is good, and unlike anything even some chefs have tasted.
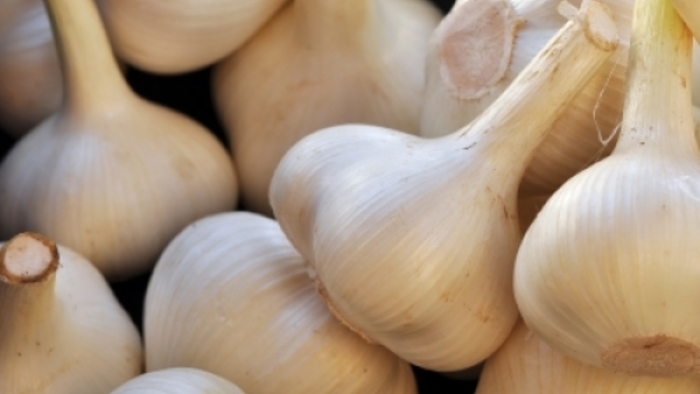
Our ideas about garlic have been formed largely by the ubiquitous garlic available at supermarkets. But the hot taste typical of commercial garlic is nothing like the subtle flavors found in the hundreds of regional varieties from around the world. In addition to distinctive flavor, each variety has its own shape and color, as well as a preference for a particular climate, soil type, and set of growing conditions.
VIDEO Planting Garlic
MORE READING Grow Your Own Garlic
Perhaps some day cookbooks will call for specific garlic varieties—‘Spanish Roja’ for a mild pesto, for instance, or ‘Asian Tempest’ for a more fiery rendition. Garlic bread could be ratcheted up a few notches with ‘Nootka Rose’ or ‘Persian Star’. Markets would carry rich rocamboles such as ‘German Red’ and ‘Carpathian’, along with refined silverskins like the French ‘Rose du Var’ or the Italian ‘Locati’. Long-storing artichoke strains like ‘Oregon Blue’ and ‘Russian Redstreak’ would be offered through the winter, and even rare porcelains such as ‘Romanian Red’ and ‘Rosewood’, with their plump, easy-to-peel cloves, might become widely available.
If you don’t want to wait that long, you can enter the world of garlic by growing your own. Over time, a garlic variety you grow faithfully will adapt to your local growing conditions and reflect them like a vintage wine. We’ve been growing a ‘Spanish Roja’ for so many years now that it’s known to local chefs and stores as ‘Ruckytucks Red’, named for our farm.
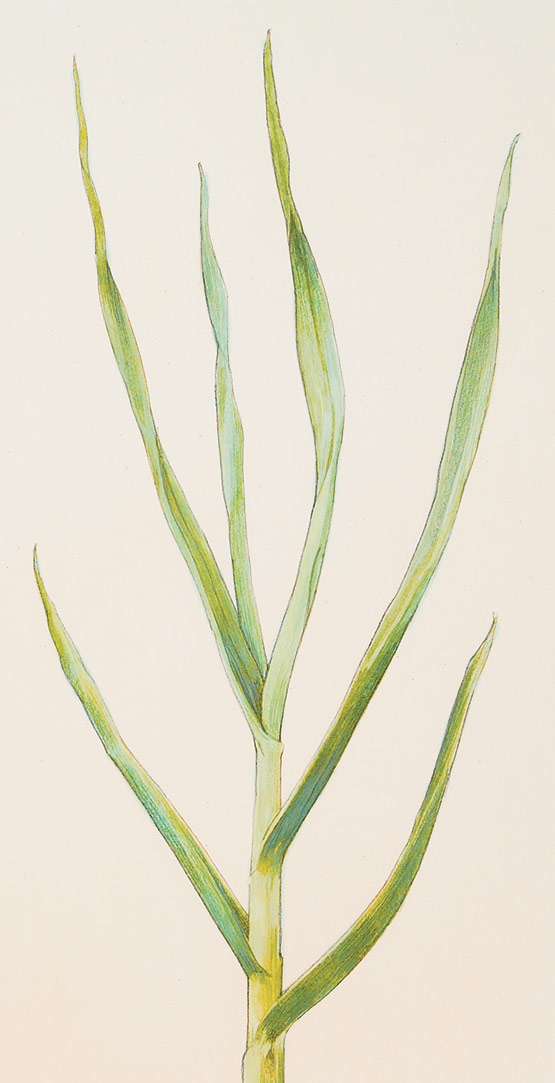
The complex attributes of garlic varieties not withstanding, all garlics fall into two main categories—hardnecks and softnecks. Most commercial garlics are softnecks, so named because their leafy stalks remain pliable. The lesser known hardnecks develop a stiff stem at their core in addition to leafy stalks. Both types are worth growing in the kitchen garden, the softnecks for their keeping qualities, the hardnecks for their flavor.
Begin with distinguished planting stock
Garlic does not produce viable seed, so it must be propagated by planting individual cloves. Mail-order catalogs can be excellent sources of planting stock, but regional suppliers should not be overlooked. Local farms, farmers’ markets, specialty stores, and food festivals are all potential sources for native garlic that may already have adapted to your climate and growing conditions. Late summer into early fall is the best time to buy seedstock. The whole bulbs can then be stored in a cool, dry location until planting time.
Avoid using garlic from the supermarket as seedstock. Besides tasting mundane, most commercial varieties have been developed to grow under highly controlled conditions. Moreover, some commercial varieties are sprayed to prevent sprouting, which can hamper germination in the garden.
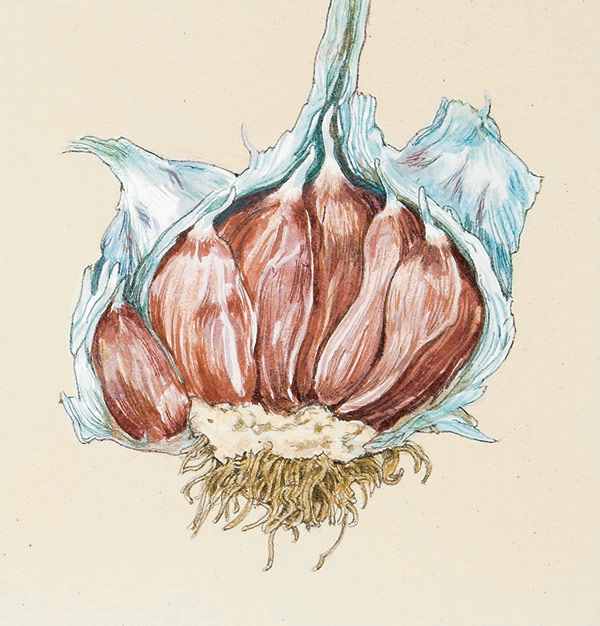
When selecting seed garlic, keep in mind that larger cloves yield larger bulbs. Don’t be disappointed, however, if the 2½-in.-diameter bulbs you got at the farmers’ market produce something quite smaller. It often takes a year or two for newly acquired strains to acclimate to your garden.
Plant garlic in late fall
Because garlic requires a lengthy growing season and benefits from a winter dormant period, it is typically planted in late October in the North and from November through January in the South. Northern gardeners need to plant garlic a month or so before the ground freezes. This is early enough for the cloves to send down roots that will anchor them against frost heaves, yet late enough to prevent the garlic tops from sprouting and exposing the plants to icy conditions. Here in the upper Hudson River Valley of New York, we start planting around November 1.
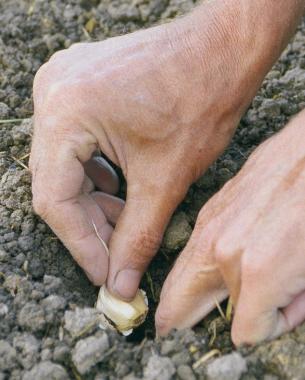
Break garlic bulbs into unpeeled cloves no more than a day or two before they are to go into the ground, so they won’t become dehydrated. Place the pointed end of the clove up during planting and the blunt end down. If you plant cloves upside down or sideways, the plant will expend considerable energy twisting around underground before sending up shoots, resulting in small, misshapen bulbs.
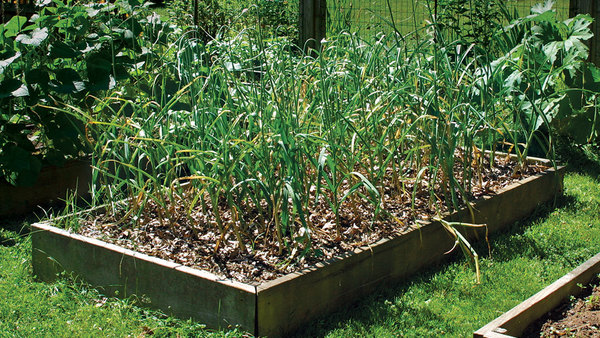
Cloves are typically planted 1 in. to 2 in. deep and spaced a minimum of 4 in. apart in the row, with the rows set at least 1 ft. apart. On our nontraditional farm, however, we plant garlic in 52-in. wide beds. We plant the cloves on a grid of 8 in., leaving 2 in. along the edges of the bed.
For planning purposes, I figure on ten cloves per bulb. Assuming six bulbs weigh 1 lb., that’s 60 cloves per pound. We plant six cloves across our 52-in. beds, so for us, 1 lb. of garlic plants about 7 ft. of bed. One of the best things about garlic is that yields come in a factor of 10. Plant just 1 lb. of cloves, and you’ll harvest 10 lb. of bulbs.
Give garlic a dose of soybean meal
Garlic grows best in rich, well-drained soil with plenty of organic matter. To enrich the soil in our garlic beds, we grow a cover crop such as buckwheat intersown with soybeans, and turn it under before planting. Cover crops feed microorganisms that consume decaying organic matter and produce nutrients, which in turn feed growing plants. At planting time, we also amend the soil in our garlic beds with soybean meal, a high-protein livestock supplement available at feed stores. We apply 30 lb. of soybean meal per 100 ft. of bed, a bit more than 1 oz. per square foot.
Soybean meal is an ideal fertilizer for overwintering garlic because the breakdown rate of soymeal protein into nitrogen and other nutrients is temperature dependent. The warmer the temperature, the more nutrients are released. Soymeal applied in the fall gets into the root zone and then lies in wait during the cold winter, ready to release nutrients as the soil warms up in the spring, right at the time most of garlic’s stalk growth takes place.
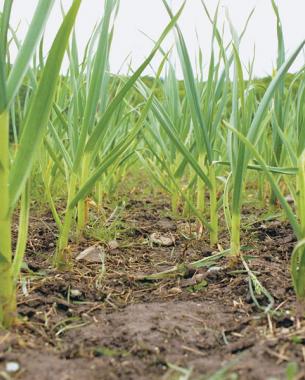
Protect garlic with mulch
We usually mulch our garlic beds soon after planting to protect the young cloves from winter damage, to suppress weeds during the following summer, and to promote the consistently cool, moist soil conditions that garlic loves. Sometimes, however, we use our tractor to mix mulch lightly into the soil before planting the cloves. You could use a rototiller instead, or chop in the mulch with a stout hoe. Mulch that has been gently mixed into the soil protects the cloves from the elements and encourages unrestricted top growth in the spring.
If you use a heavy mulch after planting, you may have to pull it back in the spring to allow the ground to thaw and to give the new sprouts an early start. Later you can tuck the mulch back around the stalks.
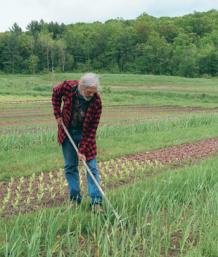
Even when mulched, garlic suffers from competition with weeds for sunlight, moisture, and nutrients. Weeding is our main task in the garlic beds during the spring and summer. We use a stirrup hoe, which has an oscillating steel blade that works with a push and pull motion to slice young weeds just below the soil surface. Unlike a conventional hoe, it doesn’t turn over the soil and bring up more weed seeds.
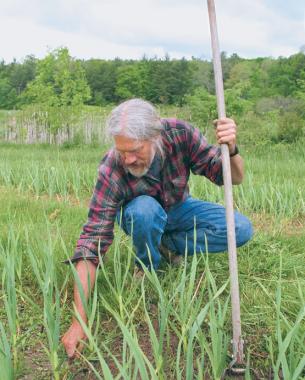
Harvest the scapes, then the bulbs
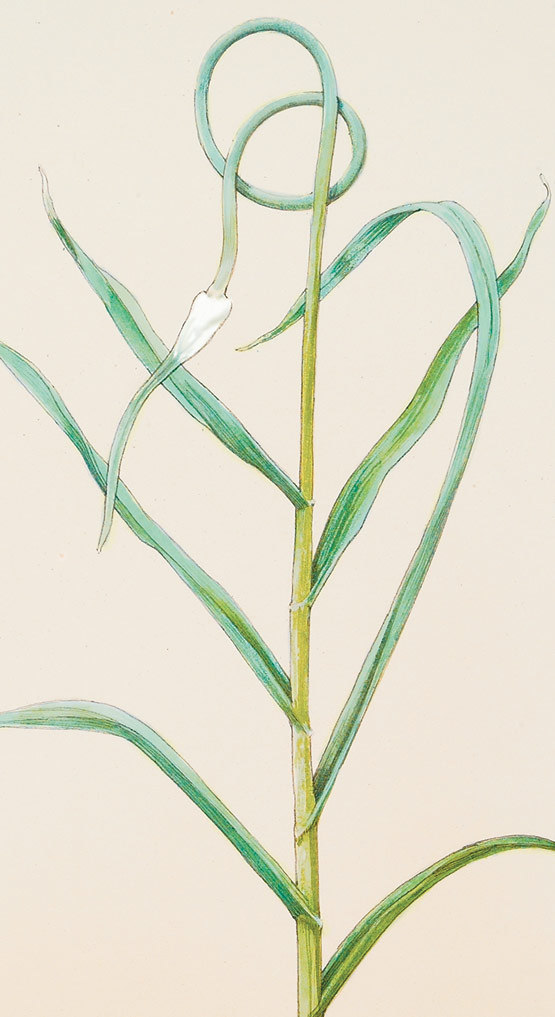
Sometime in late June, the hardneck varieties earn their name. They send a stiff central stem high above the leafy stalks, ending in a pigtail curlicue and topped by a false seed head, called a scape. I always remove the scapes, because removing them redirects the plant’s energy into bulb formation, resulting in larger bulbs with enhanced storing qualities. It’s quite easy to snap off the scapes, but pick them before they uncoil and straighten or they will be too woody. Scapes provide impatient garlic lovers with a taste of the coming harvest, whether diced and stir-fried, added to salads, grilled whole, or used as a garnish.
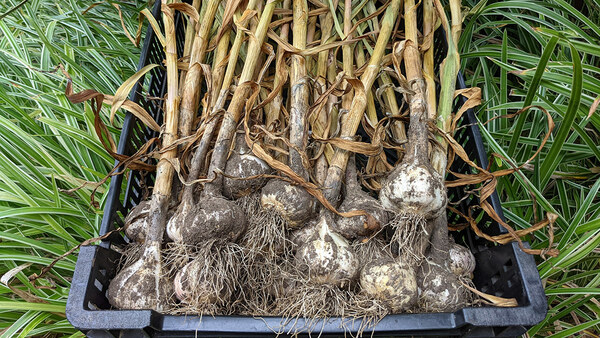
The softnecks tend to mature a week or so before the hardnecks, around mid-July in our area. Eventually, the leaves of both softnecks and hardnecks begin to turn brown and die, one at a time from the lowest leaf up. When approximately 40% of the leaves have died back, it’s time to harvest. If left in the ground too long, the over-mature bulbs can split open, leaving them susceptible to molds and dehydration.
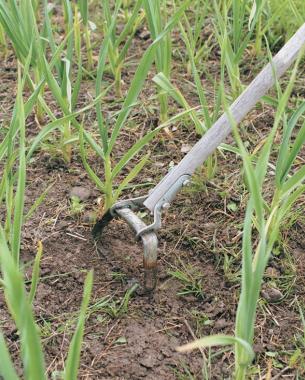
Perhaps somewhere there are soils loose and loamy enough to enable garlic to be pulled out of the ground by the tops without tearing or breaking any stems. In our heavy clay soil, however, we first use a garden fork to dig down beside the bulbs and loosen the soil.

Cure garlic indoors
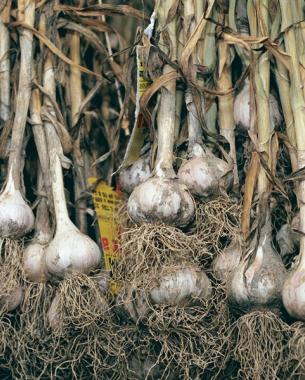
Garlic should not be laid out and cured in the sun. Bright sunshine can literally cook exposed bulbs. The proper curing method is to hang garlic inside for two to three weeks. Choose a cool, well-ventilated area, out of direct sunlight.
Part of the post-harvest process involves selecting the biggest and best garlic to use as planting stock for the following season. We sort our garlic by variety and size, label it (planting stock gets red labels), and tie it in bunches. We hang the bunches to cure on a network of wires in our packing shed, creating a ceiling of garlic. We also cure garlic in braids. Surprisingly, garlic gives off very little odor as it cures. It’s only when the cloves are crushed and the allicin and other compounds combine that the unmistakable scent is released.
You can tell garlic has cured sufficiently if there’s no apparent moisture when the bulbs are cut from the stem. To store cured garlic, cut off the stems, leaving a 12-in. neck, trim back the roots, and place the bulbs in net bags. Garlic stores best at room temperature and 50% to 70% humidity. Storing garlic in the refrigerator tends to cause sprouting. Hardnecks keep from three to six months and should be used first. The longer-lasting softnecks keep for six to nine months.
But beware. Homegrown garlic is seductive. Once you sample it, you may never again be able to make do with the mass-produced commercial varieties. At this point, I don’t think I could ever not grow garlic.


Comments
Log in or create an account to post a comment.
Sign up Log in