
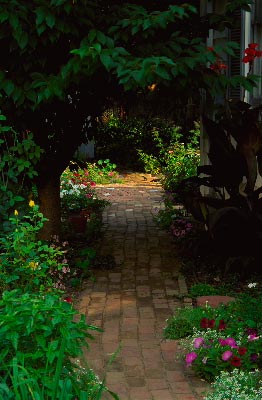
When I moved from New England to Maryland, I was struck by all the brickwork. There are brick houses, brick sidewalks, and brick paths that lead to the brick barns. Even the streets in some of the towns are paved with brick. The warmth of its color, the strength of its material, the good feeling underfoot all appealed to me. My desire was born; someday I would have a brick sidewalk.
I spoke of it so often that one day I came home to find 300 old, handmade bricks tossed in a pile in my yard, a gift from a friend who said, “You wanted them. Now use them.”
There was no turning back. As I stacked the bricks, I began to wonder how on earth to begin such an ambitious project. Well, you look at your yard and lay garden hoses along the edges of the path-to-be, moving the hoses around until the curve and location please your eyes and you have a place to step on a rainy day. It’s best to put the path where you normally walk. It will look just right, and it will keep you on track and out of the mud.
My path would be 2 feet wide, and along each edge I’d run a course of bricks standing upright like sentinels, keeping their laid-flat fellows in line.
Still, I was a long way off from laying the first brick. Had I known how far away that moment would be, I might have given up.
There’s lots of work before the first brick is laid
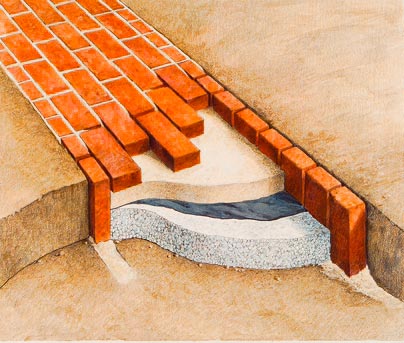
A proper brick path has to be set on a good foundation of 4 inches of gravel, a layer of heavy-duty weed-barrier fabric, and then 2 inches of sand. The fabric lets water through, but it keeps the sand from sifting into the gravel.
I wanted the top of the 2-inch-thick bricks to be even with the ground level. The thickness of the brick combined with the sand and gravel layers meant I’d need to dig a trench 8 inches deep for the length of the path. So I picked up my spade, started to dig, and quickly ran smack into the next question. What would I do with all this topsoil? Digging an 8-inch deep, 2-foot-wide trench 50 feet long makes almost 2-1/2 cubic yards of dirt—about a half hundred wheelbarrows-full.
Mine was an easy answer. In the first 90 years of its life, my house had no gutters. Water running off the eaves washed away soil until too much foundation was bare and left swales under the roof’s drip line. I wanted garden beds under the eaves, and the beds needed lots of topsoil. Someone else might want soil for raised beds or to fill in holes. There is always a use for topsoil as long as you know it’s coming.
Every day that spring and summer, I shoveled out the bed of the path-to-be and hauled soil around my house. By now, the first pile of sand—I’d use it to set the brick soldiers—stood waiting in the backyard, and I had trundled my bricks in the wheelbarrow and stacked them neatly along the edge of the trench.
Set the soldier bricks, add gravel and sand
I learned many things in those months—for example, that I could wheelbarrow only 20 bricks at a time and that the soldier bricks must be held upright along the path’s edge by generous amounts of sand packed around them.
Like good marchers, the rows of soldier bricks must remain parallel. A row that strays in or out of line will throw off the pattern and the spacing of the flat-laid bricks that come later. The width of a path increases in increments of a little more than 4 inches—the width of a brick and the space between it and its neighbor.
I found it best to dig a rough trench, line one side with the soldiers, go back to measure the width with a stick as long as the width of the path, then line the other side. Lastly, after upright bricks lined both sides of the path, I adjusted the depth of the trench here and there with a flat shovel.
By now a fledgling mason, I discovered that I could use a trowel, straightedge and level all at the 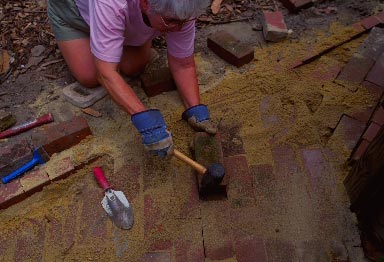 same time, then bop the bricks into their proper places with a rubber mallet. I got pretty good at it, too.
When the trench was done and the soldiers stood in line, it was time for the trucks to come with 3/8-inch gravel, and palletized bricks (called “cubes”). I’d shopped the Yellow Pages under both
“sand and gravel” and “bricks” for prices and delivery information. The free bricks from my friend went only so far.
Visiting a few brick suppliers taught me that bricks come in different colors and prices, and that some bricks are more irregular than others. Irregular-shaped bricks are harder to lay in a pattern because of differences in their dimensions. High-fired paving bricks are the best for paths.
I hired two strong men to load the gravel into the newly dug trench and rake it smooth. It takes many wheelbarrow loads to make a 4-inch bed. When all of the gravel was in place, I used a razor knife to cut heavy-duty weed-barrier fabric into strips and laid it on the bed. A 2-inch layer of sand went on top of the gravel, raked smooth and leveled with a board pulled across its width. After the sand was leveled, the trench was ready. Finally, I could lay the 2-inch-thick bricks on top.

By the way, if you live up north, in less temperate climates than the eastern shore of Maryland and want to build a brick path, you might want to tamp the sand and gravel with a power compactor from a tool-rental store. The compactor settles the sand and gravel, and might prevent heaving when the ground freezes deep.
Half-step running bond is an easy brick pattern to lay
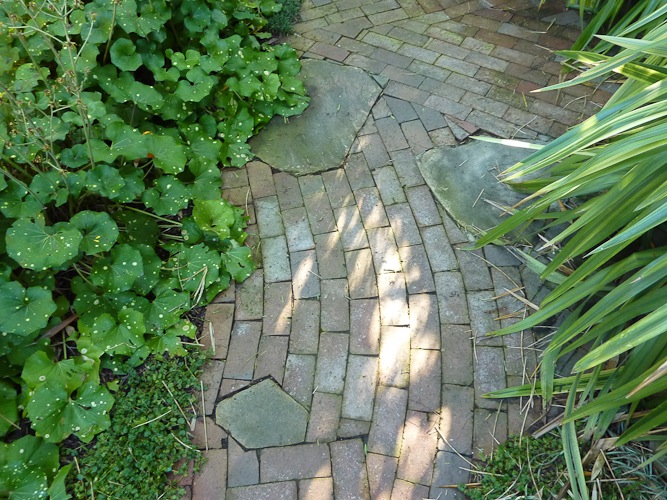
Instead of a stylized pattern, like a herringbone or a basket weave, my bricks are laid in simple straight-ahead lines. The pattern—called a half-step running bond—is easy to remember, and the bricks are easy to manage. To start, you alternate a whole brick next to a half brick. Then it’s just a matter of laying one brick next to another, following along the length of the path.
Laying bricks through gentle turns is a matter of a little give and take: You might have to pack the inside edge of one brick a little closer to its neighbor and open up the spacing on the outside edge of another as you bend the rectilinear bricks into the rounded curves.
I shouldn’t have been surprised to find that the half-step pattern was thrown off a little by the curves. It makes perfect sense: the distance around the outside of a curve is greater than the inside distance. When the path straightened out, the pattern had fallen off. One brick didn’t end in the middle of the one next to it. But no mind—after a left-hand curve, my path made a right-hand curve and the pattern was regained. If your path turns only to the right or to the left, and you’re bothered by the way it disrupts your pattern, you might start cutting bricks to compensate, but I think you’ll open a bigger can of worms than if you just go with the flow. Remember—you’re building a brick garden path, and it’s a process that’s more organic than exacting.
Intersections where paths diverge take a little figuring out. You could use graph paper to plot the bricks, or you could spend some time on your hands and knees, working out the pattern. It’s a good idea to lay the bricks in the center of the intersection and then work out in all directions. If you work into an intersection from an ongoing path, you may end up cutting lots of bricks and shoehorning in lots of little pieces.
A sharp blow with a brick chisel and a 4-pound hammer cuts a brick in half. It takes some practice, and gloves are a necessity. A miss with the hammer … I don’t even want to remember.
As work, laying bricks was satisfying. I could see what I had done. As exercise, it was rewarding. I slimmed down one size.
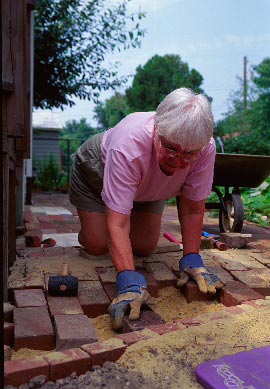
Kneeling on a foam pad will save your knees. A rubber mallet bangs bricks in place without breaking them. Occasionally, you have to shift a little sand under a brick or sprinkle some here and there to keep adjacent brick edges even. A high corner will catch a snow shovel or a summer sandal.
More paths in the years to come
When the last brick was down, I covered the length of the path with a thick layer of sand, sweeping it into the spaces between the bricks, adding more every few days for two weeks. Then I swept it clean, and my path was done.
After this first path, I was far from finished with my bricklaying. The next spring, I started across the back of the house with a path to the deck. I do only 50 feet or so a season. I need time for social things and time to tend the gardens around my paths. In the coming years, I want a path from the deck to the shed.
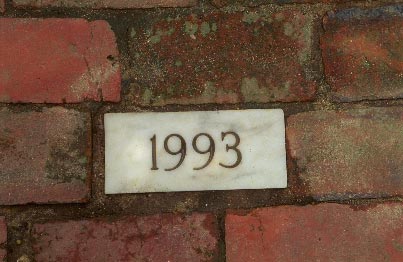
On a trip to Vermont, I found a quarry that cuts marble into bricks, so my walk has white marble scattered along its length—not traditional, but I like it. Some are engraved with the year I finished a particular section, my personal log of the project.
Phyllis Gordon has retired from two careers. She now lays bricks, plays bridge, and writes stories in Cambridge, on the eastern shore of Maryland.


Comments
I was very pleased to find this site. I wanted to thank you for this great read!! I absolutely enjoying each small bit of it and I have you bookmarked to make sure out new stuff you post. If you wish for essay related topic you can take online essay writing service help through best essay writing service before the exam.
We add sharp builders before making sand with bricks, which were initially fairly regular. Could you cut some of the larger stones or bricks with a corner of the grinder to lie low? Wiki page creator
Log in or create an account to post a comment.
Sign up Log in