

A Front-Yard Garden That Fills in Fast
This approach takes you from bare dirt to a bountiful garden

As a garden designer, I have developed many types of gardens: big, small, sunny, shady, formal, informal, classic, and contemporary. I have found, however, that no matter what kind of garden you have or desire, there does seem to be a common consideration: the time you’re willing to spend to get it where you want it to be. Although slowly creating a garden over years can be a satisfying journey, establishing one quickly gives us more time to enjoy the results. This was my goal when I began working on a new garden for seasoned gardener Anne Weckbaugh.
Learn more: Time Saving Gardening Tips
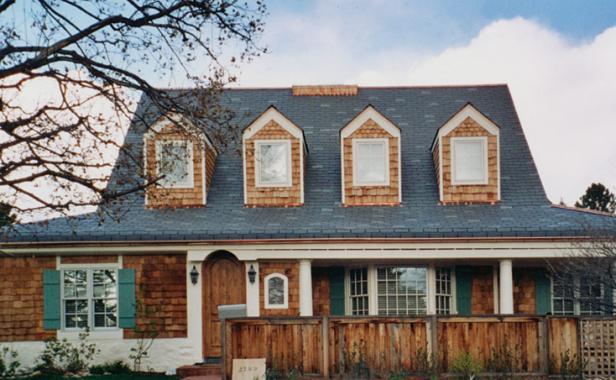
When Anne left her 50-year-old garden to move to a new home, a complete garden was her immediate desire. Though she was downsizing, she still wanted to surround herself with rich beds and borders filled with the many plants that had become her lifelong friends. By paying attention to the structural bones of the garden, the conditions throughout the site, and plant selection, I was able to have Anne’s new garden up and running before she had much of a chance to miss the mature garden she had left behind.
3 steps to a quick start
No one likes to wait to see the results of their hard work, especially gardeners. These three steps ensure your garden makes an impact almost immediately.
- The hardscape comes first. Paths and fences are naturally functional, but they also set up a structure for the rest of your garden to build on.
- Determine growing conditions. Taking advantage of the existing light, water, and soil conditions means you will have nature’s help in establishing your garden.
- Add plants that will take off. Bypass the “first year, they sleep” rule by making sure the key players in your planting plan are suited to their spot and are sure to have an impact the first year.
Begin with the structural bones of the garden
The best way to begin a garden is to establish good bones, a strong framework for everything else to build off of. The addition of elements like paths, walls, fences, or any other structures helps define spaces and provide perspective. These structures indicate where one area stops and another begins and how to move through the space. They also establish a backdrop for the garden. It is generally easier to work with an empty canvas where few obstacles, other than perhaps budget and imagination, exist. Luckily in Anne’s case, her new home came with the blank simplicity of any suburban landscape; only a sloping lawn and a couple of established trees covered the ground.
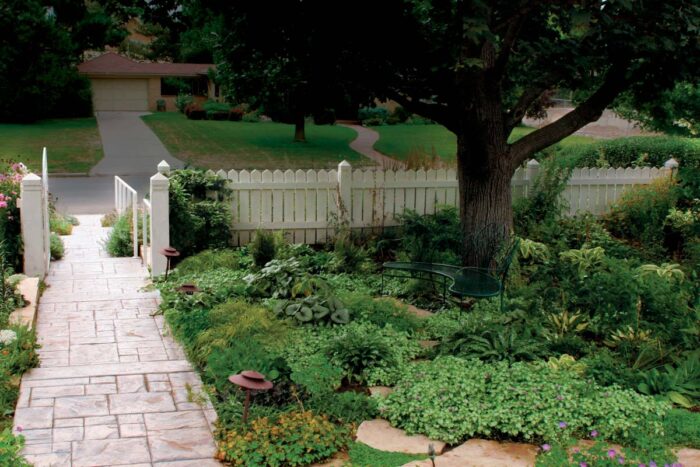
Paths create a garden’s outline and sustain its visual flow, so this is where I started designing her garden. There are typically two kinds of paths. The first type is a main thoroughfare, such as one that goes from the house to the driveway. It acts as the spine of the garden and is proportionately suited to the size of the garden and the architecture of the house. The second kind are subordinate passageways. These paths are often narrow and used to allow intimate access for maintenance or for simply enjoying a stroll through the garden. Anne’s garden received a complete path makeover. I replaced the disproportionately narrow and curved, sloping walkway from the street side to the front door with one that is wider, straight, and gently rising. Secondary stepping-stone paths were also established to put beds within reach and further define spaces.
Next came the retaining walls, which help level slopes into terraces and beautifully divide spaces. For the walls in Anne’s garden, I chose local flagstone to add further substance to the entire scene. The walls separate xeric areas from consistently irrigated sections and make the slope easier and safer to navigate.
Finally, I chose an oversize picket fence to gently bisect the property, giving just a bit of privacy from the street and enclosing the intimate inner cottage garden and shade plantings. Fences are an excellent way to introduce vertical structure and to provide depth. They act as a backdrop for neighboring plants and help put the garden into context when viewed as a whole from a distance. In the end, the fence, retaining walls, and paths in Anne’s garden instantly gave the scene a complete and polished look.
Maximize your growing conditions
|
|
|


When planting a garden, I find that it’s essential to follow the path of least resistance and segregate planting areas based on water and light availability. Plants given their preferred conditions will grow and flourish more quickly. Because Anne had a clear idea of the plants she wanted in her garden, we had to take this process a step further and designate irrigated areas for her must-have plants that require more water. From there, the outline of the garden quickly began to come together as I determined the location of the sunny, shady, xeric, and moist beds.
Considering light and moisture goes hand in hand with proper soil preparation. To get your plants to take off and remain happy, make sure their soil suits them; otherwise, they may struggle for years to get established. Plants that thrive in dry, sunny conditions typically grow best in leaner soil, which promotes less-exuberant growth and sturdier stems. Anne’s sunny bed, therefore, required only a little soil amendment. On the other hand, her irrigated beds, intended for more traditional perennials, needed the enrichment of compost and manure to prepare them for success. Shade-loving plants also prosper in rich, improved soil, but in Anne’s garden, the shallow roots of her maple tree prohibited working the amendment into the soil, so I added a top dressing of compost.
Be discriminating with your plant choices
Once the planting areas are defined and the structural bones of the garden are in place, it’s time to dive into the fun part: picking the plants. For a person who wants quick results on a suburban lot, this is a time of difficult choices, when only the absolute favorites can fit within the restricted space. It’s also important to be selective and stay focused on your objectives to keep your garden from looking like an unattractive mishmash.
Just as the overall design starts with establishing the structural bones, planting should begin by creating the botanical bones. These linchpins of the garden—trees, shrubs, and ornamental grasses—are pivotal in anchoring plantings and providing additional structure, especially in winter. Anne’s garden had a presence from the beginning with a preexisting maple, hawthorn trees, and a privet hedge that commanded some of the space. There was limited room for stronger players. Those I did add were sizable woody plants of a suitable proportion and scale.
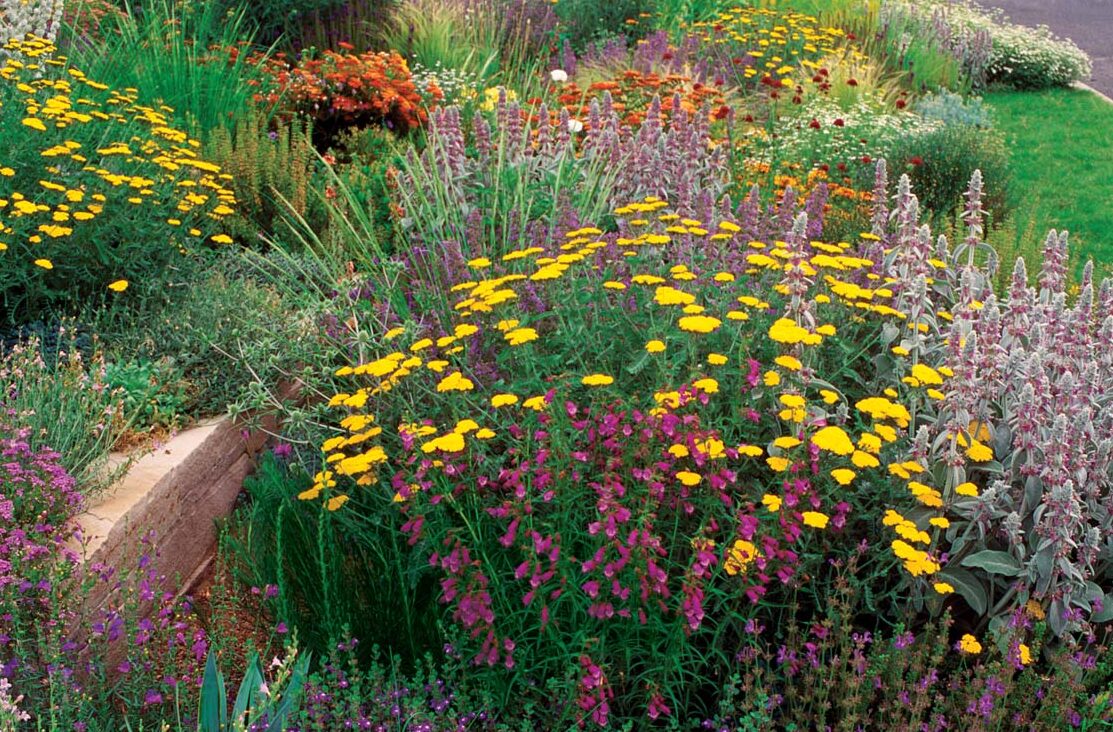
I then shifted my attention to perennials to create a seasonal parade of color. Perennials play an important role in getting the garden off to a quick start, but it’s not necessary to purchase large specimens when fleshing out the garden with herbaceous plants. These plants grow quickly, and even small perennials in 3-inch-diameter pots will put down deep roots, fill out, and mature by next spring or summer’s bloom. Plus the delightful assortment available at most nurseries gives gardeners opportunity for endless combinations.
Grouping at least three different perennials with similar bloom times but various colors and forms delivers synergy to a design. When choosing partners, don’t get lost in the current season and forget to include combinations that will peak in different weeks and months. I worked with Anne to find appropriate botanical consorts for her must-have plants, resulting in timely, successful combinations.
To finish off a garden and pump it up with immediate color in spring, consider sprinkling in a mix of bulbs. In Anne’s garden, we sited the right bulbs for the xeric areas, irrigated beds, and shade garden. Thanks to the design’s fundamentals, Anne didn’t have to wait years for a cherished garden. Less than a year after the planting of shrubs, perennials, and bulbs, the garden was a definite success.
Plants
Perennials for rapid results
Fast-filling perennials can’t be beat when you want to spruce up an area quickly. Also, check out options that can yield mature clumps in short order.
Fast fillers
- ‘Black Adder’ hyssop (Agastache ‘Black Adder’, USDA Hardiness Zones 6–9)
- ‘Blue Hill’ meadow sage (Salvia × sylvestris ‘Blue Hill’, Zones 5–9)
- Gaura (Gaura lindheimeri and cvs., Zones 6–9)
- ‘Lady in Black’ aster (Aster lateriflorus ‘Lady in Black’, Zones 4–8)
- Lambs’ ears (Stachys byzantina and cvs., Zones 4–8)
- Mexican penstemon (Penstemon × mexicali and cvs., Zones 5–9)
- Persicaria (Persicaria amplexicaulis and cvs., Zones 3–8)
- ‘Susanna Mitchell’ chamomile (Anthemis ‘Susanna Mitchell’, Zones 3–7)
- ‘Walker’s Low’ catmint (Nepeta × faassenii ‘Walker’s Low’, Zones 4–8)
- Yarrow (Achillea millifolium cvs., Zones 3–9)
|
|
|
|


Big clumpers
- Bee balm (Monarda didyma and cvs., Zones 4–9)
- Blazing star (Liatris spicata and cvs., Zones 4–9)
- Cardinal flower (Lobelia cardinalis and cvs., Zones 2–8)
- Crocosmia (Crocosmia spp. and cvs., Zones 6–9)
- Foxglove (Digitalis spp. and cvs., Zones 3–9)
- Meadow rue (Thalictrum spp. and cvs., Zones 3–10)
- Monkshood (Aconitum spp. and cvs., Zones 3–8)
- Penstemon (Penstemon spp. and cvs., Zones 3–10)
- Purple coneflower (Echinacea purpurea and cvs., Zones 3–9)
- Red-hot poker (Kniphofia spp. and cvs., Zones 5–9)
|
|
|
|


Comments
how deep dose the roots form roses get
Enjoyed the nice article ! Year 4 in my cottage garden. Same situation- nothing here but a few trees. It's really starting to look like something. Loved seeing the plant lists. Thanks !!!!
Log in or create an account to post a comment.
Sign up Log in